Pipe Welding on Steel

On the cap weld, I am only getting 3 3/4” of bead out of a 1/8” 7018 rod. I would have no idea how to extend that.
 
I made some adjustments. My machine is down to 96A. I also switched to a higher quality hood (from a Miller Classic to a Digital Infinity which did provide a better view).

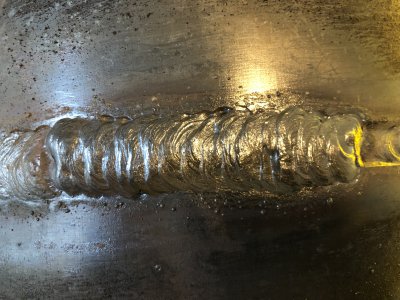
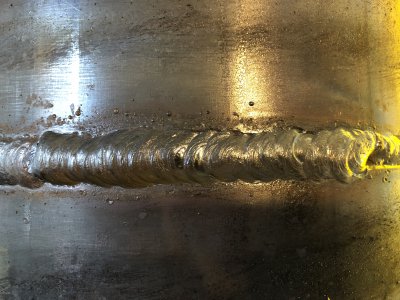
This photo is a cap. That is my best tie-in so far. I see that I failed to weld to the perimeter at one point. I have a 0-10° pull angle for the weave as I do on all my 7018 welding. I am really trying my best to strike where allowed and always hold a very tight arc.

My dad came over and watched me, and he said that the hot spatter (110A, 220V) travels no further than 2-3’.

I was also able to undo my garage door handle so that I can open it a whole extra foot! This is the time to be thinking about good ventilation.

73FB1AAC-E6D5-46CE-A640-5E4D21E76B7B.jpeg

Edit: I see undercut. Must turn down the machine.
 
Last edited:
I am almost through 3 seams of cap passes on this 10” pipe.

I have the machine all the way down to 90A, and I still see undercut. So I will turn it down yet more and hang around even longer on the edges.

I have still not yet gotten the hang of blending at the tie-in.

I see that you never run 7018 at even at the slightest angle downhill. I am only working from 10:30 to 12 o’clock, welding left to right, still with a 0-15° drag angle.

C6ECEF4E-51FE-4DE3-91F5-F53BFC9A772F.jpeg
 
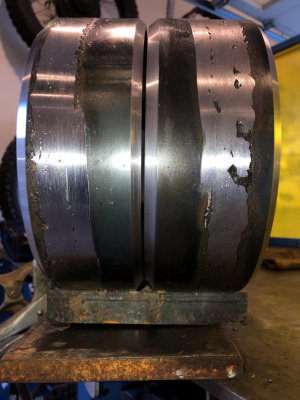
I found this non-aggravating way to lay in the tacks. That is a piece of channel under the pipe. The difficulties that I had with tack welding the other day when I was outside discouraged me a lot. I was entirely frustrated before I even got to laying in the root.

I am working with 3/32” 6010, and I am setting up the gap just by eyeball, knowing the widest that I can handle without blowing holes.

8384831D-D5C4-4C93-B698-2408F5DEB1D9.jpeg

Note that these coupons are recycled. Cool, right?
 
Last edited:
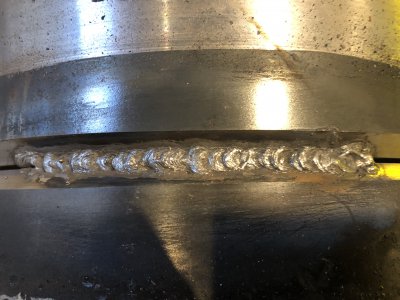
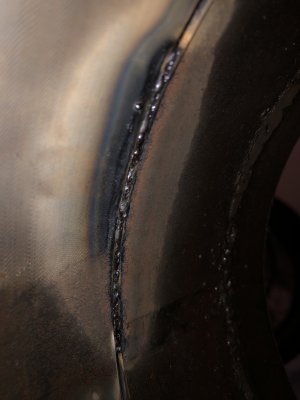
Here is a 3/32” 6010 root at 58A with a 1/16” gap and 1/8” land. I did not “de-slagify” the inside, but I can see that I did not get full pen on the inside. I had the rod jammed in the land almost the whole time. I guess I will have to jam it in deeper, which I don’t mind doing at all. The 6010 doesn’t stick.

509E52AA-D6FF-4100-9BD7-BE7168490376.jpeg

89B1401C-468F-4E1F-827B-BC1116BF75FA.jpeg

I need to get 100% pen on the inside!
 
Yep, you are certainly getting your moneys worth of practice out of those pieces.
-brino

My parting tool is .063” wide, so they might not last forever. However, the gap is always greater than that so maybe they will last forever!
 
An 1/8” land might be too great for a 3/32” rod. I had the rod “touching or deeper” the whole way around & this is the best I could do on the inside. All the rest of the interior seam was a failure with regard to full pen. I also show the top of the only successful part: 6010 is nice to work with.

FB236ED1-7660-4AAC-9004-CA4885C7312B.jpeg

E12C9556-817F-4213-BF6D-92034E2EC748.jpeg
 
Last edited:
Looking much better! I see you finally took the suggestion I made in my 4th post about setting the coupons in an angle iron, the channel iron you are using is fine as well.

You will not control your undercut as effectively by turning down your amps as you will by slowing down your travel speed and depositing more filler metal. Also concentrate on keeping a short arc also, long arc draws more amps and makes the puddle harder to control. Get the amps set and leave it alone or all you will be doing is constantly adjusting amperage.

On your hot pass strike an arc in the center of the bevel, establish a puddle, move the electrode to one side of the bevel and move it up and down t the distance of 2 rod diameters, move to the other side of the bevel and repeat the motion. Don't pay any attention to the center of the puddle as it will take care of itself, you will find this easier when you get 3/32'' 7018. As I've said before the 1/8'' 7018 is to much rod for the bevel.

You are definantly making progress.
 
Back
Top