[Metrology] Mill Spindle Mounted Microscope (aka Cheap Optical Comparator)

Will it work with windows 10?

The user manual does not list Windows 8 or 10 but the manual was written in 2009. I am running the software on a Windows 7 Ultimate, 64 bit system and on a laptop with Windows XP.

Bob
 
Hi All,

I just found this web article on the same topic.
He uses a different camera, but it has lots of good pictures and write-up.

http://www.technitoys.com/milling-machine-spindle-camera/

It also contains a link to a free Mach3 plugin to provide cross hairs.
I have never used it, but thought it might be useful to someone here.

-brino
Hey brino, Thanks for the lead! I took a brief look at the link and I will give it a try.

The great thing about the internet is hardly anything is really new. Anything that you can think of has been thought of by someone else and more than likely, they have come up with a solution.Linking millions of people together makes the sharing possible.

Bob
 
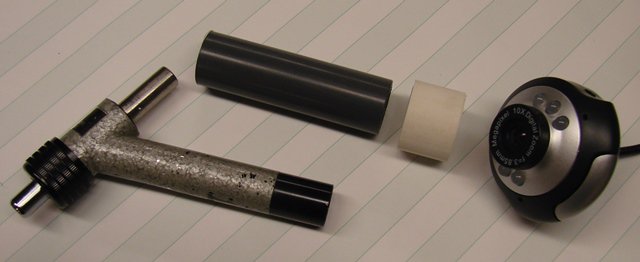
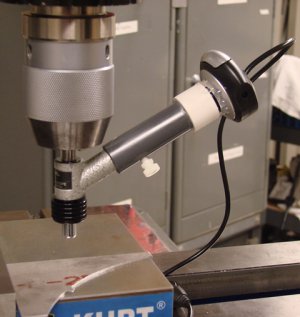
I decided I'd take a whack at adding video to my ENCO(?) centering microscope. To adjust scope cross-hairs you have to repeatedly swing the scope 90° to the left and 90° to the right while adjusting the lens tilt and the table's X axis. To many bumps on the head from the CNC display and other stuff hanging there.
I looked for a small, cheap webcam and settled on this one: http://www.amazon.com/gp/product/B000Q3VECE?psc=1&redirect=true&ref_=od_aui_detailpages00
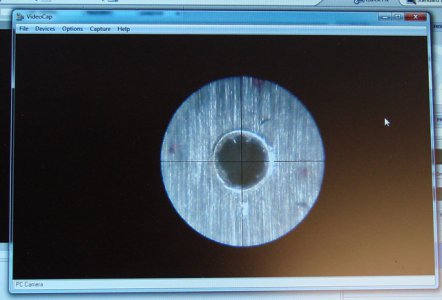
Pulled the base and bail off to reduce the size. Used scrap PVC pipe for the mount. 1/2" Schedule 80 bored through to slip fit over the centering scope. 10-32 drilled and tapped on the side for a nylon thumb screw. 3/4" Schedule 40 bored through to slip fit over the 1/2" PVC and bored 0.16" deep to press fit the camera's lens collar. I glued the 3/4" PVC on the end of the 1/2" PVC. Because the camera lens collar was a bit wobbly, once I had the cross-hairs focused and centered in the video display, I hot melt glued the body to the collar. The optics are not the greatest, but are OK for my purpose. The attached laptop display is a 0.020" hole in an aluminum plate.

Ken

Scope1.jpg
Scope2.jpg
Scope3.jpg
 
Last edited:
Back
Top