Making a Cheepo Import machine...better...hopefully

komatias

Active User
Registered
Joined
Apr 30, 2013
Messages
38
Hi all,

First off, thanks for the previous post on the topic of reconditioning and machine way scraping.

Last February, I bought what a thought was a good deal. A band new Chester Super Lux Mill/Drill with DRO, Stand and assorted accessories. The grand idea was to convert it to CNC. Previously I had converted my little Chester lathe to CNC so I was pretty confident I could do it. I also own a well used round column mil/drill that is actually pretty handy. I installed a cheep DRO with capacitive scales similar to the ones found on you digital vernier.

The conversion of the new machine went pretty smoothly.

[video=youtube_share;fbEzZo76BDo]http://youtu.be/fbEzZo76BDo[/video]

So up until the beginning of the year the Chester Lux was working ok but for some reason the y axis was producing a lot of vibration even though I had plumbed in a single shot lubrication system. After faffing about with the electrics to ensure I was not losing motion somewhere, I took a closer look at the slide ways. What I thought was pretty hand scraping was ugly gouging. I guess the manufacturer did this improve lubrication....

Of course I would have been none the wiser had I not discovered scraping. First through Youtube then the various machining fora, that Richard, Forrest and McGyver post on.

So I decided to see what I could do about making this machine better by scraping it in.

The plan of attack is:
1) Scrape the y axis ways that are on the base using the clearance surface as a datum and the left side way. The left side way does not take the tapered gib and was pretty flat and parallel to the datum to begin with. Master for this is a camelback straight edge I picked up used and have scraped flat pretty well.
1a) scrape the right hand side flat and parallel to the datum and hence the right hand flat.
2) Scrape the dovetails in parallel once I am happy with the bearing. Will need a prismatic flat or a straight edge with a long wedge for dovetail spotting. for this. Anybody in the UK selling?

3) Scrape X-Y saddle flat and parallel using my granite table as a master
4) Fit the saddle to the base to scrape in the gib

The rest of the machine will have to wait until I am happy with the above.


Before I started the scraping, I got a 24"x18" granite surface plate, from Rotagrip. A Sandvik scraper from Greenwood with a 25mm wide blade. Diamond hand laps, diamond abrasive wheels came off ebay. For spotting I started with Stuarts Micrometer Blue and Red, the latter was not easy to find. I bought 3 different brayers from a craft shop, 2 hard, 1 soft. Then I came across a 2ft long camelback.

The surface plate arrive bone dry so I squirted it first baby oil, let is wet for a couple of day cleaned it off and repeated with WD40 to condition it nicely.

The scraper took me a while to figure out but I have found the various angles to use it at to get it to cut as wide, deep and more importantly the position I want to scrape. I use both hands on the shank and place the grip on my right shoulder. The hands guide, the shoulder pushes.

The spotting compounds were a waste of money. The red is too thin and barely visible when spread, can't even use it as a highlighting compound. The blue was OK but dried up too quickly and when thinned out was unworkable. Have settled for Dykem Hispot blue and will keep going with it since I can find any water soluble stuff here in the UK. Briefly tried water based poster paints but was not happy with how they spread.

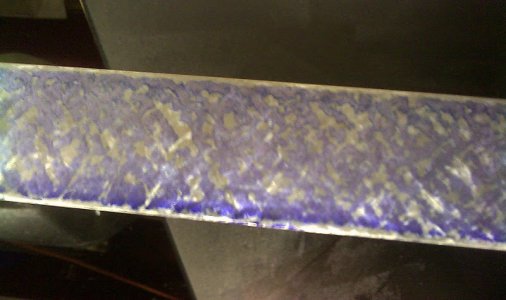
Decided to attack the camelback first. The base was rectangular and not very proud of the superstructure. This was rectified on the manual machine. A relief was milled on the superstructure to get and a chamfer on the base. Both now allow spotting all the way into the dovetail relief. Following the good advice from the various masters on the internet I have achieved the following:
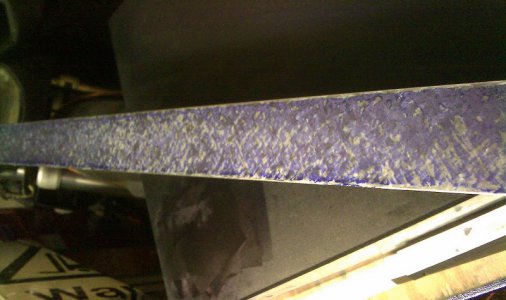
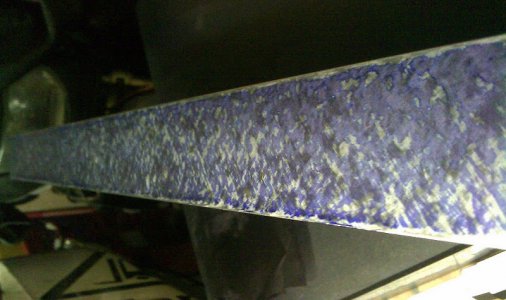
IMAGE_707.jpgIMAGE_711.jpgIMAGE_708.jpg

Click to see the larger picture Used a stone to deburr as the file I rounded left too many streaks. The edges are darker because the flat surface actually wrung onto the plate with the hispot. Had to knock it off as I could not lift it. Pretty happy with it actually. The remaining spotting on the surface plate looks like this:
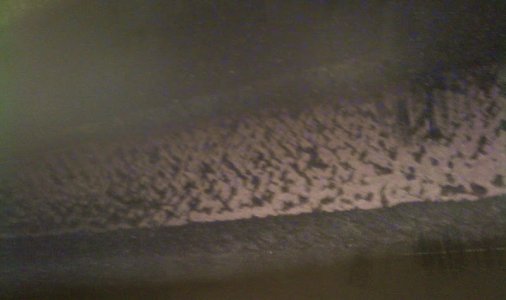
IMAGE_709.jpg

On a dry plate it rotates at around 2/3rds of the length away from the edge I am moving.

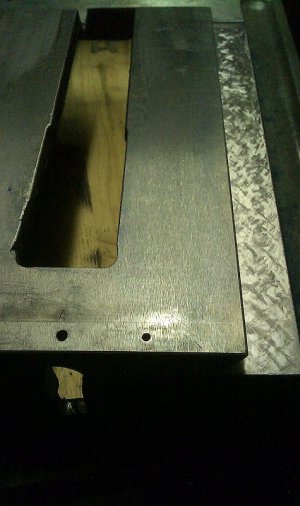
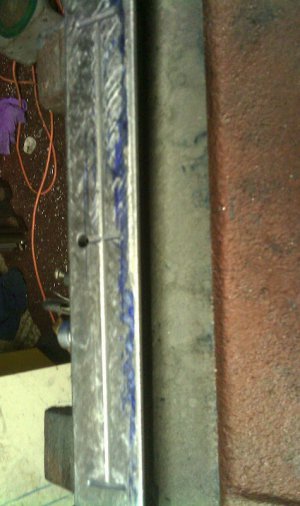
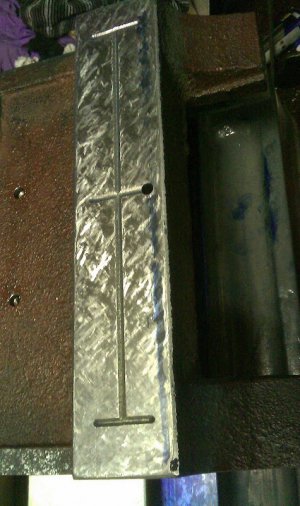
The base looks like this:
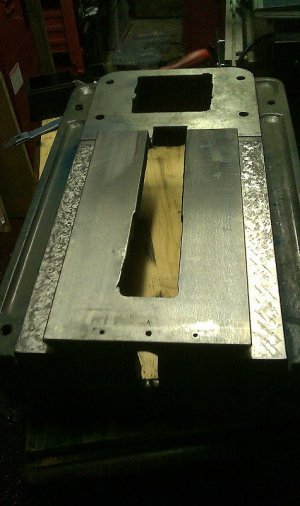
IMAGE_712.jpgIMAGE_714.jpg

Notice that the flat clearance surface has an A stamped on. I guess this is to denote the datum the machine builder used too.

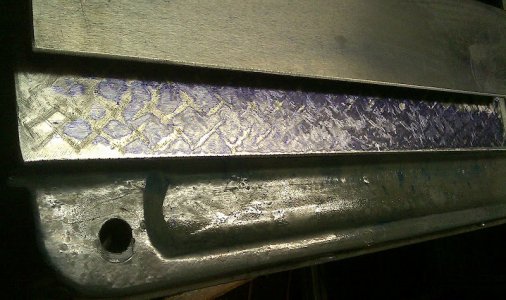
View of the original scrapejob...:
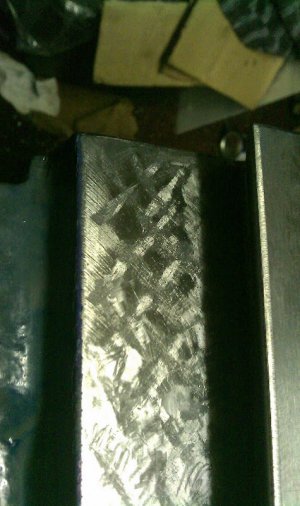
IMAGE_713.jpg


After a few cycles the flats looks like this:
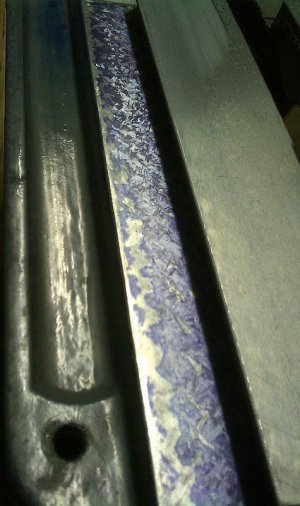
IMAGE_716.jpgIMAGE_717.jpg

Notice the gouged oil retention features?

Photos of the tools to follow, didnt want to use the phone with my blued paws

Once I get the surface to a good flat condition I will measure it up and correct it if need be.

A tip to anybody thinking of buying a small Chester machine...don't. There are other similar sized machines with better construction out there see the youtube comments for more info.

Regards to all and again thanks!

IMAGE_707.jpg IMAGE_708.jpg IMAGE_709.jpg IMAGE_711.jpg IMAGE_714.jpg IMAGE_712.jpg IMAGE_713.jpg IMAGE_716.jpg IMAGE_717.jpg
 
To all who are new to retrofitting a machine you should understand that 99% of all CNC machine built today do not use iron on iron ways. They use a Teflon product called Turcite or Rulon bonded to the short side of the ways or they are linar ball ways to let the machine feed very accurately and smoothly. It eliminates "stick slip" or a jerking motion when it moved. Stick slip is caused by lack of lubrication or does not have 100% area oil film. Even scraping the ways as you have done will not cure stick slip or "Ringing" together. Looking at your scraping it has way to much surface contact for cast on cast. Plus you still have to much bluing on the ways and it looks smeared. It looks pretty good, but to tweek it you need to measure how deep the scrape marks are or you low spots. When you have deeper scrape marks it holds the thin film of bluing. When you finish scraping the way, brush of the chips and run your fingers over the way and feel the burrs, then dry lightly stone the burrs off. It appears your stoning to much and with solvent as this will cut off to much material and you will get to high of contact area. 50% contact is best for a iron on iron scraped way.

Use a surface gage and .0001" indicator and set the gage on the flat way and your straight edge and measure from one high spot to the low spot, the measurements should average .0002" deep. This will allow oil to stay in the low scrape marks to get the 100% film. Be sure you have an oil groove in your shorted side to on a diagonal line to spread the oil from one side of the short way. One shot lube is for cast on cast non CNC machines as it will give it a shot of oil and then shut off. If you investigate lube systems on many CNC machines they are called continuious lube systems as it pumps oil all the time.

The reason they use the Teflon with bronze slivers mixed in is so you can program your CNC to move 001" and not jerk. On conventional machines you are taught that if you have to move .001" you move it backwards .025 to get the oil under the high spot and move back .026".
But as I said on the Telon it is self lubricating and you can move .001" in one shot. The one shot lube systems also work on Teflon ways as it helps increase the life of the Teflon as I said it is self lubricating.

As I have said in the past, You get what you pay for. The 2 students who brought their Chinese made machines to the GA scraping seminar also learned how lousy they were scraped at the factory. We re-scraped them in class. I have seen a hand-full of those Chinese mini machines and they all had lousy scraping. Its as if they fly cut the ways and scraped them a little smoother. It looks like they had watched You-Tube and scraped the ways with a file and never had any formal training or read anything here :).

That's why if you can find a old Bridgeport or American, British or German build machine you are far ahead of the game, as they were scraped by a pro at the factory. But as they say you have to love em or leave em...and with the influx of machines from China you have to learn to scrape them to rebuild your new machine way systems. Rich
 
I scraped in the saddle and tailstock of my minilathe. It wasn't scraped originally so much as ground out with a rotary burr (or, that is what it looked like). There were 3 contact patches on the saddle, each about 3/8" in diameter, and the thing moved a lot under heavy cuts. Scraping made a HUGE improvement. Thanks for posting your experience komatias, and thanks for the tips Richard.

One thing I also noticed on the mini was that the CI was incredibly soft. I made a prism from durrabar sometime after, and the stuff was 10 times harder.
 
Thanks Richard and DMS!

I have been contemplating Turcite actually for the saddle and gibs but not sure what thickness to go for.

Now I have a bit of a predicament....

The flat ways shown in the above post are ok, not perfect but ok. The dove tail measured parallel to +/-0.015mm which is the resolution of my DTI. The spotting using the camelback is consistent. So I have left them as is for now.

So time to see what the fit of the saddle is like. First step was to "cut" the originally ground surface then cross the cuts.

Spotting the saddle on the surface plate gives this:

IMAG0718.jpg

Again pretty uniform, bearing nearly everywhere. I measured the parallelism of the the two flat bearing sides of the saddle and the numbers are not great there are dips way into the 0.1-0.2mm range. Hoping to fix that on assembly. Remember I am going ground up here.

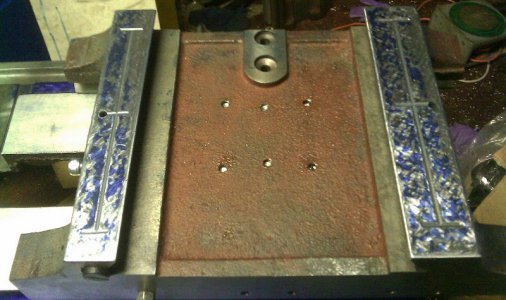
So I spread the hispot on the base's flats and this is what I got:

IMAG0719.jpg IMAG0720.jpg
The first one corresponds to left hand side flat shown above.

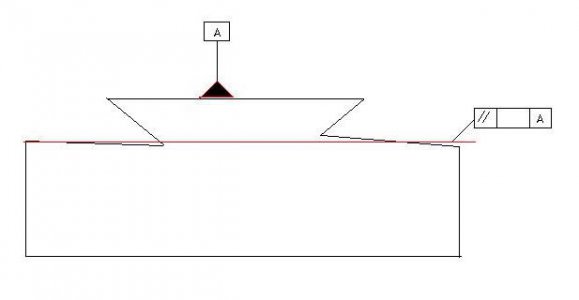
Clearly, the ways are not parallel to datum surface. The one dips toward the dove tail the other away from it like this:

Base_ways.JPG

Using a DTI on a surface gauge, I get a variation averaging 0.05mm from the inside of the dovetail to the outside.

Question here is: Do I continue to scrape the saddle to fit the base, which would be the quickest way forward I guess, or do I try and level the base's ways and in the process make them co-planar. I have considered sending the whole thing to a machine grinders to get it fixed up but would like to at least try before I give up and go that way. (Still looking for a prism to spot the dovetails with)

Regards

George

IMAG0718.jpg IMAG0719.jpg IMAG0720.jpg Base_ways.JPG
 
Next time you have the saddle on the surface plate check all 4 corners as they have to be parallel . Be sure you hinge the saddle by holding end with both hands and by moving the end of one to check the pivot points on the other end; should be 25 to 30 % from the outside edge. then hold the other end and move it left and right about 3" to and fro. and again 35 to 30% from that end too. It looks like it is high in the middle on the left side. When it is high in the middle the saddle will pivot in the middle. I teach there are 4 Rules of scraping. 1) individual scrape marks meaning you scrape a low spot and then you skip the same width and the scrape again scrape, no scrape, scrape or 0 0 0 0 , 2) Individual scrape marks

0 0 0 0 0 0 0
0 0 0 0 0 0 0 There is individual scrape mark lines, so the scrape marks do not touch the scrape mark above it

3) Depth of the scrape mark, .0002 to .0004 deep scraping marks or pockets. 4) HINGE or pivot to find the "rotation of points" 25 to 30 % from the ends. After you scrape the saddle on the plate the use it to scrape the base. When you ink up the base with the scraped saddle the measure the 4 corners again It has to be the same on all 4 corners. To all my students, remember when I say you unconsciously scrape the outside edge and not closer to the dovetail? This is a good example of that.

Not trying to pick on you Koma , but you have to consciously make yourself scrape the dovetail under side and it is a pain to scrape close and you bang in there. I would measure the saddle and make it a alternative straight edge one time with it one tome with the straight-edge, etc until you get the 4 corners the same off the base ways.page 207 fig. 23.5 of the Connelly book. The ways should be parallel and same angle from edge to under dovetail so when you check the 4 corners with a surface, moving the gage from sde to side on the same spot the indicator will read the same.

I hope that makes sense. Oh after you get it scraped you could try it with out the turcite, and if you still get stick slip, you could use some .030 on a home shop machine. If I was going to put it on a new production machine I would use .047".

We can talk more about that later. You will always find me on this forum now as I am a Moderator and check it several times a day.

Rich
 
Richard, Thanks.

When I was doing the long base ways, The camelback straight edge was not spotting all the way into the dovetail except on the left hand way. Did I wrongly conclude that the ways where out from the start? Maybe in my ignorance, I only scraped where I saw blue spots.

The technique of scraping I follow can be tweeked for sure and I will make the effort to follow the parallel scrapes with gaps between them like you describe. Point taken on the deburring, of the ways too. For the straight edge I was fascinated on how the shine came up on the high spots when I was getting close to flat.

Coming to your point about the saddle, are you recommending the following process:
1)Scrape the saddle flat and parallel to itself on the surface plate.
2)Blue the saddle and use that to show me the contact areas on the base and scrape those in.
3)Use the camelback straightedge to ensure that the whole base flat is actually flat.

I can see the logic behind this. The saddle is shorter in length than the base so how do I go about spotting? Lay on a thick layer of blue on the short flat and slide the whole travel?

Or do select a region of the base's ways ( the long ones), flatten that and then use the straight edge to bring the remaining areas to that reference? Like this below:

way_correction.jpg

The ways will be parallel to the datum surface when top corners of the saddle are parallel to it, measured using a DTI on a surface gauge.

(Fingers crossed it isnt too bad on the dovetail sides.)

Tonight I will spend taking photos and rough measurements of the various parts so I can write an RFQ to send to a machine ways grinder just out of interest.

way_correction.jpg
 
First I want to say Thanks to GA Bill, he really "got it" on how to scrape ways. As a teacher it really makes me happy seeing my students like Bill and Jim "Get it" They are struggling and it's like snapping their fingers when they finally understand it. Thanks Bill and Jim for making me proud! I also want to thank all my students.

Back to UK Bill, If I recall didn't you made a straight-edge out of a window weight and had a sore arm that was super painful when you started? UK Bill was asking several of us experienced scrapers on another forum and I want to thank him asking the question here.

I wish I knew how to draw with a program like that, pretty cool. As I said before scraping back on the dovetail inside edge can be a real pain because it's hard to see back there; the scraper blade is to thick and cant get wayyyy back in there. Page 60 Connelly book fig 9-12 That is why many will cut a relief back there on a mill, shaper, the Connelly book shows a 3 side saw page 12 fig 4-1. Groove cutter (I have never had a lot of luck with one, but to make the point) So its easy to create the unknown high spots back there that cause the straight-edge to hit hard on the outside edge making it look high out there and you accidentally scrape out there changing the original gemometry or angle.

No You are correct thinking it was screwed up from the factory and you did nothing wrong, who knows ..but this is something that happens a lot when your learning how. I can say you are not ignorant, that is an ugly term that I would never say. It's a problem that happens to everyone, even me from time to time as my eyesight isn't as good as it once was.

We always teach to scrape the longer member first and then match fit the shorter surface to it. With that said I will scrape the saddle of all machines on a plate to keep the geometry or flatness so all 4 corners are the same height before-hand as it helps speed up the job. And as I said I make it a master plate and use it with the straight-edge alternatively. I believe I mentioned in the other thread about the super high spots get shinny like a mirror when they are super high. Another thing I teach and GA Bill can comment on this, you not only look at the blue where it rubs off on the way your scraping, but you look at the straight-edge and saddle where the bluing rubs off. The high spots will rub off more blue on the straight-edge where it is super high. This is why I stress good lighting so you can see back in there to a void those high hidden spots so you don't miss them back there. Another thing I do when scraping a dovetail, I grind a top corners of the blade thinner so it can get deeper in the V.

There is a lot to remember when scraping, that is why I have the 4 rules and that is why I have the students repeat them so many times during the class. So important. 1 ) Individual scrape marks 2) Individual lines of scrape marks 3) depth of the scrape mark 4) Hinge the part.

One other way you can find that high edge back there is to set you angled straight-edge on the flat and slowly slide it back into the V or dove and feel for it to hit a ridge and jump in or lift up the straight-edge when it hits the burr high spots back there. Another thing to do is to rub it a lot of times (min of 6 times) to shine up the high-spots on the part and as I said a straight-edge. One has to be sure there is no sharp burr back there too so you don't scratch your master. I like to use a paint brush with the brisltes cut back to sweep out the chips, then a tapered slip stone (Norton MS-24) or a knife edge file to be sure the burr is gone. Scraping a base, saddle and table is like building a house in some ways. Number 1 you have to have a solid base or the foundations are level and parrallel, and as you build up you keep everything level and square (4 corners the same) and if you check as you build up everything will be good when your done. UK Bill there is a learning curve, and your technique has improved 1000% from the beginning, you should be proud of your-self and work. GA Bill had an advantage or UK Bill, I was standing behind him and telling him. It is a rael pain to learn and teach I will add over the internet. Rich
 
Last edited by a moderator:
Richard, would you kindly post the link to the other forum? We don't have many advertising scraping hands in the UK so any exposure you can share will be appreciated.
 
I can't find it as I delete my history on the other forums. You sure sound like the guy I helped a few months back on the other web-site, he had a lousy chinese import, had scraping issues at first, etc.. I can not mention which one on here, I have been asked to not mention other forums by name. I still contribute to them, as I find I can help in all 3. This forum has rules and I like the idea that Nelson had when he created this one. No foul language, no insults, no hassles allowed. Just friendly info.

You can contact my friend David Iverson and ask him if he knows a retired scraper who might like to teach you to scrape in the UK.
http://www.wmtg.co.uk/
 
GA Bill, As you remember I say in my DVD, "I don't care how you scrape as long as you can get the same results in the same amount of time". I have used angle grinders with a cut off wheel to knock out that apex and high area, (I like that term, thanks) . Bill I also say "you are limited by your imagination" and it sounds like you engineered or invented a method to help you and it worked. As you know you need to be careful not to grind to deep and make a hole for swarf and chips to enter the way system. I am so happy to see you doing so well after only 5 days of training, you stayed the 2 extra days right? I wonder how everyone is doing. I think I am going to email everyone and ask. Had any luck making a power scraper? I figure if you watch E-Bay and Craigslist you will find an old blue one for $300 to $500.00, hardly worth the effort to make one from scratch I would think, but use your imagination. I am sending one of the CA class students a link to your idea on making the blade sharpener as soon as I finish this note. Bill I am so proud of you and please keep teaching, as that is what I need you to do. Thanks again and keep up the good work. Rich
 
Back
Top