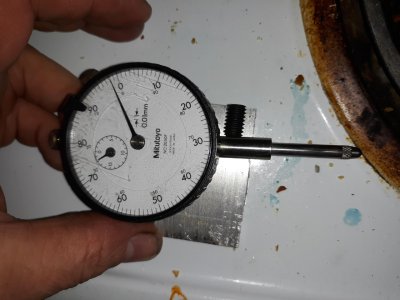
Learning to dial in a 4-jaw

40 years mucking around with this stuff and I don't think I've ever heard that phrase.

That's what I was taught, that phrase was burned into my mind, remembering that alone has made it much easier for me.

The very first project in that machining course, well second project, first to use the mill, was a C-clamp. The way he taught to set the part in the vise & direction to make the cut made it easy for me to remember climb vs conventional cutting. To this day I still picture that part if I ever get confused.
 
First month in a real shop I had the task of mounting a very large cam in a 4 jaw on a universal grinder to grind the bore to size . Didn't end up very well as the cam fell out onto the machine and floor , smashing my boss's indicator and mag stand to pieces in the process . The other boss thought it was quite funny though . When doing irregular shapes ( cams , eccentrics etc ) always keep a small amount of pressure on the opposing jaw , or things can go south in a big hurry ! :grin:
 
For a first go at chucking something in a 4-jaw, 10 minutes may be a world speed record. (IMO)

Good start!

Stu
Ton of truth here. I remember my first time with a 4j, I started on it at the beginning of class and when the bell rang for clean up time 50 minutes later I had just gotten it down to .001. I got detention that day for the blue streak that came out of my mouth when I realized I had to pull my part out to start over the next day.
WOW!
That help came quicker than calling an ambulance, you all are awesome!

Ok... 4-point it. That makes sense to me.
@mikey thank you for "look for the pair closest to the maximum deviation" This is super helpful as somehow I was expecting the runout to be conveniently located at a jaw, not in between :oops:
I'm going to figure out how to make a tool holder for my indicator. Without a mill Hmmm.
Indicator holder for a QCTP quick and dirty without a mill. Take a chunk of aluminum 1/2" thick and long enough to span the distance between 2 of the set screws that hold the tool in the holder. 1" should be plenty. Now drill a hole the size of the indicator shaft through it. A little oversize so the shaft will fit through, then drill and tap a hole 90* to it for a set screw to hold the shaft. You will have to relieve the aluminum to give clearance for the indicator but you can do that with a hack saw.

Picture attached with the parts in relation to each other. I couldn't find my first model which was replaced with a milled model that took a couple hours to do and does exactly the same thing.

The piece of aluminum goes into the tool holder and lets you use the indicator in a very solid mount.thumbnail_20200201_232457.jpg
 
Alot of great info here ready. Two things that helped me out. One was numbering the jaws with a sharpie where I could easily see the numbers. That will help with number two, make sure when you start getting close to zero that you aren't chasing your tail by taking too big of a swing at the bullseye.
 
Alot of great info here ready. Two things that helped me out. One was numbering the jaws with a sharpie where I could easily see the numbers. That will help with number two, make sure when you start getting close to zero that you aren't chasing your tail by taking too big of a swing at the bullseye.
That's precisely what I was doing today. Got down to a three or four thou and lost track of what jaws I was working on and ramped it back up to 10-15 thou! Grrr
 
That's precisely what I was doing today. Got down to a three or four thou and lost track of what jaws I was working on and ramped it back up to 10-15 thou! Grrr

Work 2 at a time . This is what Will was talking about in an above post . Bring them into 0-0 and bring your other 2 in to 0 . If your part is out of round , you may have .000 and .002 on opposing jaws , but the part is centered .
 
Not sure what the value in numbering the jaws is. If you work in pairs (as the guys have been telling you) the indicator will tell you which pair needs work. I don't even look at the jaws; I look at the indicator.
 
Easiest method for 4 jaw chuck . Measure your part , find the rings on the chuck closest to the known part diameter . Set jaws to that ring . Turn in each jaw either 1 full turn , 1/2 turn , doesn't matter , until your part is tight . You're in the ballpark , then bring in your indicator and indicate as above . If the part is square or rectangular , do it the same way . Figure out your offsets and set the jaws close and move on .
 
Dopey me @mmcmdl, I didn't even think to measure the part
 
One thing no one has mentioned . If you're picking up a finished diameter with a machined face , you NEED TO GET THE FACE RUNNING TRUE FIRST ! If you don't , you'll be chasing your tail forever .
 
Back
Top