-
Welcome back Guest! Did you know you can mentor other members here at H-M? If not, please check out our Relaunch of Hobby Machinist Mentoring Program!
You are using an out of date browser. It may not display this or other websites correctly.
You should upgrade or use an alternative browser.
You should upgrade or use an alternative browser.
First Cuts, Not Bad But Not Great.......
- Thread starter Crow Horse
- Start date
- Joined
- May 18, 2021
- Messages
- 51
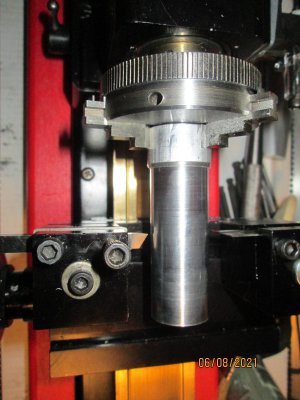
My goal in using the parting tool was to create square shouldered grooves. That failed although I'll revisit that.
Another goal is to cut a tapered end either by using a compound slider or turning the headstock.
Another goal is to cut a tapered end either by using a compound slider or turning the headstock.
- Joined
- Aug 29, 2017
- Messages
- 30
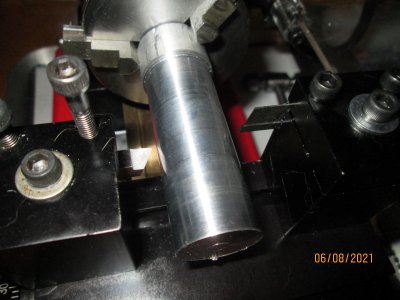
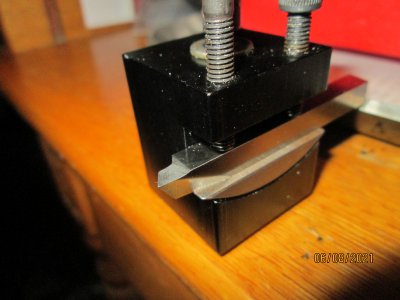
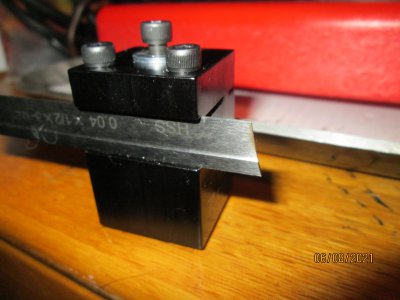
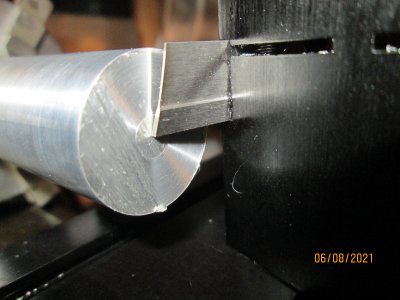
I tried and failed at using the rear mount parting tool. I slowed the speed and fed very slowly but it jammed several times. Not wanting to do any damage or cause injury I stopped. Back to the books to see where I went wrong.
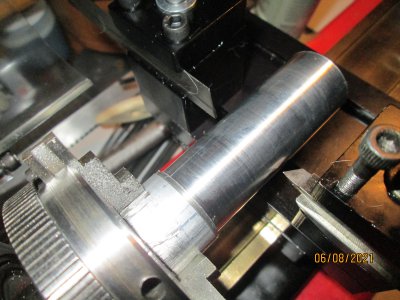
The pic makes it look worse than it is but the finish is far from what I think it should be. Any input will be appreciated.
What sort of parting tool are you using with your Sherline rear mounted cutoff tool holder?
The Chinese blades are crap, the cutting edge isn't sufficiently wide compared with the body of the tool and will jam.
Little Machine Shop sells cutoff tools mfg. by a US company, AR Warner. The difference in performance is night and day better than the Chinese tool. BTDT
Bill
- Joined
- Apr 30, 2015
- Messages
- 12,187
I'm going to preach the gospel of getting a small bench grinder and learning to grind your own HSS tool bits. Many beginners don't want to go anywhere near doing that, but in fact it was commonly expected of any metal shop student back in my high school days (70s)
Students needed to learn that before the teacher would allow them to use the lathe.
Sometimes you just can't buy the correct shape you need for a specific job and the ability to roll your own is invaluable
Once you learn it, you'll really up your game as a hobby machinist
-Mark
Students needed to learn that before the teacher would allow them to use the lathe.
Sometimes you just can't buy the correct shape you need for a specific job and the ability to roll your own is invaluable
Once you learn it, you'll really up your game as a hobby machinist
-Mark
- Joined
- Jan 2, 2018
- Messages
- 601
When parting lock the carriage, minimize the over hang of the tool bit, be sure there is some side clearance on the bit and it is sharp- plus what everyone else said.My goal in using the parting tool was to create square shouldered grooves. That failed although I'll revisit that.
Another goal is to cut a tapered end either by using a compound slider or turning the headstock.
One of my parting holders by iscar has about 3 degrees at the front cutting angle-it enters the work gradually and makes for less initial shock.
- Joined
- Dec 20, 2012
- Messages
- 9,422
I finally got everything together to take a shot at doing some practice turning. I knew from the get go that there will be a learning curve as with any skill.
I had difficulty to get the 1" 6061 to run true in the jaws. I did disassemble the jaw to verify that I had put it together correctly. One caveat is that the jaw I have doesn't have an ABC, only a "dot". I assumed that this is the starting point and worked from there. The jaws all meet when closed so I'll assume that isn't an issue.
I took quite a few conservative passes and the aluminum peeled off in long strands. Speed without a tach is guesswork at this point and I probably had it spinning slower than what it should spin. I used WD40 as a coolant and will look to different products if that is required.
I tried and failed at using the rear mount parting tool. I slowed the speed and fed very slowly but it jammed several times. Not wanting to do any damage or cause injury I stopped. Back to the books to see where I went wrong.
The pic makes it look worse than it is but the finish is far from what I think it should be. Any input will be appreciated.
The rule of thumb is to use a live center when the work is more than 2X the diameter. It makes your set up far more rigid and helps with accuracy and improves your finishes.
I agree that when using a 3 jaw for a first operation like this, run out of the work piece when first mounted doesn't matter. The lathe will turn it true with the first cut.
Cutting speed for aluminum is 500-600 sfm. For a 1" work piece, that works out to about 2300 rpm so kick it up a notch.
It would help to show us the tool you're using. The guys are right and the tool is likely a cause of the finish but it can also be speed and feed. I am guessing but it looks like you were crawling the finish using a tool with a very small nose radius. The angle of that tool as it meets the work matters (called the lead angle) so show us your set and we can give you some pointers to improve things.
A rear mounted parting tool in a Sherline lathe is almost foolproof IF the tip of the tool is, in fact, on center. If it is not then all bets are off. I suggest you find the centerline of your spindle and make sure it is the same as the distance from the bottom of the parting tool holder to the bottom of the blade slot. If the numbers are the same then that tool holder will work. You also need to be sure the tool itself is sharpish and square to the cross slide/perpendicular to the work.
- Joined
- May 18, 2021
- Messages
- 51
- Joined
- Mar 26, 2018
- Messages
- 8,645
Turning the headstock??My goal in using the parting tool was to create square shouldered grooves. That failed although I'll revisit that.
Another goal is to cut a tapered end either by using a compound slider or turning the headstock.
Ah, not a good idea, in my opinion.
- Joined
- May 18, 2021
- Messages
- 51
- Joined
- May 18, 2021
- Messages
- 51
This methodology of learning has merit but I lean to the "reverse engineering/modification" methodology of learning. Maybe I'm just wired this way. Understanding cause & effect seems to make more sense and it is easier to wrap my mind around.I'm going to preach the gospel of getting a small bench grinder and learning to grind your own HSS tool bits. Many beginners don't want to go anywhere near doing that, but in fact it was commonly expected of any metal shop student back in my high school days (70s)
Students needed to learn that before the teacher would allow them to use the lathe.
Sometimes you just can't buy the correct shape you need for a specific job and the ability to roll your own is invaluable
Once you learn it, you'll really up your game as a hobby machinist
A good example although simplistic is fishing which is a life long obsession for me. I've learned through the decades to understand the dynamics of a simple fishing rod and through use I've discovered in a real way the shortcomings of commercially available rods. Armed with that knowledge which is a percept and not a concept, I can and have built my own rods to address the shortfalls of those store bought rods. Because of my direct experience I can produce a better rod that suits my needs to a "T".
That said, both methods of teaching and learning if done correctly end up in the same spot. The journey is just different........

