Craftsman Power Hacksaw Rebuild

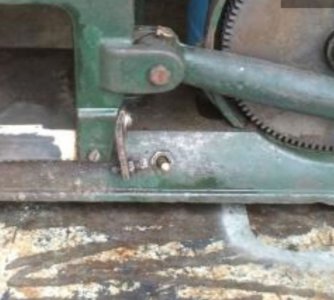
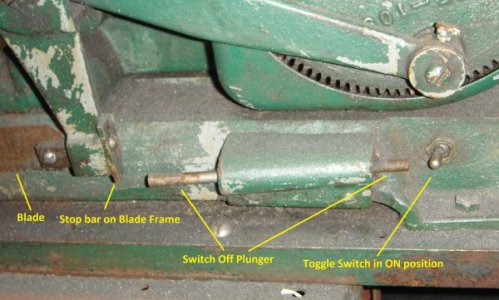
Could I get a close-up picture of the stop bar on the blade frame. My Craftsman has a small hole with threads where the screw is in the picture but no stop bar or switch assembly on it. I suspect someone replaced the blade frame with one from a saw that had the switch like the Covel. The switch will be my last addition as soon as I get the Crank Lever fixed. UPS broke it in shipment so just waiting until after Xmas to braze it.

Auto_Shut-off_Mechanism.jpg
 
Any chance we could get some measurements of the block that holds the plunger rod? And hole locations for the rod?
 
Thanks in advance. That switch assembly is highly desirable when returning the saw to near original. I plan to make one as well and the picture will let me see just the correct design to push the small bar. Already have the toggle switch but I purchases a 20 amp switch with a ground connector. I bet a lot of others are wondering about the shape and size of the assembly as well.
 
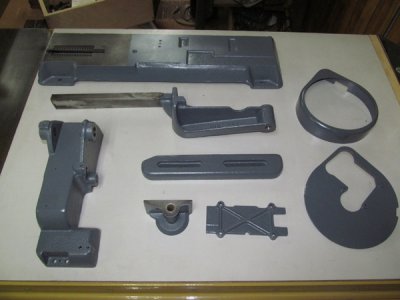
I've been really busy with work for the past month, but I finally found some time last week to make a little progress on the power hacksaw. I've got about half of the castings cleaned, stripped and repainted:

IMG_1565_zpshaoljxk4.jpg
 
I started taking a closer look at some of the parts on this saw and have discovered some issues. First up is the pinion gear and shaft.
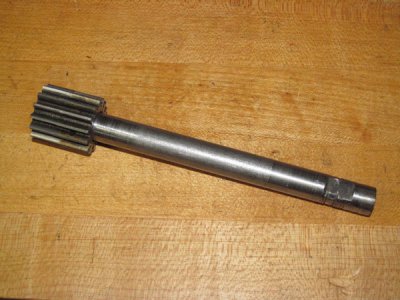
IMG_1570_zps7gju2erv.jpg

The large pulley that fits on the end of the shaft worked loose and the setscrew chewed up the end pretty bad:
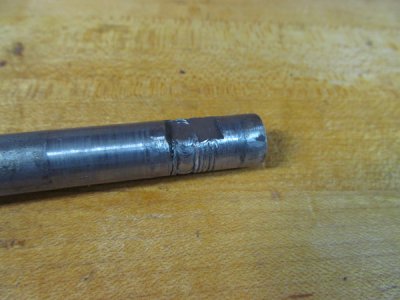
IMG_1534_zpsaptxxra6.jpg

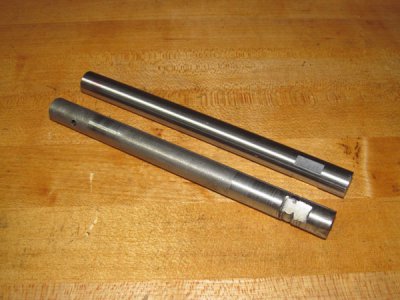
The pinion gear is just pinned to the shaft. Clausing still sells the whole assembly as a unit for $74, which isn't really that bad when you think about it. But instead, I bought a length of turned, ground, and polished steel shaft, cut it to length, and milled a couple of flats on one end at my Atlas milling machine:
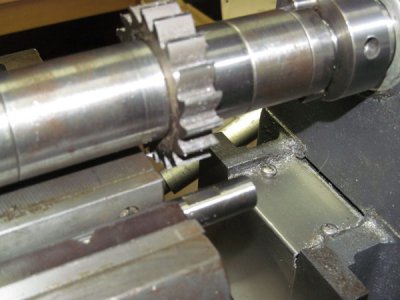
IMG_1548_zpsami0fxyr.jpg

The new shaft alongside the old one:

IMG_1551_zpsgy0ipcfd.jpg

Unfortunately, while I was milling the flats, the motor on my milling machine started making a really bad howling noise. I didn't bother to take a look at the motor when I went through my milling machine a couple of years ago, so I pulled the bearings and sure enough, one of them was bone dry and crunchy. So now I'm out of commission until the new bearings arrive. One project always seems to lead to another:
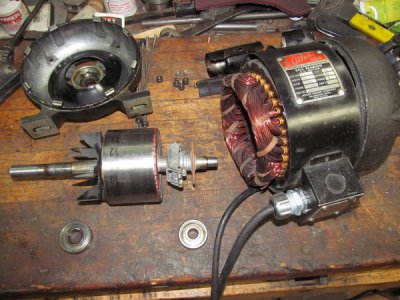
IMG_1569_zpskk89bsii.jpg
 
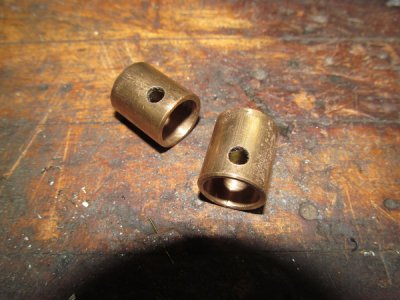
It's interesting how some of these end up needing restoration in areas you wouldn't think would get damaged from traditional usage. I'm enjoying the challenge. On mine, the Rear and Front Guard were sprung and damaged from the Crank Lever breaking. Both have been straightened and reshaped and ready for paint. Also the bushings on the Pinion Shaft assembly were missing so I have some oilite bushing material arriving today to make two new ones. And the connector pin for the draw end of the blade was drilled out and I assume someone put in a bolt and nut. The outer end is fine with the split pin on the slant and tight. I'm going to braze the hole full and ream a new hole on the opposing angle similar to the front so the blade is held as original. I'm sure the bolt would work just as well but trying to restore as best I can to original.
 
Last edited:
Did you source the turned, ground and polished shaft locally or online?
 
Here is a switch from A Sawmaster posted by AR1911. The whole picture is the top group of the forum. I zoomed in to see how it was actually made. This appears simple and functional. Not sure of any down-side features but a lot more simple to include then the larger slant block and rod. I haven't looked at the back side curve for the clearance of the switch but another feature to consider.

Toggle Switch 4.JPG
 
ndnchf -- I purchased the shaft material online from an ebay vendor. The price was a little higher, but shipping was more reasonable.

Continuing on with the restore, a well-intentioned but misinformed previous owner had drilled holes in the oilite bushings for the pinion gear shaft:

IMG_1574_zpsscb44vvi.jpg

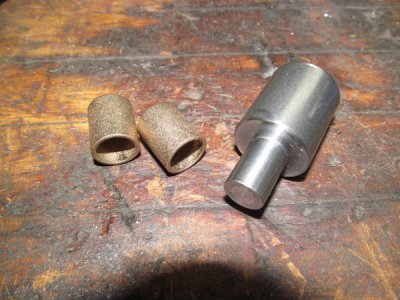
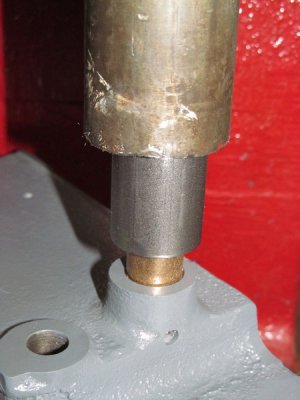
I ordered a couple of replacement bushings from MSC and turned a little pusher tool to insert them:

IMG_1575_zps51l8ekwd.jpg

I turned the narrow end of the insertion tool to a diameter that was just slightly larger than the desired I.D. of the bushing. The idea is that when you press the bushing in place, the tool prevents the bushing from closing in on itself. It worked perfectly, leaving about a thou of clearance between the shaft and the bushing:

IMG_1576_zpsry6fxsf6.jpg
 
Back
Top