Correct way to hold end mill?

Ahh, I see. No, I was specifically referring to using the drill chuck in a milling machine with an end mill. The one that came with my mill, and all the drill chucks I have ever bought, are just chucks with a jacobs taper, pressed on an arbor like this one: https://www.mscdirect.com/product/details/92302413

Up until now, I did not know they made threaded drill chucks.


I am the opposite, the only place I've run into Jacobs tapers is on a drill press. Granted I'm not well traveled in the machinery world, and mine are threaded. Hand drills typically use threaded chucks these days.

I had to replace a drill chuck recently on my drill press (lost in a move) and it was harder than I expected to find the right Jacobs taper on a chuck. Found quite a few threaded chucks and those with various taper shanks attached for machining use.

Until now I've never had reason to question how those shanks are connected to the chuck, just assumed they were permanently attached. It is quite possible you are correct and they use a Jacobs taper between the shank and the chuck.
 
I think that there is a 60's vintage Jacobs catalog in Downloads. If not, I'll add it after dinner. But drill presses and small mills come with all sorts of spindle noses. That's one of the first questions that you ask before buying one.
 
What are you doing with your machine? What sort of projects are you working on? The answer will influence what tooling you would consider. As others have stated - if your Z-axis realestate is important, then a direct mount MT3-end mill will give you the most room. Of course, your vise is taking up a good bit of "Z" room, so maybe the space is not an issue?

Of course, if you are working tougher materials (looks like a plastic type material was your most recent job) - then you may want to pull everything in as much as possible to stiffen your set up - but if that is not where you are headed, then maybe it does not matter?

Yes, collets give you a range of clamping capability, but do you really need that range? If you go with an ER collet system, then you'll need a chuck and that consumes a bit of head room. Of course it is a small mill, so you could get away with about an ER16, and that would not consume too much room.

The Weldon style end mill adapters hold very positively, and in small sizes do not consume much of that valuable "Z" realestate. The adapters are quite stiff (sturdy) and pretty cheap (less complex than a collet chuck and set of collets). If you use end mill adapters, you could standardize on just 2 or 3 sizes of end mill shanks. You have a small mill, stick to smaller end mills. Often the small end mills come on some sort of a standard size shank (i.e. 1/8" end mills are available on 3/8" shanks).

Stay in the game a while and you'll have all of the above for holding end mills!

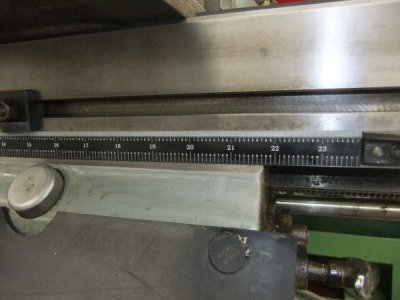
The cheapest DRO? None at all. Glue a flat tape measure (thin metal rule) to the table and count turns. DROs are great, but much very good work has been done without one. I have 2 mills, both are well equiped and nice to use. The smaller one has a DRO, the larger one (Cinci's smallest mill) has the ruler glued on - the larger one gets used the most. Which mill really depends on the job to do.

DSCF7263.JPG
 
I believe were talking hobby machines which most do hold collets and that is what the thread starter has
The "proper" way to hold an endmill is the way that the machine spindle allows, many machines will not hold a collet in the spindle directly. Therefore a collet tool holder, setscrew tool holder or shrink fit holder is required.

The advantage of holding a tool in a tool holder in a collet spindle machine it that the Z axis zero remains relatively constant if the tool is removed and returned to the spindle. A collet spindle will not repeat nearly as well in Z as a Cat, BT or MTB spindle. If you do not do many tool changes then by all means hold them in a collet.
 
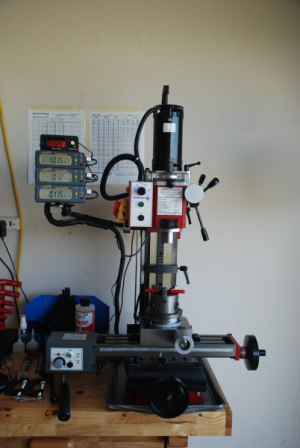
I at first had igaging absolute dro's on my mini mill.1535159486243.png These cost about $220.00 US.

2 years later I had problems with the scales delaminating (possibly from chemicals or oils, so my fault)so I went with the LMS/Sieg Bluetooth DRO $499.00 US from LMS that uses stainless steel magnetic scales. These can't de-laminate.
1535159642148.png1535159801614.png

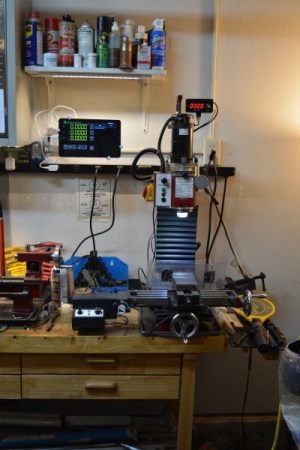
The DRO display I use is a Samsung Galaxy Tab 9.6E, about $159.00 US.

My mini mill has an R8 spindle so I use R8 collets in both us and metric. I also have an R8 to er32 collet chuck and sets of metric and us collets.
Everything works great.

The igaging dro's that Ken shows in his post are good and inexpensive, yet many magnitudes better than no DRO.

Just many ways to do what you want.

Roy
 
How is it that it’ impossibe for the stainless scales to non delaminte the strips? What makes them different? I have physically compared the 2 (auminum vs Stainless) and see no other difference other than the steel.
I at first had igaging absolute dro's on my mini mill.View attachment 274439 These cost about $220.00 US.

2 years later I had problems with the scales delaminating (possibly from chemicals or oils, so my fault)so I went with the LMS/Sieg Bluetooth DRO $499.00 US from LMS that uses stainless steel magnetic scales. These can't de-laminate.
View attachment 274440View attachment 274441

The DRO display I use is a Samsung Galaxy Tab 9.6E, about $159.00 US.

My mini mill has an R8 spindle so I use R8 collets in both us and metric. I also have an R8 to er32 collet chuck and sets of metric and us collets.
Everything works great.

The igaging dro's that Ken shows in his post are good and inexpensive, yet many magnitudes better than no DRO.

Just many ways to do what you want.

Roy
 
How is it that it’ impossibe for the stainless scales to non delaminte the strips? What makes them different? I have physically compared the 2 (auminum vs Stainless) and see no other difference other than the steel.

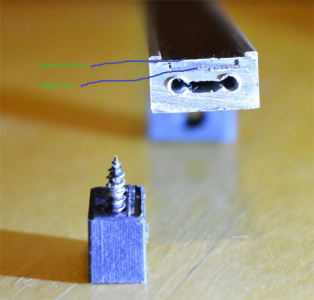
The Sieg scales have a stainless cover plate that slides in a channel over the magnetic strip. The end cap screws on and the stainless steel strip extends into a channel in the end cap. This applies only to the Sieg scales, not the igaging scales. My igaging scales that failed were the stainless first version absolute scales. They are exposed just like the aluminum. I probably should have wrote that it's unlikely to de-laminate instead, since nothing is impossible. Also the Sieg scales can be easily cut to any size.

1535220160587.png

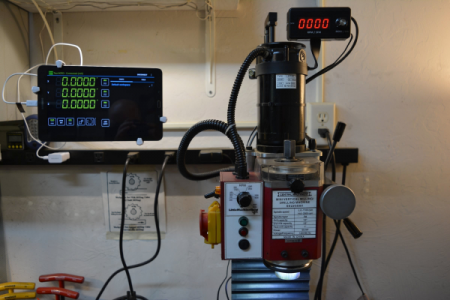
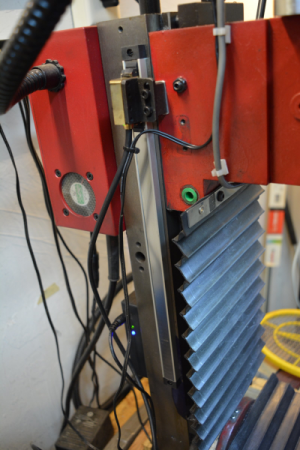
1535221579079.png Z scale and reader. The LED's on the back of the column are on the Blue Tooth transmitter.

Roy
 
Last edited:
Ok now I see what you are referring to. I was confused because I did not read where you said they were Sieg scales. Two years ago I was at the Cabin Fever Expo and LMS brought their version of the knockoff iGaging scales and a knockoff of Blu-Dro’s controller. I was unaware that Sieg came out with their own design or perhaps they copied someone else’s design. Either way they are obviously more robust and I think are in an entirely different league of scales. Thank you for posting this because I never paid attention to this new product. If I ever have a problem with mine I think I will probably go this route. How do the read heads attach? The entire set up appears to be more rigid as well
The Sieg scales have a stainless cover plate that slides in a channel over the magnetic strip. The end cap screws on and the stainless steel strip extends into a channel in the end cap. This applies only to the Sieg scales, not the igaging scales. My igaging scales that failed were the stainless first version absolute scales. They are exposed just like the aluminum. I probably should have wrote that it's unlikely to de-laminate instead, since nothing is impossible. Also the Sieg scales can be easily cut to any size.

View attachment 274466

View attachment 274467 Z scale and reader. The LED's on the back of the column are on the Blue Tooth transmitter.

Roy
 
Ok now I see what you are referring to. I was confused because I did not read where you said they were Sieg scales. Two years ago I was at the Cabin Fever Expo and LMS brought their version of the knockoff iGaging scales and a knockoff of Blu-Dro’s controller. I was unaware that Sieg came out with their own design or perhaps they copied someone else’s design. Either way they are obviously more robust and I think are in an entirely different league of scales. Thank you for posting this because I never paid attention to this new product. If I ever have a problem with mine I think I will probably go this route. How do the read heads attach? The entire set up appears to be more rigid as well

Yes I thought you might not have seen the new Sieg scales and readers. Here is the reader
5499.480.jpg

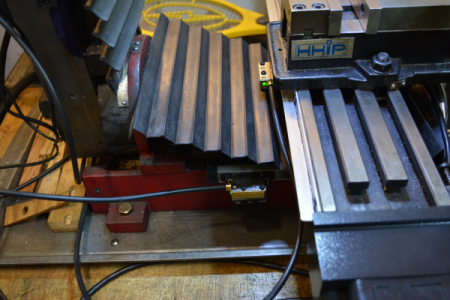
You can see that 2 screws attach the reader and wiper to a mounting bracket shown on my post #27 above. The scales are magnetic and the scales and readers are much smaller than the igaging scales. Here are the X and Y scales and readers on my mini mill
1535247990165.png

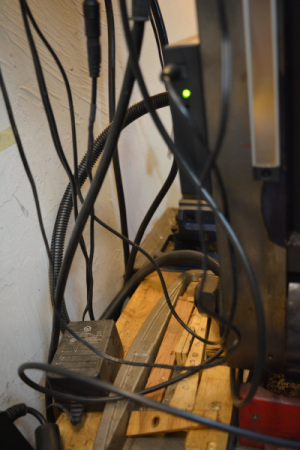
The BT transmitter is attached by six magnets to the back of the column (the box with the green LED)
1535248131826.pngThe transmitter is powered by a wall wart. I've had no interference problems yet.
LMS sells kits for different mills and lathes with the scales cut to size and all brackets. They also have a universal kit and sell the individual components separately. I purchased the standard HF minimill kit and a 3 foot section of scale that I cut to the size needed for My z axis. The air spring and small upper stop on my mill adds about 2 and a half inches of travel. I used a 32 tooth hacksaw blade to cut the scale section. I mounted the Z axis scale on the left side of the mill instead of on the right as the instructions call for.

Here you can see the out of focus Y scale and reader and the aluminum mounting block I made to mount the reader.
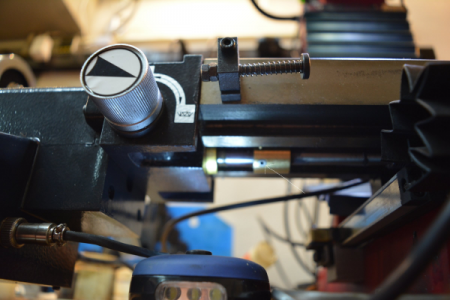
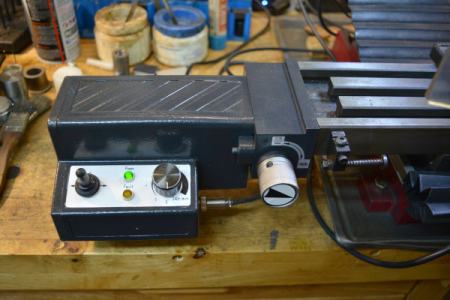
1535248830996.png The block needed to be milled with a 5° angle since the mill base is made with an angle. The kit contains 2 4mm studs with nuts for mounting the reader but I thought it not stable enough. I used 2 5mm shcs to mount the reader bracket and 2 4mm shcs to help hold the aluminum block in place. Also you can see the new style x axis power feed with clutch. I really like both products.
1535249298550.png

Roy
 
Royesses you have got all kinds of nice mods done to this mill. Nice job! Do the read heads ride in any sort of a slot or groove on the scale or do they just float?

So Sieg has a new powerfeed that you have as well. I don’t know how I haven’t been able to keep track of all of this new stuff. How do you like the power feed? Does it have enough power? Sorry for all of the questions but you’ve got a lot of neat mods done to your machine
Yes I thought you might not have seen the new Sieg scales and readers. Here is the reader
5499.480.jpg

You can see that 2 screws attach the reader and wiper to a mounting bracket shown on my post #27 above. The scales are magnetic and the scales and readers are much smaller than the igaging scales. Here are the X and Y scales and readers on my mini mill
View attachment 274486

The BT transmitter is attached by six magnets to the back of the column (the box with the green LED)
View attachment 274487The transmitter is powered by a wall wart. I've had no interference problems yet.
LMS sells kits for different mills and lathes with the scales cut to size and all brackets. They also have a universal kit and sell the individual components separately. I purchased the standard HF minimill kit and a 3 foot section of scale that I cut to the size needed for My z axis. The air spring and small upper stop on my mill adds about 2 and a half inches of travel. I used a 32 tooth hacksaw blade to cut the scale section. I mounted the Z axis scale on the left side of the mill instead of on the right as the instructions call for.

Here you can see the out of focus Y scale and reader and the aluminum mounting block I made to mount the reader.
View attachment 274499 The block needed to be milled with a 5° angle since the mill base is made with an angle. The kit contains 2 4mm studs with nuts for mounting the reader but I thought it not stable enough. I used 2 5mm shcs to mount the reader bracket and 2 4mm shcs to help hold the aluminum block in place. Also you can see the new style x axis power feed with clutch. I really like both products.
View attachment 274500

Roy
 
Back
Top