Atlas V36 rebuild

Well that’s a nifty article. I can’t say I’ve ever done any reading on roll pin installation before. I will say though from my own experience, that you don’t actually need anything but a small hammer to drive one in. A soft hammer if you’re concerned about deformation of the pin. Driving them out is considerably easier with the roll pin punches though. Especially the small ones.

Anyhow, I had a great day today! The cat will come home tomorrow. I spent the morning in school, teaching a young man how to run a manual lathe. We’re building an adapter to mount a gripper to a Fanuc robot. Then I got another couple hours of basement shop time at home before the family started arriving for the day. Now a progress picture. Yes...two hours...I know...I work slow. This will be a spindle thread protector for the Atlas if I don’t screw it up.
 

Attachments

  • E3734398-9FD8-4DBB-93C2-C804670BE9C9.jpeg
    E3734398-9FD8-4DBB-93C2-C804670BE9C9.jpeg
    45.6 KB · Views: 21
I’ve gotten myself in a pickle. Firstly I have no way to check this thread protector to find if the threads are full depth. Secondly, I am threading away from the chuck, and have made the thread relief(right term?) too short. So what's happening is that as I wind out the compound, my threading tool has already begun hitting the area meant for threads. I wonder if that's clear. I have bored three sections in this piece. One section is meant for the register, one short section equal in diameter to the root of the threads, meant to place my threading tool before actuating the half nut, and one section equal in diameter to the crest of the threads. The idea here was that I'd be able to safely assume my thread was complete when my tool bit scratched the relief area. Yes I know...I set myself up for failure. I had intended to make this piece before I reinstalled the spindle. Then I'd have been able to actually check the threads before removing the piece from the chuck. So what's the plan? For now, I'm waiting to hear back from a couple of friends locally who "think" they "might" have a 1 1/2-8 tap. If that avenue fails, I will remove my threading tool bit, and use a boring bar to extend the thread relief. I'll have someone at work turn sixty degree points on two headless screws, thread those both into a standoff, and use that as a makeshift thread depth measuring device. Reinstall the threading tool bit, pick up my threads, and continue.

I had a heck of a time trying to figure out how to cut internal right hand screw threads away from the chuck. And to be honest, I'm not absolutely confident that I'm doing it right. I watched Joe Pi's Youtube video on threading, which is when I basically decided to never thread towards the head stock again. I highly recommend that video, which can be found here.
I can say that this is the single best method I've ever seen or tried.

Pictures to follow.
 
And here they are...some pictures.
 

Attachments

  • 1949C237-BCC0-4883-8A48-13BC99CE559D.jpeg
    1949C237-BCC0-4883-8A48-13BC99CE559D.jpeg
    26.4 KB · Views: 18
  • 0414669C-B004-45D9-ACAE-479B5F02D47F.jpeg
    0414669C-B004-45D9-ACAE-479B5F02D47F.jpeg
    36.9 KB · Views: 9
Well, you need at least a GO Gauge. I would suggest contacting Joel Rogers or one of a few others who routinely part out Atlas built lathes and ask him or them whether they have a spindle out of a babbit bearing 10" or 12" whose bearing journals are worn out but which still has good threads on the spindle nose.
 
I'm not sure what sort of paint the PO used on this lathe, but it's been a bear to get rid of. While I had intended to use electrolysis, I realized I didn't have any good sacrificial sheet metal to donate to the cause. So that plan hasn't been enacted yet. I did try the Easy Off oven cleaner again. This time I soaked all the parts, came back 8 hours later, and soaked them again, came back 8 hours later and did the scrubbing. This worked very, very well in some spots, and not at all in others. I haven't figured out why. For instance, the motor platform: The Easy Off almost completely cleared off all the paint on the bottom side of it with very little pressure required. But it didn't even budge the stuff on the top side. I mean it's like I didn't even put anything on it. Puzzling for sure. So I removed what I could, considered the idea that it's possible most people would never scrutinize this piece quite so exhaustively as I have been doing, and decided to paint over the stubborn top side paint. We'll see how that worked out in a couple days.

I have big plans for the carriage area. I have an MLA T slot cross slide that's been sitting around here for a few years. I'm going to machine it for this lathe. I'm also going to copy Ironman's carriage improvements detailed here: https://www.hobby-machinist.com/threads/10-atlas-carriage-modifications.21046/

After I get that done, I'm going to try to copy Dranreb's mods pictured here: https://www.hobby-machinist.com/thr...t-reading-cross-slide-dial.19715/#post-167176

Mine won't be exactly the same as either I'm sure. Firstly, I'm not using a plate of brass on the bottom of the carriage, but two flat bars, and am trying to figure out how I'll make them replaceable. I'm also lacking in confidence on how Ironman did the piece for the apron, and am full of confidence that I'll screw it up. With Dranreb's mods, I won't be using as large of a dial. I have one of those laser cut aluminum dials from an Ebay vendor, and will try to figure out how to adapt it. It won't be direct reading, but I'm mostly concerned with trying to copy his dial adjustment method.

In addition to all of that, there's a fellow out in the ether known as Bogstandard, and another Rick Sparber I believe, whom I'm sure most of you are familiar. They've both done mods to their own Atlas lathes and recorded it for me to steal from. So I'll be cherry picking from them as well. Specifically, Bogstandards method of getting some clearance under the lathe bed, and Mr. Sparber's tailstock lock.

Their stuff can be found here http://www.modelenginemaker.com/index.php?topic=1428.0

and here https://rick.sparber.org/tsl.pdf

and also Mr. Sparber I believe contributes to some of the hobby machining magazines. His website has a ton of interesting information on lathes, mill, shapers, and machining topics. If you're interested, check here: https://rick.sparber.org/ma.htm

All that said, I believe my ETA on completion will have to be extended. I was thinking June originally. Now I'm thinking October. Which, may very well be too optimistic. But who knows. Luckily, there's only two or three of us even slightly interested. lol

I ordered vertical countershaft gear guards from Antfarm2000 on Ebay today, because I realized just yesterday that I only had one of the two, and it was missing a mounting tab. While I could have fixed it probably, with such a ridiculous list of things I WANT to do to the machine, I just figured I'd sit this one out.

If we count the 65 dollars for that, plus the 80 dollars for the MLA casting, another 100 altogether for supplies I've bought, I think I'm at 675 dollars all in. So, I've failed in my attempts at finishing for 650 dollars. But I'm adding costs that were recouped earlier with the parting out of the original TH54. It was years ago though, and I can't recall exactly how far into the black I was when I was done. I'll assume I made a hundred bucks on that one, and say I have another 75 to spend if need be. HA!

Thanks for reading!
 
My solution was to purchase a used tap of the correct size from EBay. I didn’t actually use the tap to cut threads. I simply used it as a go gauge. This worked. I’ll finish machining this on the Atlas when it’s ready to make chips.
 

Attachments

  • 7E8FF628-7280-4B83-AB9E-5AC76B9440C9.jpeg
    7E8FF628-7280-4B83-AB9E-5AC76B9440C9.jpeg
    34.8 KB · Views: 7
  • 552F049F-F9AB-496A-B2AE-0D3F6F594D70.jpeg
    552F049F-F9AB-496A-B2AE-0D3F6F594D70.jpeg
    60.7 KB · Views: 7
  • 46D46198-5F54-4260-9554-B4FF20D500A7.jpeg
    46D46198-5F54-4260-9554-B4FF20D500A7.jpeg
    45.1 KB · Views: 14
OK. I meant to mention that but forgot.
 
Here’s an easy before and after.
 

Attachments

  • E66FC07C-A093-44DC-9384-61945C701CF2.jpeg
    E66FC07C-A093-44DC-9384-61945C701CF2.jpeg
    33.8 KB · Views: 14
  • D034E1A5-A900-48B1-A28E-8B5748A6FAA0.jpeg
    D034E1A5-A900-48B1-A28E-8B5748A6FAA0.jpeg
    34.6 KB · Views: 16
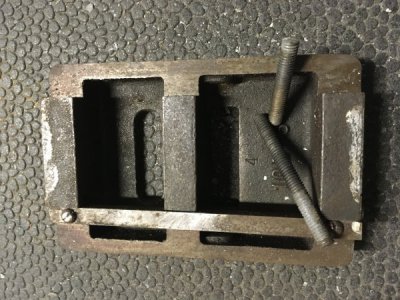
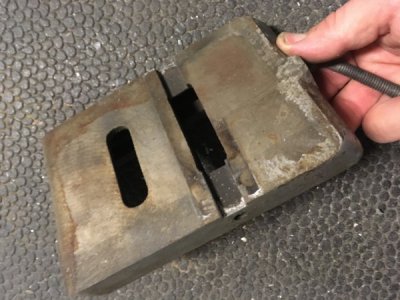
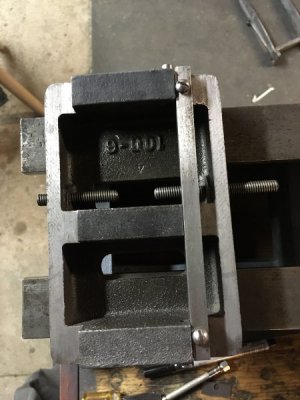
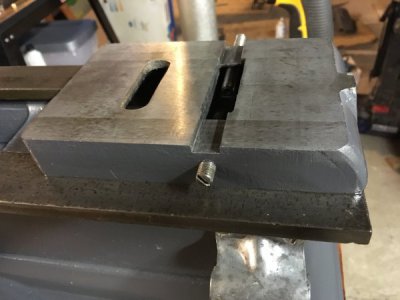
Another quick one.71A909F4-9835-4564-9220-4997981F85B6.jpeg2DB1821C-C2B2-4F85-8F3B-E959F6BD0138.jpeg0250BA9D-E781-4F55-8A5A-DCB9C99F7937.jpeg06D1A97A-A700-430D-AE59-E1D1F9C0B0A7.jpeg
 
Back
Top