Almost ready to cut

Yes I tried tonight , put the 1" through the chuck with only a small amount out. I thought small amount was 3" after having 10" out, will adjust to 1/4".
Yes on the center drills, just arrived today. A set of anytime tools 5 lathe center drills size 1-5 60 degree tip angle. Also picked up a 1/2" JT33 2MT drill chuck, arbor is threaded for draw bars.
Just measured stuff, no power on or cutting. Put my dial indicator so the cross slide pushed on it, nice to test the accuracy of my dials on the lathe vs the dial indicator.
Thinking about modding a direct measure of cross slide and feed with a couple gauges. Might be a lot easier to read as I work, plus my handles/dials are a bit sloppy.
Thanks for the tips!!
 
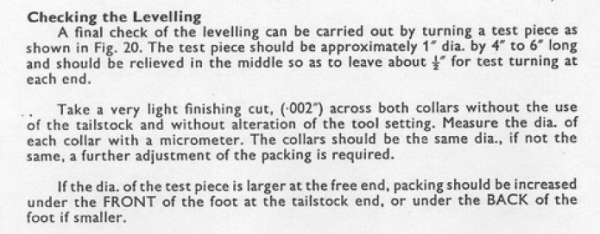
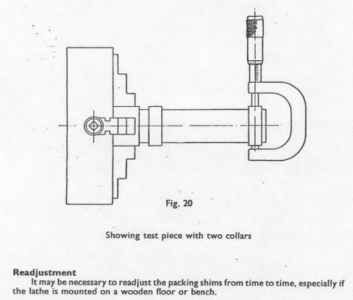
Surely, if you want to check the alignment of the headstock or twist/leveling in the lathe bed (both of which will cause a taper if wrong) you need to take the very light test cut, over a reasonable distance from the headstock, without supporting the piece with the tailstock - just as he was proposing. If you support the work with a tailstock center all you will be confirming is the tailstock alignment.

You want to do both as part of your initial setup - but you should start with the test piece unsupported.

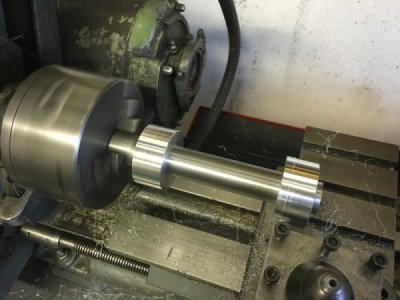
I made up a steel bar with two aluminum collars locktighted on for just this purpose. The cut can then be a light as possible and cause the least impact on the result, while the steel bar remains a rigid as possible.

IMG_0613s.jpg
 
Surely, if you want to check the alignment of the headstock or twist/leveling in the lathe bed (both of which will cause a taper if wrong) you need to take the very light test cut, over a reasonable distance from the headstock, without supporting the piece with the tailstock - just as he was proposing. If you support the work with a tailstock center all you will be confirming is the tailstock alignment.

You want to do both as part of your initial setup - but you should start with the test piece unsupported.

I made up a steel bar with two aluminum collars locktighted on for just this purpose. The cut can then be a light as possible and cause the least impact on the result, while the steel bar remains a rigid as possible.
How do you determine what is out, it could be the headstock, it could be the bed twist or even the chuck?
 
Used a laser on my cross feed and marked where the dot was on my 3 jaw then spun the feed wheel so it traveled to the tail stock end of the lathe. Over the distance the dot moved 1/8" up and 1/8" to the right. Anyone else try to use a laser, kinda like bore sighting a gun?

Will continue and try to get a test pc cut, thanks for all the help.
 
The amount of runout your'e willing to work with depends on how you intend to use the stock. I try to use oversized stock and complete all operations where runout is critical in a single setup. This insures concentricity without a lot of fuss.
If I need to do a second setup like reversing the part where concentricity is critical, then I will dial it in. My 3 jaw chuck has about .003" TIR. If I need better than that, I'll use my 4 jaw or 5C collet chuck. If you need to have near zero runout but need to remove the part mid-process for inspection, consider turning between centers.
Joe Pieczynski did a You Tube video on getting near zero runout with a 3 jaw chuck

Old trick I learned years ago. Mark #1 jaw on your 3 jaw. Then make an alignment mark on on the part in line with with the chuck mark on #1. This will give you runout corespondent with the chuck


Sent from my iPhone using Tapatalk
 
I do not follow marking my chuck and my bar stock, what is the relation/where do you measure to see the run out? I already rotate the stock as I tighten and loosen the jaws to get the best fit by measuring with dial indicator, loosening and rotating a bit more repeating making note until I find the least run out.
 
I do not follow marking my chuck and my bar stock, what is the relation/where do you measure to see the run out? I already rotate the stock as I tighten and loosen the jaws to get the best fit by measuring with dial indicator, loosening and rotating a bit more repeating making note until I find the least run out.

That is on a 3 jaw chuck only. Not a 4 jaw that you adjust.


Sent from my iPhone using Tapatalk
 
I have a 3 jaw self centering chuck.

I was referring to an operation where you need to flip the part in the chuck. In response to a post about using a 4 jaw to indicate the part in.

To check your chuck runout you need to use a different method. If I was checking chuck runout I’d find a true shaft preferably a ground rod. The chuck it up close to the chuck and indicate the runout.

Example if your chuck has .002 runout. You machine the first part of your part, mark as I describe and align the marks in theory the part would have the same .002 runout. This is what I did when I made my fly cutter


Sent from my iPhone using Tapatalk
 
Back
Top