3d printing sand casting patterns

A quick, but relevant, question. Did you go a percentage over size with the pattern to allow for shrinkage in the casting as most molten metals do shrink as theycool and solidify in the mold.

A quick example to look at is this. Not the be-all end-all and there are specific calculations based on material being cast, but it does give a rough idea...

https://www.novacast.co.uk/articles-library/metal-shrinkage-in-castings-and-why-it-matters/
My understanding is most of the shrinkage happens as the metal cools from a liquid to a solid. If a gate and sprue of at least a few inches long are used then they will act as a reservoir with the shrinkage showing as a dimple on top of the metal in the gate.

Also there is a big difference in the alloy used. In my case I was casting aluminum and bought some proper aluminum casting ingots from e-bay. (Don't use extruded aluminum)

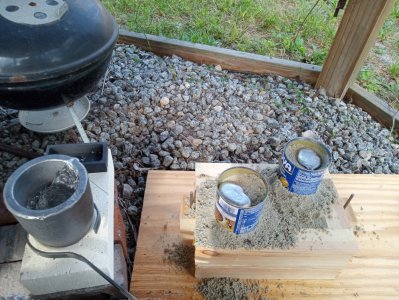
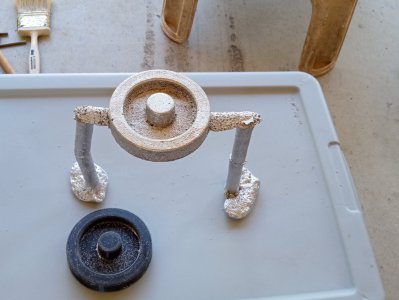
The stuff I used pored excellent with very low shrinkage. Here are a couple of pictures that show the gate/sprue and funnel I used (black bean can with old style rim on top and bottom so the bottom can be removed with a can opener)
 

Attachments

  • Funnel.jpg
    Funnel.jpg
    265.4 KB · Views: 47
  • RawFlyWheel.jpg
    RawFlyWheel.jpg
    121.1 KB · Views: 44
I've played around a bit with printed patterns. Generally they can be a bit sensitive to getting squished together if you're packing sand, otherwise they're great at allowing high complexity with little effort.
I tend to plaster and paint them and use some wax to make them slippery

Thanks for the reply and pictures. Great tip on the sealing/paint and wax. That was one thing missing from my pattern and I noticed some of the sand stuck to the pattern making the casting rougher then it could have been.

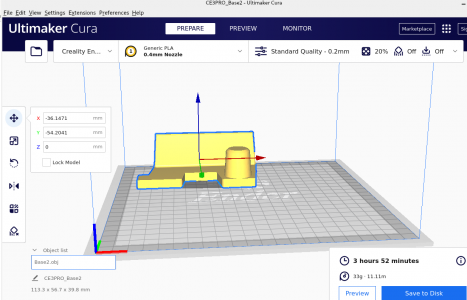
BTW - I used 20 percent infill on the print and used PLA. So far the pattern seems to be holding up fine but on the next go I'm going to ram the sand harder trying to get a better smoother form..
 
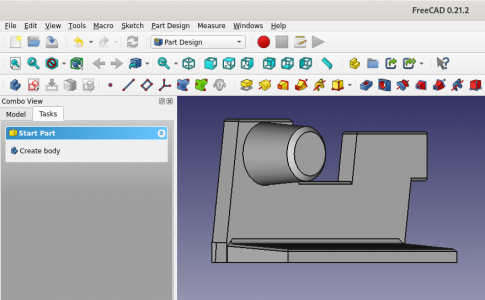
Here is the side and base for the Wig-Wag model steam engine I'm trying to make. It's on the hot bed now. The design by Ade Swash calls for machining from brass and extruded aluminum. I wanted to see if I could make it using a one piece sand cast side and base. I made the fly wheel a bit larger to try and compensate for the much lighter aluminum. Thinking of drilling some pockets in the back of the fly wheel for lead inserts for more weight if needed.
 

Attachments

  • SideBase2.png
    SideBase2.png
    82.7 KB · Views: 39
  • SideBase2Cura.png
    SideBase2Cura.png
    223.9 KB · Views: 40
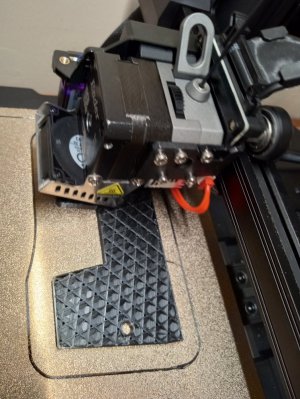
Here is the default infill pattern being used on the print job running now. Not sure what it's called but it seems to be very strong.
 

Attachments

  • DefaultInfill.jpg
    DefaultInfill.jpg
    191.2 KB · Views: 47
These are some 3d printed patterns I've been working on. Some are from thingiverse or other online sites and some are self-designed. I've mostly used tinkercad but making the draft angles is not easy with that program. I'm trying to learn openscad. Other programs I can't get to run on my old Linux or raspberry pi computers.
Some of these patterns have the fillets and draft angles just sanded or filed.

My casting isn't very good but usable and I'm getting better.

IMG_20240905_143607.jpg

IMG_20240914_170214.jpg
 
A quick, but relevant, question. Did you go a percentage over size with the pattern to allow for shrinkage in the casting as most molten metals do shrink as theycool and solidify in the mold.

A quick example to look at is this. Not the be-all end-all and there are specific calculations based on material being cast, but it does give a rough idea...

https://www.novacast.co.uk/articles-library/metal-shrinkage-in-castings-and-why-it-matters/
That was a good read, thanks, Dale
 
These are some 3d printed patterns I've been working on. Some are from thingiverse or other online sites and some are self-designed. I've mostly used tinkercad but making the draft angles is not easy with that program. I'm trying to learn openscad. Other programs I can't get to run on my old Linux or raspberry pi computers.
Some of these patterns have the fillets and draft angles just sanded or filed.

My casting isn't very good but usable and I'm getting better.
I'm running FreeCAD 0.21.2 on an older computer and it runs fine. It's just a dual core running Debian 12 but I do have a lot of memory (16GB)

FreeCAD is a feature rich, complex CAD open source program with what I think is a steep learning curve but it may be well worth learning. The FreeCAD people are working hard and version 1.0 is in the works. (RC1 is out now). Maybe look into it if you have not already.

Thanks for that suggestion. I do have that program but had never figured out how to use it at all. I started watching tutorials and it looks like it will be much better than tinkercad once I figure it out. Tinkercad didn't seem to have much of a learning curve but adding draft or chamfers/fillets requires a lot of steps (at least how I have been doing it) so I often printed the parts and tried to file or sand the draft to the finished print. Being able to include those features in the print itself should be worth learning to do.
 
Back
Top