2021 POTD Thread Archive

Nice job on the cart. That's a great little welder, I have the same unit, and mostly keep .023 wire in it, as I have bigger machines for .030 and up. being 120V it's very handy for remote work.

Quote: Trying to learn MIG welding, so my first real project was a welding cart. Have a bunch of lab table legs that I've been moving out of the way for years and slowly repurposing as the need arises (see the grinding table in the background of the first photo). A pair of them became the starting point for the sides of the cart. I suspect I created my own learning trial by fire using them, since the walls are rather thin and very easy to burn right thru, but it was a great learning experience.
 
My first MT2 taper!

So, I'm in the process of making tailstock tap/die holder for my Micro-Mark 7X16 mini-lathe. The first step was to cut the MT2 taper on a piece of steel. I never cut a precise taper before and I was a little anxious. I think it came out very well for a mini-lathe. It seems to fit snugly in the tailstock. The finish isn't great, but it will be functional.

I put a MT2 dead center between the headstock and tailstock and adjusted the angle of the compound until it was parallel by using a dial indicator. I was within 0.001" over the length of the taper. This is not easy as anyone with a mini-lathe can attest. The compound slide has to be unscrewed enough to get to two screws underneath that tighten it. Adjust it and retighten. Then, move the slide again across the taper. Rinse and repeat until you get it.

Plus, I was having a real tough time turning the compound handwheel. I tried loosening the gibs, but it had no affect. I finished the cut and then looked at the compound in more detail. With the gibs out, I was still having trouble moving the compound. There must be some grit/debris in the screw mechanism. I just ordered a M10X1.25mm tap and die to clean up everything.

But, overall I'll claim success on this!


IMG_6135.jpg
 
My first MT2 taper!

So, I'm in the process of making tailstock tap/die holder for my Micro-Mark 7X16 mini-lathe. The first step was to cut the MT2 taper on a piece of steel. I never cut a precise taper before and I was a little anxious. I think it came out very well for a mini-lathe. It seems to fit snugly in the tailstock. The finish isn't great, but it will be functional.

I put a MT2 dead center between the headstock and tailstock and adjusted the angle of the compound until it was parallel by using a dial indicator. I was within 0.001" over the length of the taper. This is not easy as anyone with a mini-lathe can attest. The compound slide has to be unscrewed enough to get to two screws underneath that tighten it. Adjust it and retighten. Then, move the slide again across the taper. Rinse and repeat until you get it.

Plus, I was having a real tough time turning the compound handwheel. I tried loosening the gibs, but it had no affect. I finished the cut and then looked at the compound in more detail. With the gibs out, I was still having trouble moving the compound. There must be some grit/debris in the screw mechanism. I just ordered a M10X1.25mm tap and die to clean up everything.

But, overall I'll claim success on this!


View attachment 381155
Changing the compound angle in a mini-lathe is a major pain. One has to totally remove the compound assembly by unscrewing it all the way off, making the adjustment, and screwing it all the way in again. If you have tightened up your gibs, as most of us have done trying to reduce chatter, it's a bit of work cranking it on and off. Getting a taper right on a mini is just plain time consuming. Making it harder is there are no subtle adjustments. Tap and pray. My hat's off to you, I know how much work that was.
 
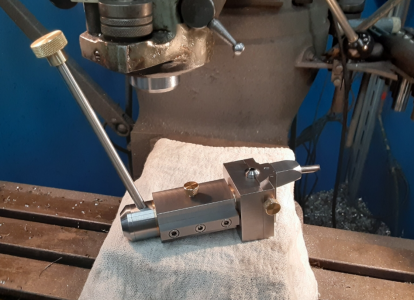
I got around to finishing a Hemingway Ball-Turner knock off, less the engraving on the adjustment screw, may or may not do that ;) I haven't test driven it yet, and still some touch up grinding on the cutting tool.
 

Attachments

  • Ball-Turner-3.jpeg.png
    Ball-Turner-3.jpeg.png
    1.2 MB · Views: 47
I had made a set-true type ER40 chuck many years ago, but wanted to add a screw in stop system for the back of the chuck so when repeating parts they would all be the same length. When I made the ER40 chuck I threaded the back with a 1.25-20 thread, which is the same as the outer thread of the 5C collets. Stop system is 5.5" of CR1018 bar stock that I had, through drilled with a 3/4" MT3 drill and then bored out one end to 1.001" to a depth of 3" with a 5/8" carbide boring bar, and threaded that end. CR1018 is a bit more challenging to get a good finish/threads, but depends on the inserts/speed. The threads were cut at 600 RPM, boring at around 1200 RPM with a sharp positive rake CCMT insert. The center adjustment rod is 3/4" O1 steel, it can be flipped for different tips, and also threaded for additional size tips. I milled a flat fon the adjustment bar for the 3/8-24 allen set screw and milled the head flat so it locks in securely without digging in. I also have a through the spindle stop system, and use that if I need to adjust the part depth with the chuck mounted. Was a nice afternoon project.

ER40 Stop.jpg
 
The weather has been co-operating and progress is being made.
Spent a good part of today squaring up the first sections then pinning all the joints and braces to lock it in place.
IMG_4522.jpeg
Thanks for watching
Greg
 
Thanks, retired, with more time than money, so I can take the time to do it traditionally. Stick framed, the building would be up in a fraction of the time, BUT I'd have had to buy the lumber and sheeting. This building will come completely off the sawmill. Except for the cement and steel roof lol

Greg
 
My first MT2 taper!

So, I'm in the process of making tailstock tap/die holder for my Micro-Mark 7X16 mini-lathe. The first step was to cut the MT2 taper on a piece of steel. I never cut a precise taper before and I was a little anxious. I think it came out very well for a mini-lathe. It seems to fit snugly in the tailstock. The finish isn't great, but it will be functional.

I put a MT2 dead center between the headstock and tailstock and adjusted the angle of the compound until it was parallel by using a dial indicator. I was within 0.001" over the length of the taper. This is not easy as anyone with a mini-lathe can attest. The compound slide has to be unscrewed enough to get to two screws underneath that tighten it. Adjust it and retighten. Then, move the slide again across the taper. Rinse and repeat until you get it.

Plus, I was having a real tough time turning the compound handwheel. I tried loosening the gibs, but it had no affect. I finished the cut and then looked at the compound in more detail. With the gibs out, I was still having trouble moving the compound. There must be some grit/debris in the screw mechanism. I just ordered a M10X1.25mm tap and die to clean up everything.

But, overall I'll claim success on this!


View attachment 381155
Looks great.
Have you blued it?
 
Back
Top