- Joined
- Jan 2, 2014
- Messages
- 9,241
Let's hope i'll have enough cable to make a repair alone tomorrow.
Very glad it is the cable and not inside the housing!
-brino
Let's hope i'll have enough cable to make a repair alone tomorrow.
Were the Peugeot engineers having some kind of contest or drinking game to see how many different special hoses they could fit in the engine compartment?
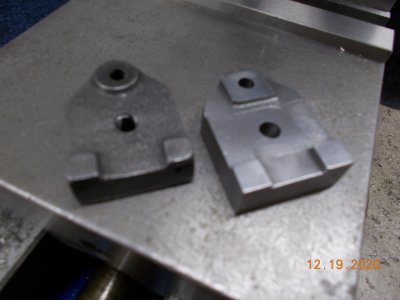
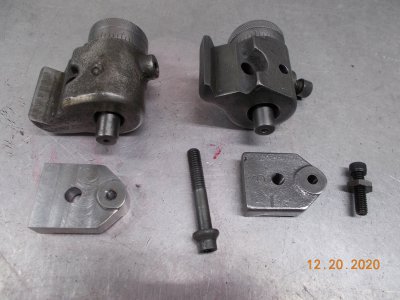
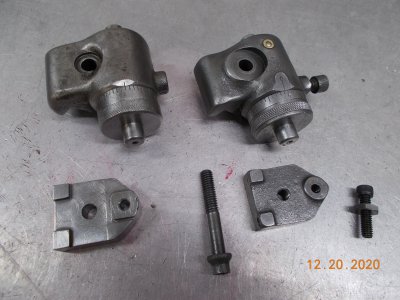
This is the what did you BREAK in your shop today thread, right? My $100 4" CDCO milling vise finally gave up the ghost.
View attachment 348014
Yes, I noticed that parts were lifting slightly when I tightened the vise down. I readjusted the movable jaw and the soft jaws. Then I started to load the next part. As I tightened the vise down I felt something let go, kind of like when a thread strips. That's when I noticed the crack.
I ordered a Kurt DX4 to replace it. I'm sure it will be much nicer than the CDCO vise.
Beautiful work Brino. This screams for a video of it in operation!In another thread I mentioned that I was working on some ClickSpring inspired gyroscopes, and promised some pictures.
Here they are!
First a shout-out to Chris Ramsay (ClickSpring). He has such amazing content; much of it on youtube.
His camera work is first rate, his builds are always clear and his results beautiful.
His home page is here: http://www.clickspringprojects.com/
If you haven't seen his excellent gyroscope build videos on youtube here are the links:
Part 1 where he makes the wheel (or rotor):
and Part 2 where he makes all the pother parts and assembles it:
and here are links to the downloadable PDF plans in imperial and metric.
I only have three small criticisms of his build:
1) He shows in the video use of a little button to help mark the outline of the wheel taper cuts with the part on the super-glue chuck. If you go this way, be sure to make that part first! You do not want to have to remove the project from the chuck to go make that button when you need it!
(really this was just my bad planning, but if had been in the plans and not just the video I would have had it when I needed it)
2) I used the imperial plans and there were a couple inconsistencies..... for instance they show the lower bearing hole in the frame as 0.197", however the bearing itself is 0.200". Read them over for double-check before you start!
3) the loctite 603 bearing retainer only seems to be good for a single use! It was fine for my first unit, but then was too thick to wick into the slip joints a few days later. Maybe I just got a bad bottle.....but at $30 for two drops, it's not worth it!
I made a couple other changes:
1) rather than put a screwdriver slot on the upper bearing I knurled it and rounded the end because I thought it would be easier on tables, floors and other surfaces. Of course now mine won't balance on a string......
2) I found I needed to use non-permanent loctite for the threaded upper bearing or it would tighten/loosen with the rotor
3) I first made my first gyroscope full-size to the plans and realized how big it really is. I then made three more for some young people in my life as Christmas presents. I made those smaller for smaller hands, and hopefully a little stronger, just in case they get dropped....
Frame: 3-1/4" OD and 2-1/2" ID
Rotor: 2-3/8" OD, 1/2-inch thick,
Axle: 1/4" diameter.
Now I realize that I cannot compete with Clickspring for camera work and his amazing level of presentation.
Consider this an homage........
Here's the first full-size one I made:
View attachment 347901
View attachment 347902
View attachment 347903
I can get over 2-1/2 minutes spin time with the pull string.
I haven't timed it when using compressed air to spin it up.
In the video ClickSpring shows a lathe tool that will cut brass on the end and two sides. Here's mine:
View attachment 347904
View attachment 347905
View attachment 347906
The rest is just a collection of photos from various stages of the build:
View attachment 347907
View attachment 347908
View attachment 347909
View attachment 347910
View attachment 347911
View attachment 347912
View attachment 347913
View attachment 347914
View attachment 347915
This was really my first use of a super-glue chuck.....
View attachment 347916
Since I was making multiple rotors, I did NOT want to remove it from my 4-jaw chuck to go outside to loosen the glue with a torch.
However, from soldering near a super-glue repair I know the gag-inducing aroma and eye-watering smoke when you burn it.
Luckily, if you're careful you can get it apart at a lower temperature and it looks like this:
View attachment 347917
I used a propane torch directed at the brass wheel.
Well that should be enough pictures to prove that it really did happen!
-brino


