2019 POTD Thread Archive

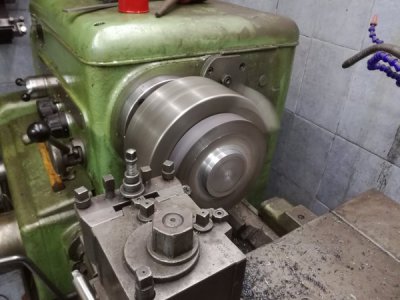
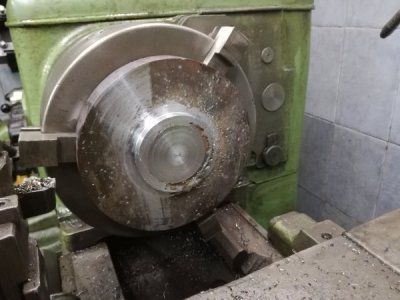
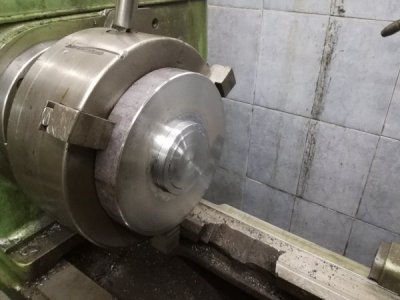
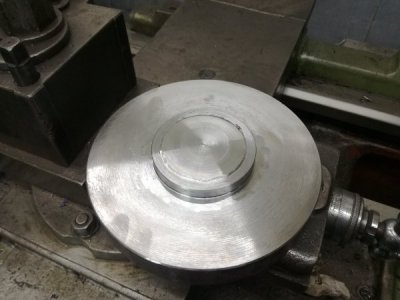
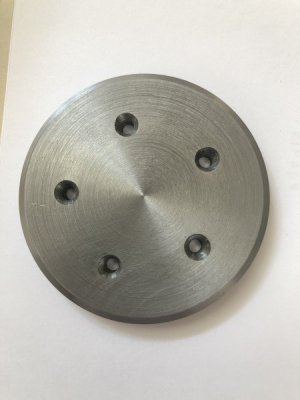
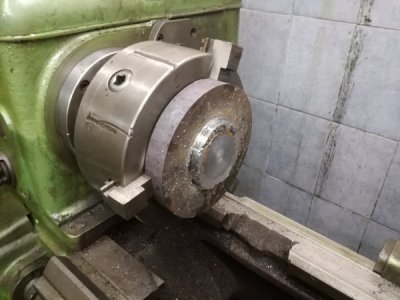
Today i decided to switch what i've been doing last few weeks, and to do some machining, i welded this wheel spacer about a week ago and today i chucked it in my lathe and started making cuts. I was told this is a high carbon steel, and expected C45 but cuts more like 4140. The weld had few hard spots and they broke two inserts but the 1K62 had no troubles cutting it, on the first cut the saw cut was very noticeable probably too much pressure on the blade i put on a 2 degree taper on the middle, and plan later on to machine a indention for stick on centre caps.
IMG_20190706_214352_1.jpgIMG_20190706_220001.jpgIMG_20190706_220359.jpgIMG_20190706_222949.jpgIMG_20190706_223041.jpg
 
made an ugly but functional motion sensor LED light for inside the garage
attachment.php

attachment.php


the idea is that it gives off enough light for my wife and kids to find their way into the car, without having to turn on the main lights which they'll then forget to turn off. On the first instance, it was completely unsuccessful, but I have high hopes :)
 
POTD was crawling in the attic of my shop to string 20A 220 and 110 lines to my new to me Tormach 1100 Series 3. Yes, it's ALIVE! Haven't made any chips yet, have a big learning curve to go through still. My wife is a Unigraphics designer and is pretty adept at SolidWorks too. So I'll start using Solidworks and go to Fusion 360 for the CAM/post processor. Once I get the hang of Solidworks, will probably go to Fusion for the CAD also. Previous owner of this mill was a Fusion user and spoke very highly of it.

First thing after powering it up was to install and tram the Saunders tooling plate. One of the things that attracted me to this particular used mill was the owner didn't go cheap on the accessories. The Saunders tooling plate (aluminum) is about $900. He bought two matched/ground Glacern 6" vises too, certified for height on the deck within 0.0002". Trammed those in too with the (you guessed it) actual Indicol spindle adapter and Interapid DTI. Once trammed in, I covered the tooling plate with some Saunders rubber pads. These came with the mill, receipt shows they were $5 each. Should do a nice job keeping chips out of the tooling plate holes, will cut a couple to better cover the area around the 4th axis.

The Tormach has a nice tool(ing) storage compartment under the mill which now houses some extra parts, 6 or 8 sets of Aluminum vise soft jaws, 2 tombstones for the 4th axis, 3-jaw chuck/5-C collet holder for the 4th axis, T-nuts, hold downs, way oil, lifting bar, etc.

Also cut a couple of pieces of plywood for a 16" x 30" cart that'll hold some of the tooling. I've got 60+ TTS tool holders for this mill, so going to break out the Brother label maker and start labeling things here shortly. Once nice feature on the Tormach (and I'm sure others) is I can populate the automatic tool changer with 10 tools and have it automatically cycle them over the electronic tool setter and record the tool heights. The mill also came with a Tormach granite surface plate and height gauge with a USB link to PathPilot for recording the tool heights, so will probably use both methods and do some learning.

Still have a lot of work to do before I make chips. The cooling system uses a 1/2 HP sump pump with a plastic tub set to the LH side. The mill came with 5 gallons of water-based coolant, need to mix it up and do a little plumbing.

I'll use the mill with the open enclosure this year and come up with a design for a full enclosure probably next spring (too many other things to work on . . . .). The mill also came with a MistAway filter/oil collector that will eventually get plumbed into the finished cabinet. These go for $1350 on Amazon and are supposed to do a really good job sucking the coolant out of the air. My unit includes a HEPA filter that goes on top, close to the one pictured below but mine will need about another 15" of head room. More to follow, still have 3 boxes of stuff that came with the mill to go through.
Thanks for looking,

Bruce


Crawled into the barn attic to run a couple of power lines to my new to me Tormach 1100.
View attachment 297537


Saunders Tool fixture plate covers to keep most of the swarf out of the 1/2" fixture holes. The top half of the holes are reamed to around 0.501" (1/2" dowels slip in/out with some effort), 1/2-13" tapped holes through the bottom half. The rubber sheets have 1/2" plugs that drop into the fixture plate holes to secure them in place.
View attachment 297538


Using the tooling cabinet to store extra soft/hard jaws, tombstones and other hardware
View attachment 297539View attachment 297540


Mill came with 60+ TTS tool holders and 50+ ER20/ER16 collets, Haimer 3-D probe, and an ETS that's in (hopefully) some of the boxes I haven't gone through yet.
View attachment 297541


Using a 16" x 30" HF cart to hold some of the tooling. Parallels, 4th axis tail stock, electronic tool setting height gauge on the bottom, more commonly used stuff up top.
View attachment 297542


MistAway MA700 unit, have the same one with a HEPA filter on top to keep from breathing coolant fume/vapor
View attachment 297543
Bruce,
There is no going back man. You have entered a new world.
Bon Voyage my friend
 
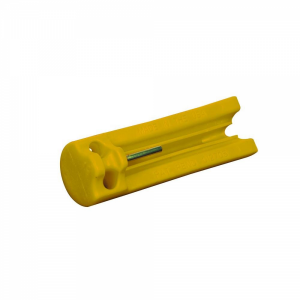
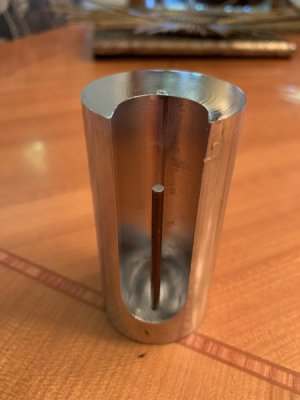
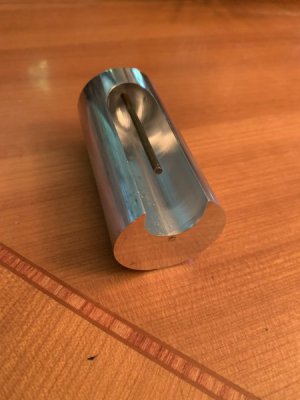
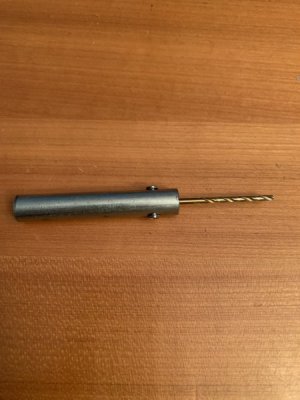
For the project above I needed a drill bit extension for the 7/64 drill hole that I press fit the 1/8 rod in.

Put a steel rod in the lathe. Using same 7/64 bit drill in one inch. Then on the drill press drill all the way through and tap all the way through for two 1/4 - 20 set screws.

It worked perfectly for what it needed to do.

Quick and simple extension to get into the deep spot.

297960
 
Last edited:
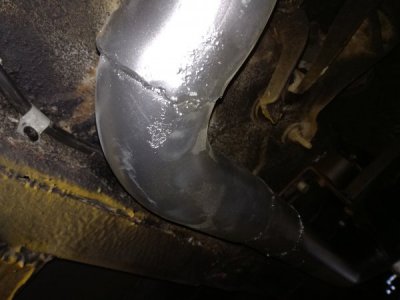
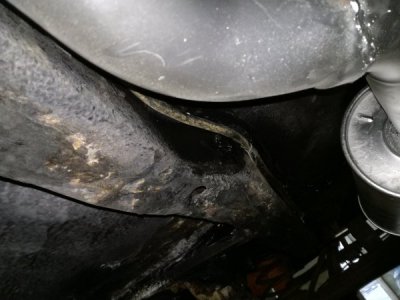
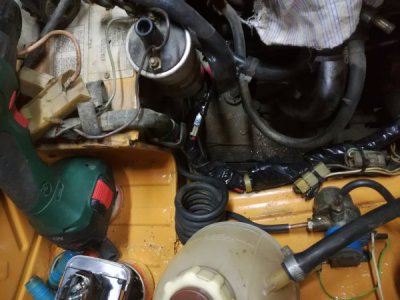
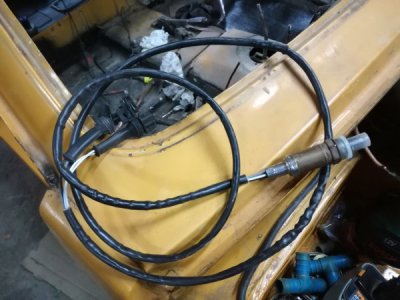
Today was a very unusual day, trying to get some work done in the big garage. I had a big plan to get the LPG, Fuel, exhaust, and cooling system completed. The LPG was first because the exhaust and cooling gets run on top of it. So i measured and picked a rubber lined copper pipe that was about a metar too long and run it underneath the little niva and connected it to the high pressure tank that i mounted in the trunk. I left it loose at first than i run the fill line because of the location i had to go from inside the car to the outside and then back inside. I picked out the longest line i had and it was very tight, then i secured the tank in place and tighten the lines, then i went underneath the little niva ( my injured back loved it) and using galvanized P clamps secured both fill and delivery lines as high as i could, i used self drilling big headed screws that i drilled directly in the frame. Then i coil wrap the extra pipe and connected it to the valve and filter, then i presurased the system and tested for leaks with some soapy water. I was getting phone calls about every 30 -45 minutes by this time. But the phone calls intesitafited to less then 10 min between them so after looking thru my spares wich i did when on the phone i found me a new Bosch oxygen sensor and managed to mount the front part of the exhaust and the sensor. By this time i was more on the phone then underneath the little niva so i stopped working. I'm getting excited to get it fired and hear the new exhaust.
IMG_20190707_192837.jpgIMG_20190707_192851.jpgIMG_20190707_192555.jpgIMG_20190707_192604.jpgIMG_20190707_193406.jpg
 
Been watching videos to figure out my DRO PROS EL400.
Figured out the bolt circle. There is probably four ways to go about this. A rotary table would be in addition to.
You guys probably think this is kids stuff. It is, so i’m A kid.
I just looked at the clock, 2:42 AM. Been getting up earlier and earlier these days.
It was fun!3AB48CA3-9D25-4D78-95DB-E302EDF44076.jpeg
 
Last edited:
Bruce,
There is no going back man. You have entered a new world.
Bon Voyage my friend
You couldn't be more correct about slippery slope. Fortunately, my 40' x 96' barn is getting pretty full, so not too much more going into it unless I get rid of some stuff first. The Tormach is really low-end for accuracy relative to what I've seen written about a Haas mini-mill for example. But I'm not making parts for the space shuttle and figure 0.003" give or take will be close enough. Fortunately, the machine I bought was pretty well tooled so I haven't had to break the bank adding things like tapping heads (came with 3) or probes or tool setters. One of these days I might even get a chance to start using it! Currently helping my better half build a new chicken coop in the shop. Photos to follow, our chickens will live in better digs than a lot of people.

Bruce
You know Bruce, when you get proficient wait that CNC gadget, you may not want to use the manual tools.
Say it ain't so.
Golly, your barn sure is big! Good for you!
 
It was fun!
My wife and kids just don't understand how it can be fun. I did "punch the numbers" hand keying programs for about 10 years. I had the use of two machines which had been retrofitted with CNC Controllers but they needed M-Codes and I became proficient. I made subroutines for the alphabet and numbers, did all sorts of what i considered fancy work. The machines did have canned subroutines for ramping down to bore holes. and tool offsets.
But it was FUN.
 
Back
Top