- Joined
- Sep 30, 2014
- Messages
- 16
I've recently moved into a house to start family life .. and having a large garden decided to build myself a dedicated workshop. Being in the UK I'm restricted to building in my back garden, under 30 square meters and off "substantially non-combustible materials" if within 1 meter of a boundary and maximum height of 2.5meters. So taking the restrictions into account and the size of my back garden I opted for a 4x6meter shop built on a 8inch steel reinforced concrete slab with 7.2newton concrete blocks. I'll have a few windows and a steel door and 2meter wide roller shutter. My budget was £5 but I ended up spending £1.5k on various additions I'd like for the shop. I'm doing all the work myself and so far the costs have roughly:
£700 - 500 Blocks, 12bags of cement, 2 ton bags MOT, Damp proof sheet. 6sheets of A142.
£50 - shuttering for slab
£700 - ~7.5cubic meters of C35 concrete with fibers
£100 - cement mixer
So this is the bit of land .. I started by clearing all the shrubbery and mountains of cat sh*t.
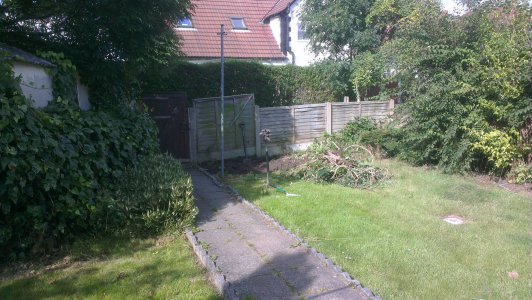
It took about a month of on and off digging in the evenings / weekends but I finally go down to some stable soil. What worked for me was to take a layer of 2-3inches away at a time. I don't know what it was about this bit of land but it seemed to attract all the neighborhood cats that treated it as a giant litter box .. so most digging sessions started with me filling a wheel barrow full of cat treats before getting to the real work.
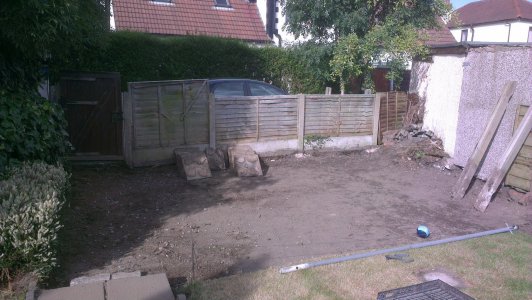
I managed to scrape together enough rubble from my front garden and my nextdoor neighbor who was having an extension put on .. they must love having a neighbor that rummages around in their skip.
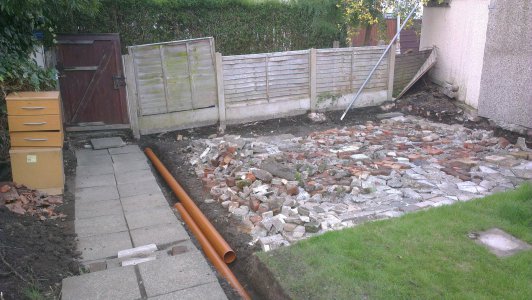
Got the 2tons of MOT on .. luckily the neighbors had a ton left over as well and even then I could have done with more. Oh well I'll just have to have a thicker layer of concrete. At this point the rubbel and MOT is only 2-3inches thick at best. Everything was well packed down with a whacker plate .. don't forget this bit!
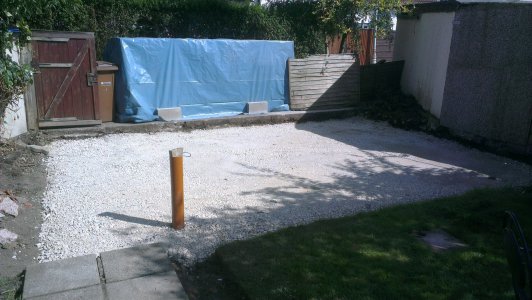
Got the shuttering in place .. didn't take much effort as I only needed to put it up on two sides as I want the concrete to be level with the drive.
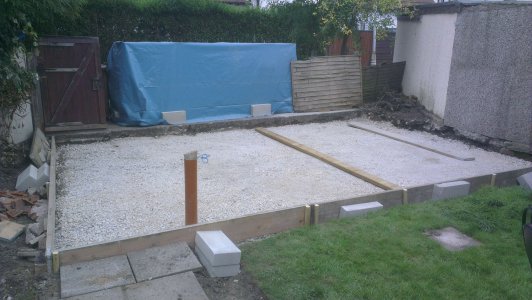
As I didn't bother with putting sand on top of the MOT I used some weed control fabric to stop the MOT puncturing the damp proof membrane.
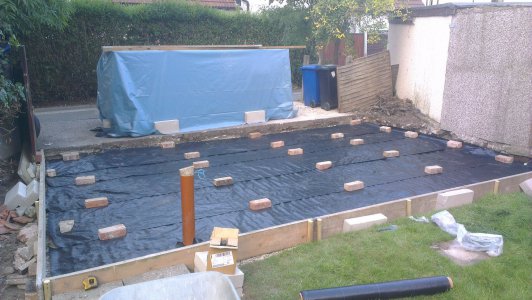
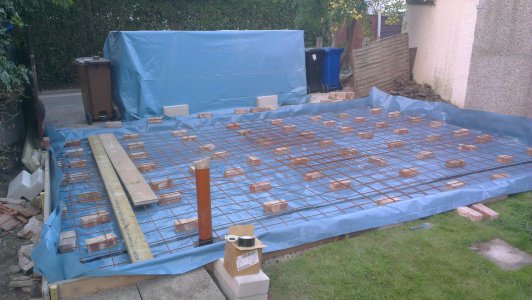
On top of the weed control fabric I added a damp proof membrane.. it came on a roll 4meters by 30meters .. the slab was about 4.5meters so had to overlap two pieces and stick together with gaffer tape. I also added 6sheets of A142 reinforcing steel mesh on top of some bricks I reclaimed from a seller on ebay. He said he only had 100 and the buyer was to collect ALL of them .. by the time I was finished going back and forth I had 200 .. I'll make a BBQ out of the rest.
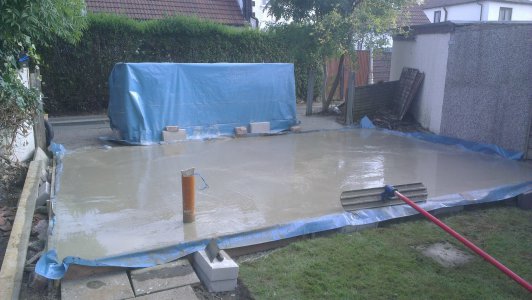
Concrete was poured nice and early on a Saturday morning .. very hard work and you've got to keep moving and tapping it down as you go. Don't be afraid to get into the concrete to move it about and use a vibrating poker to help get the air bubbles out .. I also got an easy trowel but wish I'd just got on the concrete and hand trowled it as the finish was terrible (my lack of experience). Also I ended up using the entire truck load of concrete and had to spread the high spots about to finish the fill .. got very lucky.
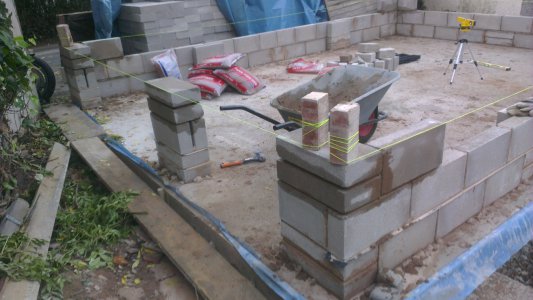
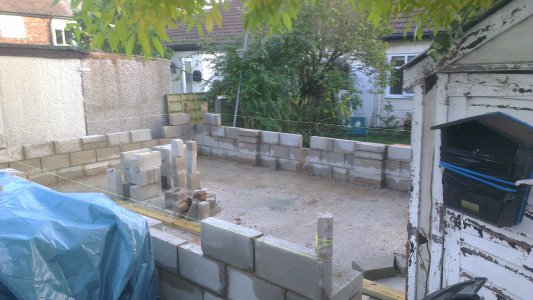
It took two weeks to figure out how to get the first course down and squared .. it turned out my shuttering wasn't square so I had to build over onto the drive at one end by a few inches. But once the first course was down I was a happy camper.
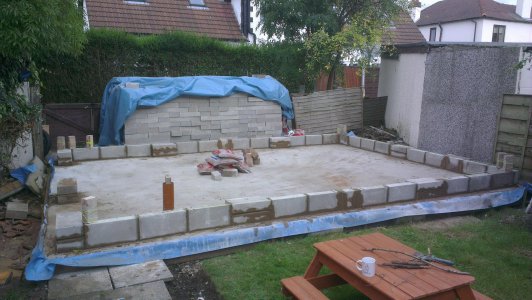
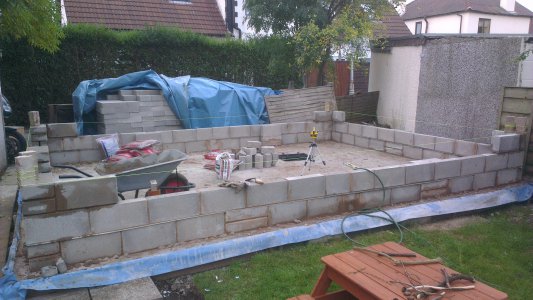
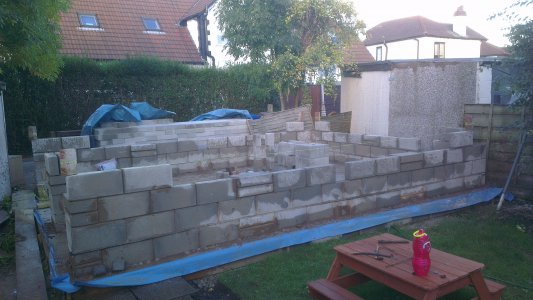
This is the second course .. I got about 8 blocks down before I realised I'd forgot the DPC! By the time I'd taken the blocks back down and started the course again with the DPC my back started to give out .. I powered through and managed to finish the course after 8hours of graft! I'd planned to do 3 courses in that time.
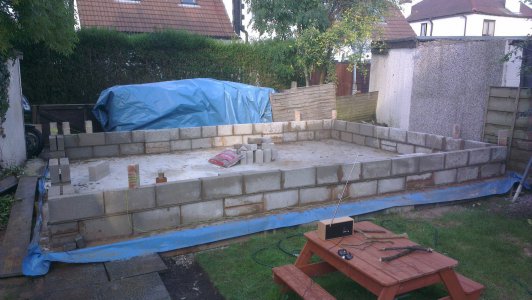
Well that's it so far. I'll update as I go along .. feel free to ask any questions .. I know I could have done with someone to ask when I was planning this build.
cheers
Andrew


£700 - 500 Blocks, 12bags of cement, 2 ton bags MOT, Damp proof sheet. 6sheets of A142.
£50 - shuttering for slab
£700 - ~7.5cubic meters of C35 concrete with fibers
£100 - cement mixer
So this is the bit of land .. I started by clearing all the shrubbery and mountains of cat sh*t.

It took about a month of on and off digging in the evenings / weekends but I finally go down to some stable soil. What worked for me was to take a layer of 2-3inches away at a time. I don't know what it was about this bit of land but it seemed to attract all the neighborhood cats that treated it as a giant litter box .. so most digging sessions started with me filling a wheel barrow full of cat treats before getting to the real work.

I managed to scrape together enough rubble from my front garden and my nextdoor neighbor who was having an extension put on .. they must love having a neighbor that rummages around in their skip.

Got the 2tons of MOT on .. luckily the neighbors had a ton left over as well and even then I could have done with more. Oh well I'll just have to have a thicker layer of concrete. At this point the rubbel and MOT is only 2-3inches thick at best. Everything was well packed down with a whacker plate .. don't forget this bit!

Got the shuttering in place .. didn't take much effort as I only needed to put it up on two sides as I want the concrete to be level with the drive.

As I didn't bother with putting sand on top of the MOT I used some weed control fabric to stop the MOT puncturing the damp proof membrane.

On top of the weed control fabric I added a damp proof membrane.. it came on a roll 4meters by 30meters .. the slab was about 4.5meters so had to overlap two pieces and stick together with gaffer tape. I also added 6sheets of A142 reinforcing steel mesh on top of some bricks I reclaimed from a seller on ebay. He said he only had 100 and the buyer was to collect ALL of them .. by the time I was finished going back and forth I had 200 .. I'll make a BBQ out of the rest.

Concrete was poured nice and early on a Saturday morning .. very hard work and you've got to keep moving and tapping it down as you go. Don't be afraid to get into the concrete to move it about and use a vibrating poker to help get the air bubbles out .. I also got an easy trowel but wish I'd just got on the concrete and hand trowled it as the finish was terrible (my lack of experience). Also I ended up using the entire truck load of concrete and had to spread the high spots about to finish the fill .. got very lucky.

It took two weeks to figure out how to get the first course down and squared .. it turned out my shuttering wasn't square so I had to build over onto the drive at one end by a few inches. But once the first course was down I was a happy camper.

This is the second course .. I got about 8 blocks down before I realised I'd forgot the DPC! By the time I'd taken the blocks back down and started the course again with the DPC my back started to give out .. I powered through and managed to finish the course after 8hours of graft! I'd planned to do 3 courses in that time.

Well that's it so far. I'll update as I go along .. feel free to ask any questions .. I know I could have done with someone to ask when I was planning this build.
cheers
Andrew


