Who is up for a project?

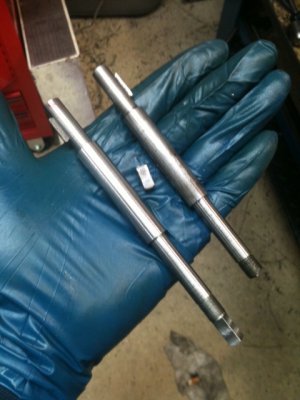
OK, threads are cut. Since they are small (36 TPI) and on a very slim shaft, I used HSS and cut at 200+ RPM. It was a white-knuckle flight but we landed safely... It's all anti-climactic from here... The woodruff key is flattened to size and we just need to cut the slot and make the knob rectangle. It will be in the mail tomorrow or Thursday.

I won't be able to finish it tonight as I have another obligation to meet...

Ray

View attachment 61916


Wow! Nice. Why the white knuckles?
 
Spinning at 200+ RPMs means a very vast disengage of the halfnut lever; otherwise, the shoulder would get over-run. I thought about cutting from left to right in reverse and on the backside but the problem with that is the shoulder is only 45 thou wide and if I had a false start on the lever engage, there would be no time to abort and the threads would get ruined. Going from right to left was tricky enough with only 45 thou stopping space. This took 5 passes and a spring pass. Had to take light cuts because the SFMs were so low on a narrow shaft. BTW: The threads are 16.5 thou deep and they mic'd out to spec.

In the picture there appears to be a warp in the threads -that's just the overhead light reflection and the digital camera picked it up funny. They look and feel real nice though...

Ray

EDIT: BTW, about 2-3 times a week, I get broken parts like this and repair or re-make them. It's not a big deal or hard job but, most of the stuff I get is at least 4-5 times bigger with much coarser threads. Here was a case though where I really could have used a much faster lathe. I pushed mine up to 2000 RPM for the small diameters and still struggled to keep the finish acceptable... There we have it, now I need one of those new production HLVs...
 
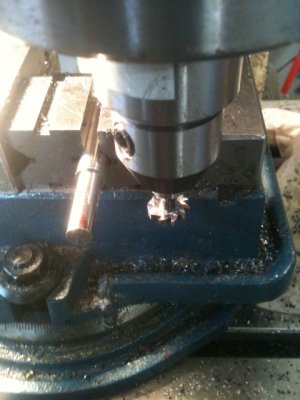
Here's the magic secret to cutting a wudroof slot. -Not much to it. Just a plunge with the proper size cutter. Of course, putting it in the right position is another matter. For that, you need to measure, and measure, and measure -and take the plunge.

Slot.JPG


Out with the old, in with the new... All done. I'll put it in the mail tomorrow...

Done.JPG

Ray

Slot.JPG Done.JPG
 
Nicely done Ray, and very nice of you to do this.
Bunch of nice folks on this site. !

Here's the magic secret to cutting a wudroof slot. -Not much to it. Just a plunge with the proper size cutter. Of course, putting it in the right position is another matter. For that, you need to measure, and measure, and measure -and take the plunge.

View attachment 61961


Out with the old, in with the new... All done. I'll put it in the mail tomorrow...

View attachment 61962

Ray
 
Thanks alot Ray. I look forward to installing and getting the little guy running. Considering not repainting this one, just a tear down, inspect and rebuild.
 
Actually, nothing comes for free... My request to all the folks whom I've made parts for here (at least a dozen or more) is that they make a small contribution to the web site. I don't specify an amount but I'm pretty sure the minimum donation is 5 bucks... Also, I ask that folks pay for postage or any materials that are "substantive" and I don't up-charge on materials. Shop drops are free and in this case, the stick of metal was laying on my lathe bench for about a month -so that qualifies as free shop drops... A touch of weld is free but I do ask a few bucks if I'm running Argon for more than 10-15 minutes.


Ray


Nicely done Ray, and very nice of you to do this.
Bunch of nice folks on this site. !
 
Back
Top