Warmed over Dogmeat

LEEQ

Active User
H-M Supporter Gold Member
Joined
Jan 13, 2013
Messages
1,033
You guessed it, this is one of those eat what's on the table or go to bed hungry kind of nights. Here's the stopper mounted to the old indicator/hard stop finally. You know the old make a tool to make a tool to make things story. Keep your eye out for familiar parts through this thread.20200406_161933.jpg
 
So the problem I'm working on is lack of a good way to measure drilling deeper than the tail stock will reach. Some of you will recognize some warmed over dogmeat here. I mounted a proper dro so I had leftovers from before. With said leftovers, I decided to fix one end of the cheap scale to the qctp and the reader to the tailstock quill.20200406_221908.jpg
20200406_221858-jpg.319984
 

Attachments

  • 20200406_221858.jpg
    20200406_221858.jpg
    3.1 MB · Views: 196
From the back side you can see the Z shaped mount I cut into an L and added a bolt pattern to. It goes between the gray quill plate and the reader head. From the two bolt patterns on the reader head, the two sides of the plate, and the two directions the L bracket can be flipped I come up with 8 positions the head can mount to the plate. If you look at it from the front you can still see two pencil ticks on the top of the reader. Those represent the two bolt patterns on the back of it. You can also see some familiar construction on the mag base flashlight.20200406_221533.jpg 20200406_221635.jpg
 
So with a bit of fiddling, the compound, cross slide, and qctp can be used to true up the scale to the Z axis. The toolholder is used to true the scale to the bed vertically. Now this ensemble can be drug down to the work for the deep precise drilling. Even if you have to unlock the tailstock and slide it forward, as long as you leave the carriage where it is the dro knows where you are at. This is why I didn't hook calipers to the quill and tailstock like everyone else. Sometimes I want to bring two features together from opposite ends in a precise, repeatable manner. a sharpium mark or masking tape on the drill shank doesn't always cut it for the deep stuff. Oh and do me a favor and don't tell Mom I do Shtuff like this when no one is looking.20200405_195603.jpg
 
So no kids don't try this at home with a paddle bit on Daddies lathe. I did, but the king of my shop figured it's mine and I'll wreck it if I want to. Bonus points for getting away with it. By the way the recurring part was the knurled jam nut in the first photo. It appears later on the assembled gizmo clamping the gray quill plate to the quill. Had I been that bright I would have knurled more than I needed and made two of them. I guess when I round corners and otherwise pretty up the dogmeat tool I'll make up another for the hard stop. The install of the new x axis scale means I have to have the little rod on the hard stop to clear it, so I'm gonna want that. Happy turning folks.
 
He is just that bit adventurous, isn't he?
 
"adventurous" You are pretty kind. It wasn't as bad as it sounds though. I would chop the shaft of the bit down before I did it again, but in plastic it behaved ok. I didn't let it get gooey and it didn't get weird on me. I would have tried a hole saw minus the center bit if I had one handy. It would have been cooler to keep that circle of plastic than to turn it into chips.
 
The flat blade bits are surprisingly efficient when cutting wood, though they don't take kindly to directional alterations during the cut, like some trick Forstner bits can do.

I am a bit wary of the flat blades because at times, in a hand drill, things have gone violently wrong. One grabbed and tried to wrench my arm off (Makita on full torque). Another gyrated madly, and injured an electrical cable in the house power wiring, in amid ceiling joists. I have once inadvertently drawn blood. One has to be very firm, steady, and careful if using them.

BTW - I think you can get advantage in cutting plastics if the stuff is first put in the freezer.

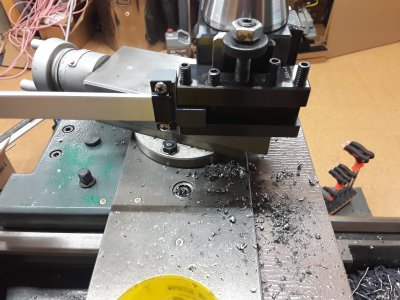
In passing, I have recently bought my first iGaging product - the OriginCal Absolute Origin Encoder with SPC/USB data output caliper, though I have no idea (yet) how to connect and use the latter. Seeing the iGaging DRO kit hooked up to your lathe prompts me to ask what you think of it, and how you find it to use.
 
I like the scales ok. I don't make parts for Nasa though. One thing I can tell you that will make life better is don't let it ground out on your machine. You'll notice every time I make some quick cheapo measuring device there is plastic between the machine and the scale. That's not because I have a lot of it. The first time I mounted one up on my 7x12 lathe the display started going ape after a bit. I replaced it with the other one only to have the same thing happen. While researching touch dro stuff I came upon the answer. Insulate the cheap Chinese scales. I suppose it's possible new generations don't have this problem, but I don't know. The other thing is take out the batteries if you want them to last.
 
I don't have any of their calipers. I have a cheap grizzly left handed set(that eats batteries), and a set of Mitutoyo calipers I trust and treat well. I don't have any reason to plug my calipers in, so I can't help there. I use napkin aided drafting, and rookie aided machining. None of my napkins have usb ports so I'll just have to wish you luck there.
 
Back
Top