Used Albrecht chuck - when to give up

I agree with you that it seems to be necessary, as 0.0015-.002” is not very good.

I am reminded of a white paper by Techniks that stated the fact that tool wear increases 10% for every 0.0001" of run out in a spindle. A spindle with 0.002" TIR is going to wear tools at an alarming rate, not to mention the potential for inaccuracy and poor finishes.

It would seem that getting those bearings sorted might be important.
 
I am reminded of a white paper by Techniks that stated the fact that tool wear increases 10% for every 0.0001" of run out in a spindle. A spindle with 0.002" TIR is going to wear tools at an alarming rate, not to mention the potential for inaccuracy and poor finishes.

But that's if you're running endmills and the like, no?

The wear on a drill bit has got to be a tiny, tiny fraction of that, I'd think.

I'm not sure what the answer here is. But several thou runout on a drill chuck: while not ideal, seems to me it'll be plenty good enough for the vast, vast majority of applications. Exceptions to that being really tiny drill bits (though you'd probably switch to a smaller drill chuck at that point).

So if it were me, I think I'd be mildly disappointed, but I'd run it anyway and move on to the next project on my list.


EDIT: I realize now you're talking about the 0.002" runout of the spindle, not runout in the drill chuck. Your point is a good one when it comes to milling cutters.
 
I would check spindle runout with a 0.0001 DTI on the inside surface of the spindle, no collet installed.
 
I have several in my scrap box that are 0 to 10MM and the jaws are bad on both. Other than that, they look OK.
 
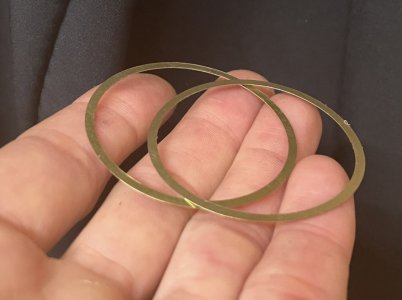
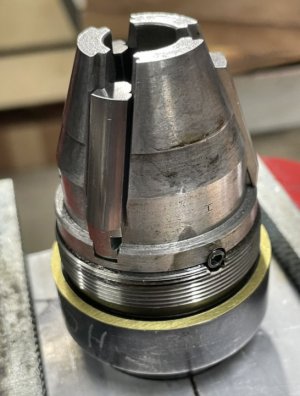
I made a spacer so the hood would tighten to a different position relative to the shell, meaning a new portion of the hood’s inner surface bears against each jaw.
79965DC5-D336-43A1-9432-7CBF2D4EEBBF.jpeg
1DF016AB-8C0A-41F7-A67B-4D9065188415.jpeg
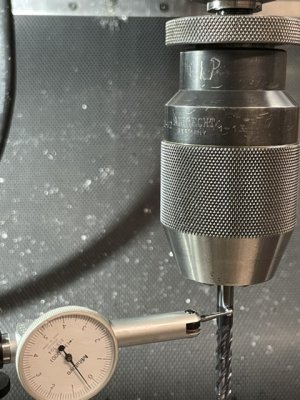
And measured 0.0005” TIR on a 1/4” carbide end mill:
E279C8F5-1055-4489-A8DA-4A433F75C629.jpeg

Obviously I got lucky with the tolerance stackup and canceled some of my spindle runout, but the issue with the chuck is resolved. I made no other change to it, so I could be sure about the effect. I’m pleased.
 
Good fix Jason . :encourage: Keep us posted as to runout staying put .
 
I would check spindle runout with a 0.0001 DTI on the inside surface of the spindle, no collet installed.
That is how I did it, unfortunately. I believe there is some play when I manipulate a tool in the spindle, in the neighborhood of .001-.002”, so it is possible that tightening the top nut could make a significant difference.
 
I made a spacer so the hood would tighten to a different position relative to the shell, meaning a new portion of the hood’s inner surface bears against each jaw. And measured 0.0005” TIR on a 1/4” carbide end mill. Obviously I got lucky with the tolerance stackup and canceled some of my spindle runout, but the issue with the chuck is resolved. I made no other change to it, so I could be sure about the effect. I’m pleased.

I can see how a shim might shift the location of the contact points between the jaw and hood but not sure how this changes the run out unless those shiny spots were the specific cause of 0.002" TIR. Well, regardless, half a thou is pretty good.
 
I can see how a shim might shift the location of the contact points between the jaw and hood but not sure how this changes the run out unless those shiny spots were the specific cause of 0.002" TIR. Well, regardless, half a thou is pretty good.

Good fix Jason . :encourage: Keep us posted as to runout staying put .

I suspect the shiny spots are areas of some wear, and are nonuniform along the length of jaw engagement, so they let the jaws bell mouth a little. That’s my guess but little more. It really seems like the hood’s inner contact areas were the cause.

With a 3/16” end mill, I see 0.0015” TIR, and about the same on a 1/2” end mill.

Making the spacers was super fun.
How did you make the spacers?
 
Back
Top