-
Welcome back Guest! Did you know you can mentor other members here at H-M? If not, please check out our Relaunch of Hobby Machinist Mentoring Program!
You are using an out of date browser. It may not display this or other websites correctly.
You should upgrade or use an alternative browser.
You should upgrade or use an alternative browser.
Used Albrecht chuck - when to give up
- Thread starter jwmelvin
- Start date
How does the inside of the hood look like.
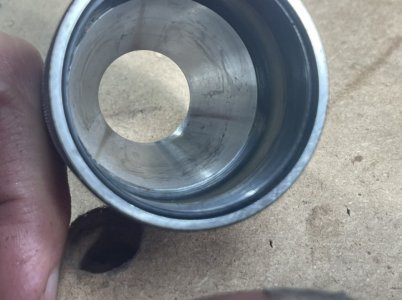
Hard to get a picture to reflect what is seen, but that’s it. I don’t feel anything but can see the burnished/worn area for each jaw.
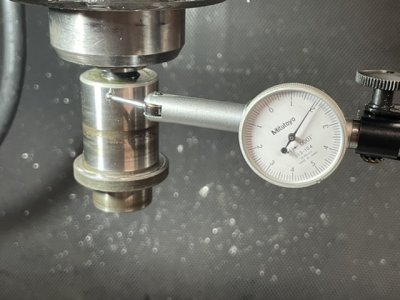
Doing so gives about .002”, so that’s a good point about where some of the TIR comes from. I also mounted just the body and measure about the same on that:Could be runout in your collet then.
Try lowering the chuck down in your collet and measuring runout of the straight shank right where it enters the collet.
While I could try a hood, I’m tempted to send it all to Royal and see what they say. Or do nothing and just use it.
Well, I figured I would try a different collet, so in doing so I measured the spindle R8 taper. At close to 0.002" TIR. That's sad.Could be runout in your collet then.
Trying a different 3/4" collet ended up with 0.001" TIR on a carbide end mill (I guess that collet canceled out some of the spindle error?).Use a carbide endmill if you have one. The shanks are held to incredible tolerances.
I'm not sure where this leaves me other than to say that my $1k cloneport isn't great and my $75 Albrecht isn't great. I'd still like to think the drill chuck doesn't add 0.004-.005" TIR (they are specified at 0.0015" TIR max) but I question the wisdom of seeking much improvement.
I will say that my PM-branded keyless chuck (not their Ultra Precision model, the High Precision model) is completely terrible. It does not stay tight at all. I have an Enco-branded keyless chuck that is quite nice to use; I'd have to check it for TIR if I'm going to really be upset about this Albrecht. And I have some Jacobs chucks that work well but got hooked on the keyless.
- Joined
- Dec 20, 2012
- Messages
- 9,422
Jason, you have so many interfaces that it's hard to tell what is contributing to the run out. From long experience, I can tell you that you have to make a clear diagnosis before doing anything else or spending more money.
- First thing to know is what is your spindle run out?
- You are using R8 collets. Are they quality collets or typical asian imports? Good collets (Crawford, Royal, Lyndex, Hardinge) have pretty low run out numbers; imports ... not so much. Collets can definitely be a source of run out.
- Check your arbor. Most good arbors (Albrecht, Jacobs made in the UK, Rohm) have little to no run out but you need to check it directly in a V-block to be sure. Related to this is how the arbor is installed - do it wrong and the run out increases.
- Check the chuck's female taper socket for burrs and debris and oil. It has to be totally free of all of this stuff.
- Those ruined chuck jaws in the first pic suggest a drill spun in the chuck. Oil in the screw will do that. So will a crap drill because the jaws can't grab it.
- The hood shouldn't have those three shiny spots. Take some 400 grit sandpaper and take the shine off of them. This will give the jaws a more accurate bite on a drill shank.
- Check the jaw slots where the base of the jaws sit. I've seen one chuck where there was a lot of wear and that chuck was toast.
First thing to know is what is your spindle run out?
Spindle: 0.0015-.002” TIR
You are using R8 collets. Are they quality collets or typical asian imports? Good collets (Crawford, Royal, Lyndex, Hardinge) have pretty low run out numbers; imports ... not so much. Collets can definitely be a source of run out.
Carbide end mill in 3/4” collet: 0.001-.002” TIR depending on collet. Not high quality ones but tried the two I have.
That’s consistent with the 0.002” TIR on the chuck body.
Check your arbor. … you need to check it directly in a V-block to be sure.
I think I checked the arbor when I first disassembled the chuck and it showed nearly no measurable runout.
Check the chuck's female taper socket for burrs and debris and oil. It has to be totally free of all of this stuff.
I remember being picky about this when I did it but I will take them apart and redo at some point.
The hood shouldn't have those three shiny spots. Take some 400 grit sandpaper and take the shine off of them. This will give the jaws a more accurate bite on a drill shank.
I agree. I think that the hood shows some wear and that directly affects the jaw positions. I’d like to make a thin shim for the hood, so that it tightens into a different alignment with the jaws. I calculate 0.0066” would cause 60° offset, so the 0.007” brass shim stock should work well. It’ll be interesting to try at least.
I have no issue with resurfacing the existing mating locations, but that won’t address any hood wear. I’d like to understand how you connect hood surface finish with accuracy.
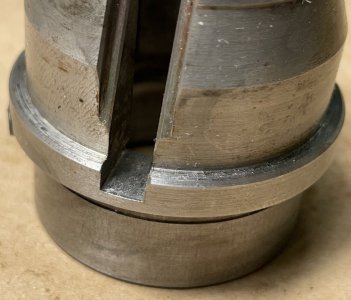
Check the jaw slots where the base of the jaws sit. I've seen one chuck where there was a lot of wear and that chuck was toast.
They look pretty good to me:
See also:
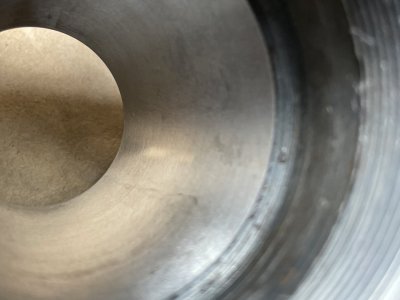
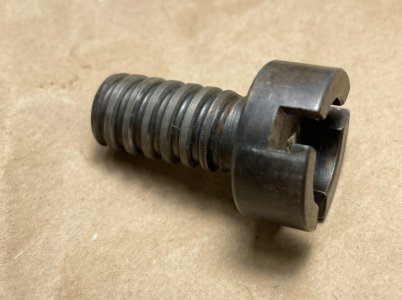
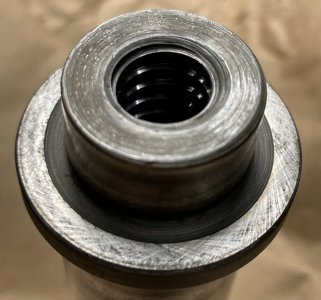
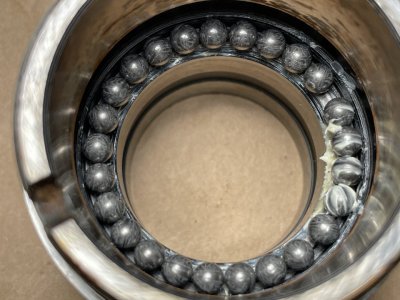
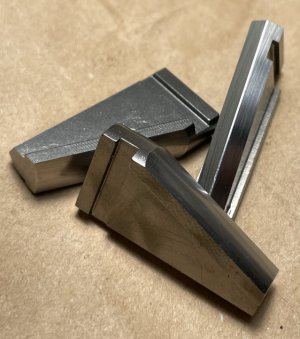
I figured seeing some pictures helps get a feel for what I’m working with. I’ll report as I have a chance to keep trying some things.
The hood is what pushes/directs the jaws closed. The spindle body keeps them aligned and straight while going in/out. The screw pushes them in/out.
Me thinking here the amount of play between the jaws and the spindle body That’s one area.
The screw if someone was drilling with large diameter bits and had the chuck tighten the screw notches could be spread from the jaws rolling.
The hood same deal if someone locked it up drilling big diameter bits and used something to wrench down on the hood to release the chuck the hood could be ovaled.
Just some stuff to think about where to look.
- Joined
- Dec 20, 2012
- Messages
- 9,422
With 0.0015 to 0.002" TIR, the best you'll get at the chuck will be that; it will likely be worse due to stacking tolerances. Have you considered refurbishinhg your spindle assembly? Spindle run out should be in the neighborhood of 0.0002" or less.
The shine inside the hood is simply due to wear and it allows the jaws to slip and slide as they tighten. When this happens, the jaws don't tighten equally around the bit so run out increases at the bit. Albrecht recommends you take off the shine to reduce this slippage.
There is grease on your leadscrew. That's no good and will cause the chuck to not grip well. The screw has to be totally free of any oil or grease to function properly.
I agree that the body/jaw guides look fine, as do your new jaws.
The only other thing I can think of is that the arbor may or may not be installed accurately. If you can get it out, try cleaning it and the female socket with lacquer thinner and then do not touch the mating surfaces with anything other than a lint free cloth. Insert the male taper into the female socket with a gentle twisting motion and no downforce until it contacts and locks. The cover the end of the arbor with a piece of wood and give it a firm tap with a steel hammer. This will seat the arbor in the most accurate way and it will not come out until you want it to.
Have you considered refurbishinhg your spindle assembly?
I am considering it now
The shine inside the hood is simply due to wear and it allows the jaws to slip and slide as they tighten. When this happens, the jaws don't tighten equally around the bit so run out increases at the bit.
That makes sense. I’ll try both removing the shine and the shim I am contemplating. Will report when possible.
There is grease on your leadscrew.
I thought I had cleaned it off but will do a better job of that.
The only other thing I can think of is that the arbor may or may not be installed accurately.
I’ll take it apart and redo it soon.
Thanks everyone, I quite appreciate the suggestions.
- Joined
- Dec 20, 2012
- Messages
- 9,422
I am considering it nowI’ll put it on the list; if all I need to do is install new bearings, that seems pretty easy. If I need to grind the spindle, that seems harder.
What kind of mill do you have?
Unless the spindle taper is really worn or out of round, sending it out for a re-grind or replacing it shouldn't be necessary.
I am wondering if the excessive run out of the spindle might not be due to inadequate spindle bearing preload. If the bearings are in good shape and have been lubed properly (cleaned and packed to 25-30% capacity) and then run it properly then getting the preload adjusted might improve things. If preload is good and the spindle taper is good but the run out is that bad then the bearings will need to be replaced.
Depending on the quality of the mill and spindle, it might be a good idea to step up to an ABEC-rated bearing. I have FAG P5/ABEC5 Angular Contact bearings in my plain vanilla RF-31 spindle and it holds just under 0.0001" TIR. With a Keo Woodruff keyseat cutter in an ETM collet on this mill, TIR is under 0.0002" max so I'm pretty satisfied with this level of bearing accuracy. Anyway, just something to consider.
What kind of mill do you have?
It’s a Bridgeport clone, made in Taiwan (She Hong Industrial), 1980. The head is a copy of the BP J head (step pulley). The current bearings are open, oil lubricated. I understand typical replacements use grease.
I believe bearing preload is set by a spacer but could be wrong about that.
I wasn’t able to pull the spindle when I cleaned up the machine, as the ball trip lever is stuck. I have a carbide burr to obliterate that and allow spindle removal, but it’s not something I’ve been rushing to do.
I agree with you that it seems to be necessary, as 0.0015-.002” is not very good.

