[Newbie] Unimat Sl, Not True.

Topsy do you know that all was well before you did all the service on it?

It still sounds to me that the chucks are not seating onto the spindle shoulder. If you put the chucks on and then take a 0.001" feeler gauge and try to see if there is any clearance between the back of the chuck and the shoulder of the spindle. If there is then something ain't right. And it makes a big difference believe me.

David
 
W W a Unimat SL or DB200 is a small engine lathe that was popular around the 1970's or so. It is a light duty lathe, but with care is capable of some nice work.

David
Thanks, have seen the name in several threads here, I often thought that it might be related to Hydromat at first glance, upon reflection of several seconds concluded that no one has such a machine in the garage at home.
 
Topsy do you know that all was well before you did all the service on it?

It still sounds to me that the chucks are not seating onto the spindle shoulder. If you put the chucks on and then take a 0.001" feeler gauge and try to see if there is any clearance between the back of the chuck and the shoulder of the spindle. If there is then something ain't right. And it makes a big difference believe me.

David


I believe it was fine, but I can't tell for sure.
My mate tried it out with me and we turned about 0.3mm off a 5mm diam rod, approx 3cm in length, so I doubt I'd be able to check on that and see if it was true then..

I'll try to get hold of a feeler gauge somewhere tomorrow!

Cheers!
 
That doesn't look bad to me. Mine will do that if I just throw a rod in without centering it. I cut me a 1/2" piece about 4" long & turned the end to press a bearing on. I put this in my tool holder & with the chuck just snug I run the bearing against it until it centers then tighten the chuck. That bolt probably isn't straight to start with.
 
That doesn't look bad to me. Mine will do that if I just throw a rod in without centering it. I cut me a 1/2" piece about 4" long & turned the end to press a bearing on. I put this in my tool holder & with the chuck just snug I run the bearing against it until it centers then tighten the chuck. That bolt probably isn't straight to start with.
 
I agree with the others that the wobble on those big parts looks pretty normal. The lathe is just too small and light weight to clamp up and center such large parts with out some help.

It is hard to tell, but the spindle face looks a bit borderline. In video 2 there is some rust or something on the spindle face. In video 5 between 11 and 13 seconds, there appears to be a shallow dip or swale in the spindle face. Might just be an illusion caused by the camera trying to steady the image though.
You really need to put a test indicator on the face and make sure it is flat. You can test the squareness of the face by putting a narrow parallel between the face and the chuck. Mount a DTI and zero it on the parallel, rotate 180 and see how far out of square it is. Repeat at 4 spots around the spindle.
It takes very little debris to cock the chuck pretty far off when the spindle is this small. small rust spots, little dings on the face, or tiny bits of swarf will cause problems.

Do you have a full sized lathe? Might be worth just making a new spindle. It should be a fairly simple job, and could be made from pre-hard. I am sure there are folks here who would be happy to make one if you can send them the old spindle or provide dimensional drawings. It looks like the spindle could be upgraded to a Morse #1 taper as well.
I have seen upgrades Morse taper tail stocks for those, so might as well make a new tail stock ram at the same time :)
 
Thank you for the video’s. You should carefully clean the centers of rust and burrs before you do any alignment checking. And sorry again, but using a bolt for your other alignment check is not the best choice of metrology tooling. You should have a precision ground shaft or similar. And everything that shares mating surfaces should be carefully cleaned of rust, burrs, etc. I would not re-machine any part of the original head stock spindle. I would leave it alone. It’s looks good in the video. Just clean the threads and shoulder. Clean the chuck threads and its back face…Dave.
 
Do you have a full sized lathe? Might be worth just making a new spindle. It should be a fairly simple job, and could be made from pre-hard. I am sure there are folks here who would be happy to make one if you can send them the old spindle or provide dimensional drawings. It looks like the spindle could be upgraded to a Morse #1 taper as well.
I have seen upgrades Morse taper tail stocks for those, so might as well make a new tail stock ram at the same time :)

Nope, otherwise I guess I'd know a tiny bit more about lathes! (I'd hope!)

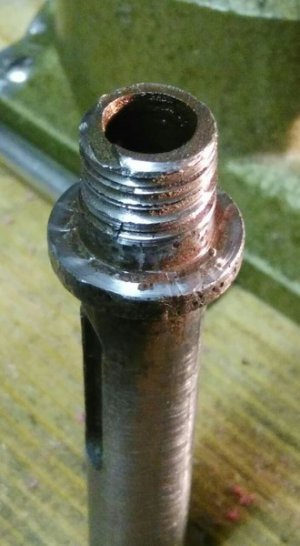
A new tailstock ram wouldn't be a bad idea though, someone definitely had a big oopsie with this one, a part of the thread is broken off and it's full of dings...

RbGzHPq.jpg


Thank you for the video’s. You should carefully clean the centers of rust and burrs before you do any alignment checking. And sorry again, but using a bolt for your other alignment check is not the best choice of metrology tooling. You should have a precision ground shaft or similar. And everything that shares mating surfaces should be carefully cleaned of rust, burrs, etc. I would not re-machine any part of the original head stock spindle. I would leave it alone. It’s looks good in the video. Just clean the threads and shoulder. Clean the chuck threads and its back face…Dave.

Yeah, but the bolt was the straightest thing I found..

I've just cleaned all the threads (as good as I could, I haven't got anything to reach the female threads properly) then took the drill chuck and lightly sanded the contact surface. And.. it's running perfectly true! :D

Now to cleaning up the useable center carefully :)

Thanks a lot!
 
Last edited:
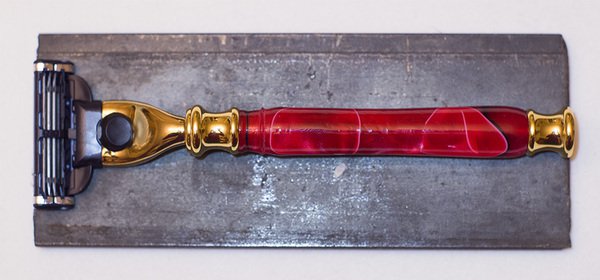
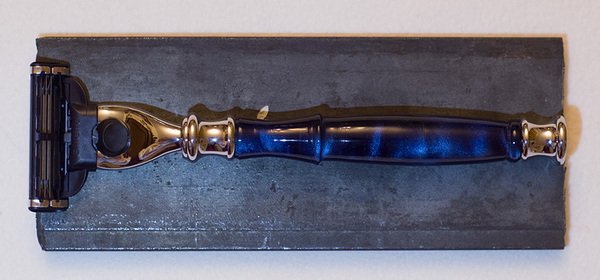
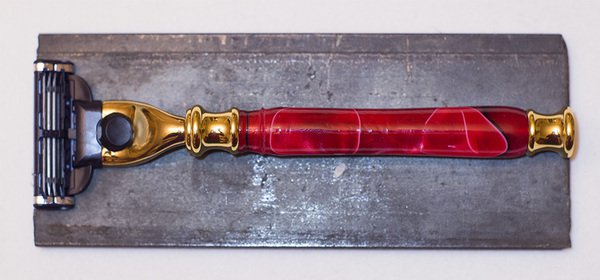
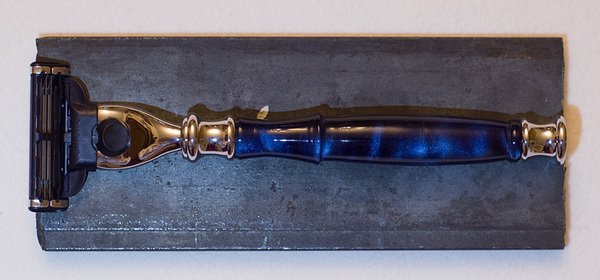
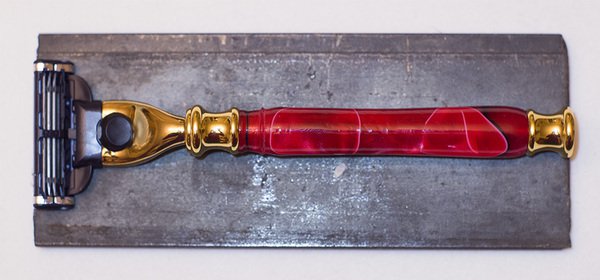
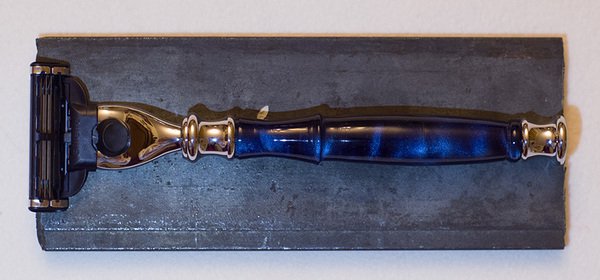
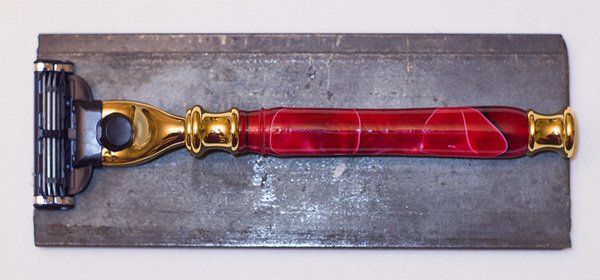
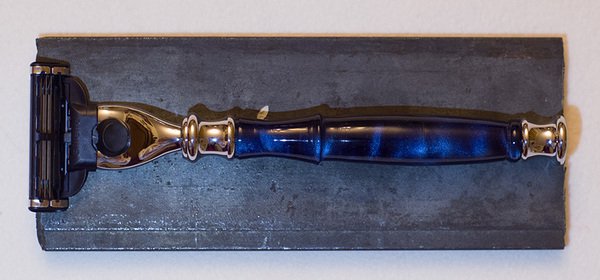
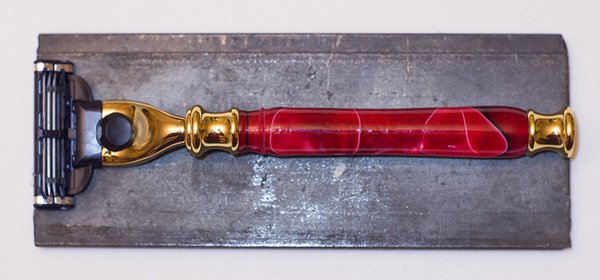
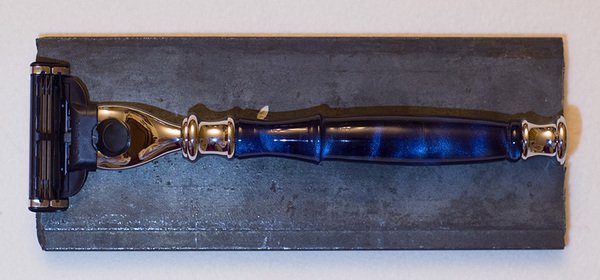
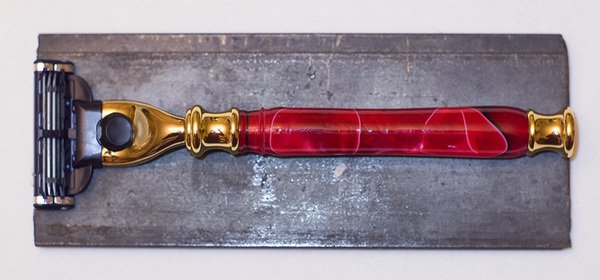
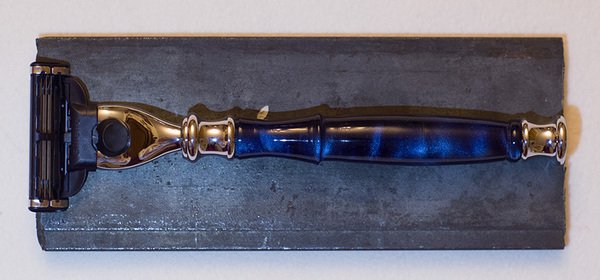
Just thought I'd give you guys an update: I managed to do some very last minute Christmas gifts with the wood turning toolrest and a few tools I had lying around (not necessarily the optimal ones) and was pretty pleased how they turned out considering I've never done anything like this before!

I did the red one first as in case I did something horribly wrong..

razor_red_top_by_topsy93-d9lu9oo.jpg

razor_blue_top_by_topsy93-d9lu9vu.jpg

Sadly the razor kits aren't the best quality, some don't hook into the blades and some don't come off them anymore, luckily I had ordered five..


I hope you all had a merry Christmas and a great start to the new year! :)

razor_red_top_by_topsy93-d9lu9oo.jpg

razor_blue_top_by_topsy93-d9lu9vu.jpg

razor_red_top_by_topsy93-d9lu9oo.jpg

razor_blue_top_by_topsy93-d9lu9vu.jpg

razor_red_top_by_topsy93-d9lu9oo.jpg

razor_blue_top_by_topsy93-d9lu9vu.jpg

razor_red_top_by_topsy93-d9lu9oo.jpg

razor_blue_top_by_topsy93-d9lu9vu.jpg

razor_red_top_by_topsy93-d9lu9oo.jpg

razor_blue_top_by_topsy93-d9lu9vu.jpg
 
Looking pretty good for first time work.
With some practice you should be able to get those coming out really nice. You have a nice eye for shape and balance.
You can and should feel proud of this work. Keep at it and you will get your tool to reproduce what is in your minds-eye with out the errors that come from inexperience with the tool.
 
Back
Top