Super glue and hold down related questions

Although the wood would be easy to sink a few screws into, it's not a decent hard wood. So I am redoing this with the aluminum plate I posted. I found some shorter studs that could work. They will work because the clamp height is now 3/8 rather than 0.80. The head and collet now don't interfere with the studs.

So for anyone following along, the steel workpiece and the aluminum sacrificial plate (ASP) were cleaned with acetone. (I basically followed the method given in a NYCNC video.) Then both surfaces were taped with 2" wide painters tape. Used a round rod to press the tape down for better adhesion. Wiped the tape with 70% isopropyl to get any errant fingerprints off. Super glue was put on the ASP tape. Then the workpiece was laid onto the ASP trying to align it all. You don't have any time for alignment, it has to be pretty close the first time. This time I didn't glue my fingertips! Finally some weight in the form of some aluminum chunks was placed on top to act as a clamp. In an hour it should be cured enough.

After tramming, I'll get the holes located and drilled. Then I can drill partially into the ASP and tap it. Finally I'll screw in some SHCS. They won't be in the way of what I want to machine. Then finally I can mill the slot in the workpiece. Assuming I don't fluff the whole thing, pictures to follow.
 
Some time back I made a small sine table to make some tapered gibs. I used brass rods for the rolls. I drilled and countersunk a hole on each end to screw them to the table. Then I milled a "vee" on each end of the table to capture the rods. I didn't have a "real" V style end mill but I did have a carbide router bit. The table is aluminum so it machined pretty well, although I had to go fairly slow to avoid chatter.

While less convenient, you could just slip a roll under your clamp, it really doesn't need to be attached to the clamp body. Once the hold-down bolt is tightened it's not going anywhere.

I had thought about attaching them with epoxy but any flex in the clamp would pop the roll loose. Silicon adhesive would probably be OK.
 
So for anyone following along, the steel workpiece and the aluminum sacrificial plate (ASP) were cleaned with acetone. (I basically followed the method given in a NYCNC video.) Then both surfaces were taped with 2" wide painters tape. Used a round rod to press the tape down for better adhesion. Wiped the tape with 70% isopropyl to get any errant fingerprints off. Super glue was put on the ASP tape. Then the workpiece was laid onto the ASP trying to align it all. You don't have any time for alignment, it has to be pretty close the first time. This time I didn't glue my fingertips! Finally some weight in the form of some aluminum chunks was placed on top to act as a clamp. In an hour it should be cured enough.

I have never tried the CA-glue "chuck" concept.
What advantage does the tape add?
Could you omit it and just CA glue the steel work-piece to the sacrificial aluminum plate?
(use a little heat later for separation)

Thanks,
-brino
 
I have never tried the CA-glue "chuck" concept.
What advantage does the tape add?
Could you omit it and just CA glue the steel work-piece to the sacrificial aluminum plate?
(use a little heat later for separation)

Thanks,
-brino
I'm far from an expert. I've heard the rough surface give the glue better purchase. I'd also rather clean off tape adhesive than CA. Even if you use acetone, it doesn't dissolve CA, it makes CA a little softer. Still have to scrape it off with a razor blade. Tape adhesive is easily wiped off with acetone.

The first time I put glue on the workpiece directly and tape on the plate. (No tape on the workpiece.) The tape came up easy. The CA side (workpiece) required a lot of work. If the workpiece was aluminum it would have be all scarred by the razor blade.
I haven't tried heat, so can't comment on how easy hot CA is to get off stuff.
 
To make this piece I would first drill and C'sink the 3 holes on the material for the part. C'sink the holes deep enough that the face cutting will not hit the tops of the flat head screws that you plan to use. Then remove the part from the mill and put in your ASP and drill and tap the 3 holes. Now you can mount your final part to the aluminum block with 3 flat head screws and it will not go anywhere. #8 screws will be plenty long as long as you are not really hogging off material. From here you can easily mill to final thickness and then mill the contour. The rounded corners would be real quick and eassy on either a belt sander angle grinder or if you don't have that a file would not take real long.
 
I don't know what a bed bracket is, but I'm guessing it isn't a part for the space shuttle. That means you can use a spotting drill to locate your hole pattern on the part, and just finish the holes in the drill press. The idea behind this being you won't be working with a warped piece of wood as a backup to protect your mill table. The part can be held directly on the table with edge clamps. Else if the part is thick enough to not warp much, you could put it up on parallels and work the interior features in that setup. I would be compelled to do this whole part in a vise, only finishing the fillets and radii by hand/belt sander. I'd probably do the outer dimensions four at a time, vertical in the vise, then the internals on parallels. No glue, no spending on fancy hold downs.
 
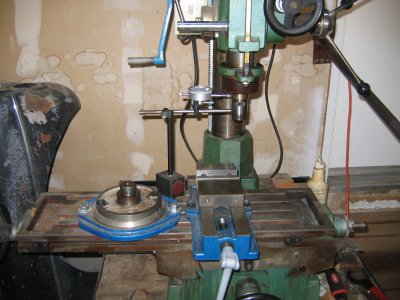
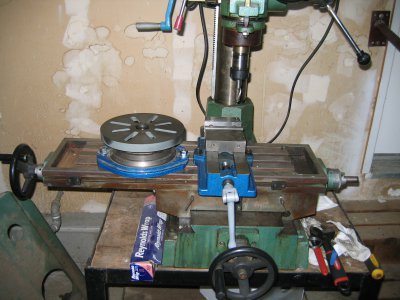
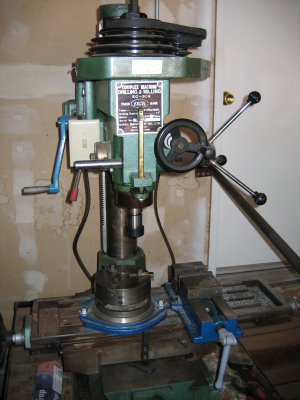
First off don't toss the swivel base that came with your mill vise. I made a backing plate for my swivel base that holds my lathe chucks. While no where near as good as a rotary table it is still very useful. So far my it has served my needs to the extent that I have stopped looking for a rotary table.

IMG_3922.JPG IMG_3792.JPG IMG_3895.JPG

The leg on the clamp does not need to be round. I thought it looked nicer than being square. You can use a router bit in your mill to round off the corners All the leg does is give you a fulcrum point. Depending on what you are trying to hold and the arrangement of the clamps you may not even need a leg. Because your work piece is so thin you need the leg to help clamp the work to the table. The leg doesn't need to be much higher than the work piece. But a longer leg would make the clamp useful for other projects.
 
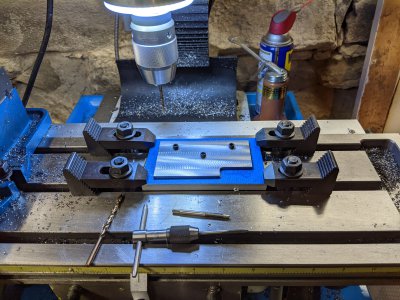
Ok, all done. The drilling and tapping blind holes was a little tricky, but otherwise went smoothly. Here's a picture of the set up prior to milling the slot. Only could fit in 8-32's, so that's what I did. The screws clamped down the workpiece along with the superglue.
PXL_20201020_213551181.jpg
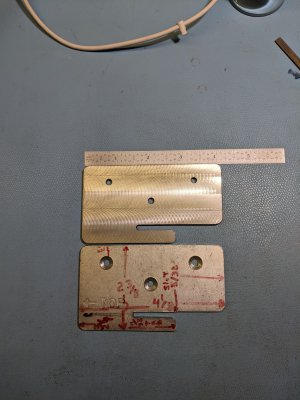
Milled out the slot, and rounded off the corners on the belt sander. Took off all the sharp edges and it's ready to go. Using tape on both pieces is the way to go. Much much easier clean up, as in NONE.
PXL_20201021_001825101.jpg
They aren't perfectly identical, but it should be good enough! If not, heh, there are always files...

Have to say, doing it the second way with taping both parts and super glue is the way to go. I had no clean up.
 
I don't know what a bed bracket is, but I'm guessing it isn't a part for the space shuttle. That means you can use a spotting drill to locate your hole pattern on the part, and just finish the holes in the drill press. The idea behind this being you won't be working with a warped piece of wood as a backup to protect your mill table. The part can be held directly on the table with edge clamps. Else if the part is thick enough to not warp much, you could put it up on parallels and work the interior features in that setup. I would be compelled to do this whole part in a vise, only finishing the fillets and radii by hand/belt sander. I'd probably do the outer dimensions four at a time, vertical in the vise, then the internals on parallels. No glue, no spending on fancy hold downs.
Using the wood was indeed a bad idea. Using an aluminum backer worked out much better. Figured out a way to hold it down with what I had - just wasn't thinking about it the right way. (Lack of experience.) I just used the glue down method because I had read about it and seen it demonstrated in a Stefan Gotteswinter video. He used it as a CNC hold down. It was pretty effective for him. When I used it correctly (the second time) it was successful. I'd use the method again for thin material.
 
That's what's cool about this place, you learn about how different folks do things and can try them out yourself. There's really no "ONE" right way, if you get it done then you've done it right for you on that particular day....

Hope the bed gets plenty of good use now that you've fixed it ;)


John
 
Back
Top