Show us your 4x6 Bandsaw Modifications!

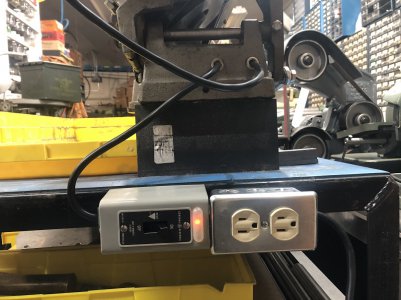
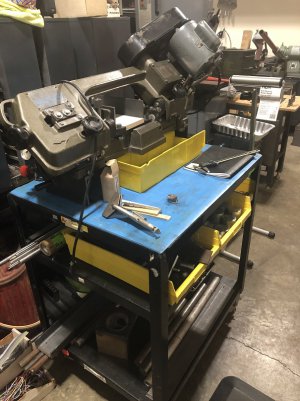
I decided to show some of my mods from pictures I took. I think that these are most of them. I never operate my saw in the vertical orientation, so some of these may not work for all of the 4x6 owners.

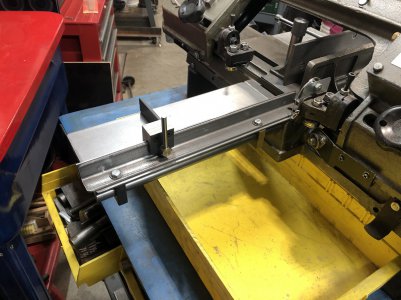
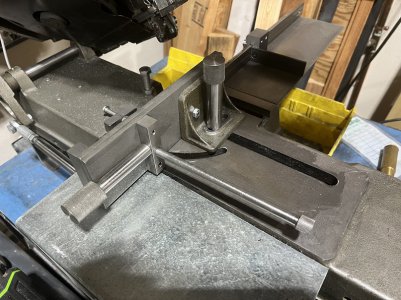
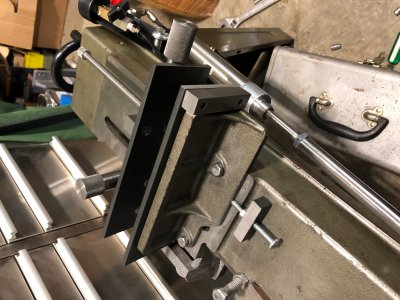
Here are some of my vise mods. The key modifications include:
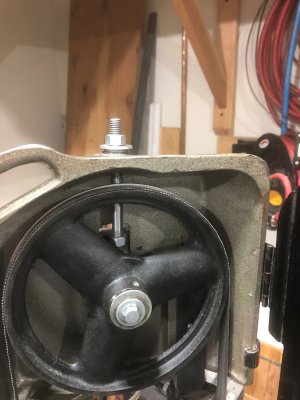
a. knurled handles to tighten the movable vise jaw.
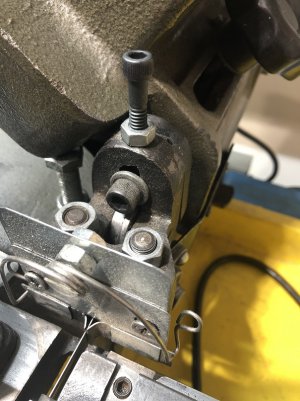
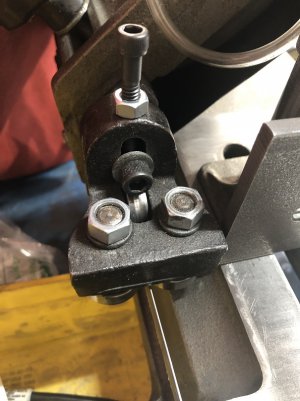
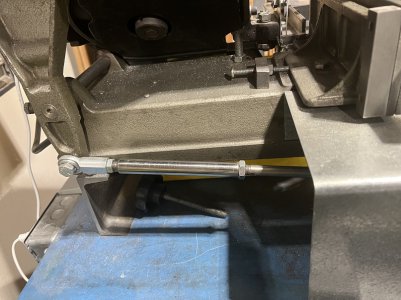
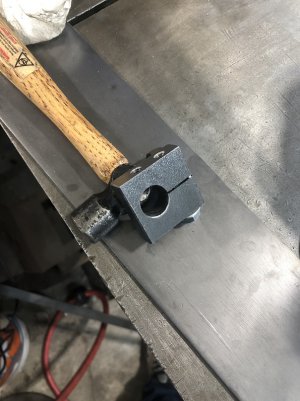
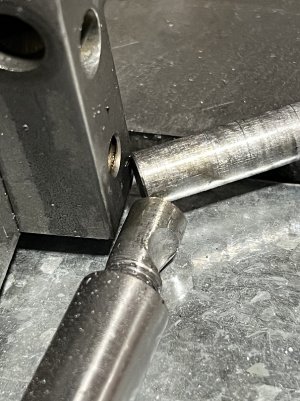
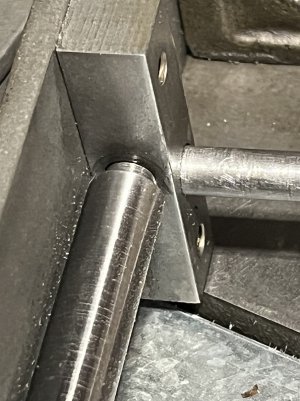
b. a block with a rod to locate "home" for the stationary vise jaw
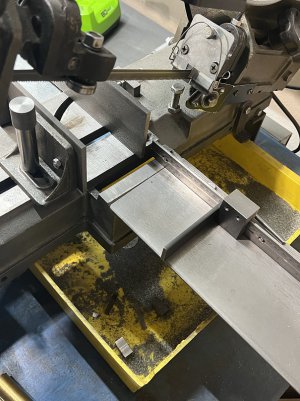
c. a floating jaw to place on the stationary jaw to hold pieces very close to the blade
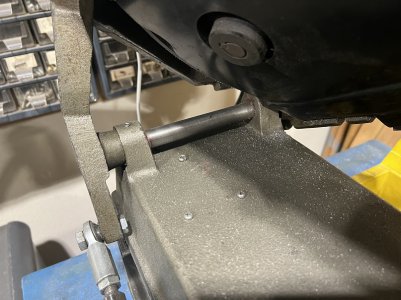
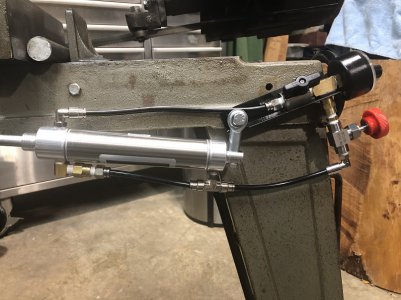
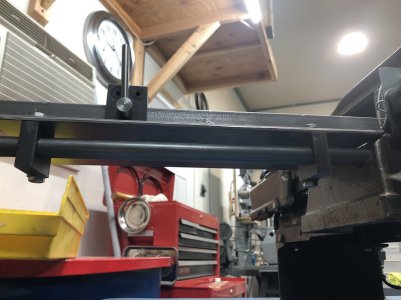
d. a rod to keep the movable vise jaw from rotating when gripping short pieces. Note the clamp mechanism.
d. Not shown, a T nut to replace the nut under the table of the stationary vise
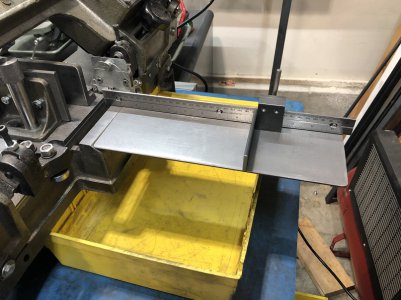
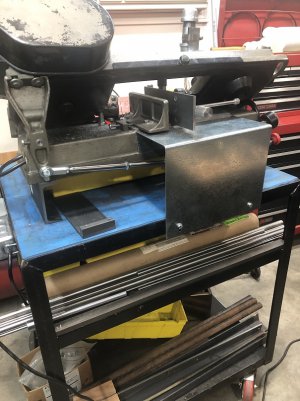
e I also made a table extension out of sheet metal which is really handy when wanting to load long pieces of metal into the saw.
 

Attachments

  • Vise_Table_Mods.jpg
    Vise_Table_Mods.jpg
    230.2 KB · Views: 175
  • Vice_mod_1.jpg
    Vice_mod_1.jpg
    474.7 KB · Views: 155
  • Vise_Rod_Clamp_UnAssembled.jpg
    Vise_Rod_Clamp_UnAssembled.jpg
    219.2 KB · Views: 148
  • Vise_Rod_Clamp_Assembled.jpg
    Vise_Rod_Clamp_Assembled.jpg
    186 KB · Views: 145
  • cylinder_guard_1_small.jpg
    cylinder_guard_1_small.jpg
    195.9 KB · Views: 161
Last edited:
Here are some of the mods I made to the table to make the saw cut square:
a. I had to make a new pivot shaft so that there was no slop in the table ears. This required a stepped shaft. This is a critical step.
b. I changed the design of the blade guides so that they were easy to rotate the blade square to the table and they kept a uniform upper blade guide bearing to blade body distance
c. I filed the table so that the pivot shaft and table were parallel. This was a total pain. I got the part to cut square though (see picture of 1 1/2" bar thickness cut. This is also very square with the axis of the bar.
d. I replaced the handle that tightens the blade with a 3/8" bolt that was threaded on both ends, a thrust washer/heavy flat washers, and a nut. I tighten the blade so it runs true then give it one more turn with a wrench. This allows me to get to the same blade tension. The frame on these band saws deflect a lot and this puts the same distortion on the frame which is necessary to cut really square.
 

Attachments

  • Pivot_Shaft.jpg
    Pivot_Shaft.jpg
    192.3 KB · Views: 148
  • Blade_alignment_lower_small.jpg
    Blade_alignment_lower_small.jpg
    194.9 KB · Views: 131
  • Blade_alignment_upper_small.jpg
    Blade_alignment_upper_small.jpg
    157.5 KB · Views: 129
  • AfterAdjustmentSawCoupon_small.jpg
    AfterAdjustmentSawCoupon_small.jpg
    116 KB · Views: 128
  • thrust bearing blade tensioner.jpg
    thrust bearing blade tensioner.jpg
    243.1 KB · Views: 130
Last edited:
Here are some pictures of my down feed cylinder. I bought a custom cylinder from Parker that had two connectors on the end of the cylinder. I used all brass fittings (some nickel plated) and nylon tubing with ATF fluid. I set the down feed rate with the needle valve and watch the pressure of the gage to assess the feed rate. I usually keep the pressure around 100 psi. I use the ball valve to start the down feed. Note, the brass colored fittings on the rod side of the cylinder are an elbow and check valve. I made a connector shaft to go from a 7/16" NF on the cylinder to a 3/8" NF on the tie rod.
 

Attachments

  • Down_Feed_Cylinder.jpg
    Down_Feed_Cylinder.jpg
    178.2 KB · Views: 129
  • cylinder_valve_tubing_small.jpg
    cylinder_valve_tubing_small.jpg
    190.6 KB · Views: 118
  • Cylinder_Mod_mating_rod.jpg
    Cylinder_Mod_mating_rod.jpg
    191.9 KB · Views: 122
Last edited:
Here's the cut off table I basically copied from the internet except with some modifications. The material stop hole was so badly drilled that it caused the blade stop shaft to be badly offset at 12". I had to drill and hand ream so I am using a 5/8" shaft now. I made the typical block to hold the table, used 1/8" steel for the table, 1" angle iron, a scale I bought from Harbor Freight, and made a stop so I can accurately measure piece length up to 12". This table also keeps pieces from dropping. It's pretty strong, but I designed it so it could be removed if I were cutting some really heavy pieces (in theory, I haven't ever done it).
 

Attachments

  • Finished_Table_Right_SIde_View.jpg
    Finished_Table_Right_SIde_View.jpg
    186.4 KB · Views: 128
  • FInished_Table_Left_Side_view_Small.jpg
    FInished_Table_Left_Side_view_Small.jpg
    185.6 KB · Views: 124
  • Finished_Table_Bottom_View_Small.jpg
    Finished_Table_Bottom_View_Small.jpg
    145 KB · Views: 123
  • Table_bar_clamp.jpg
    Table_bar_clamp.jpg
    186.2 KB · Views: 140
  • Front_Mods_Vise_Area.jpg
    Front_Mods_Vise_Area.jpg
    231.8 KB · Views: 125
I also added a motor starter and power receptacle to the saw when I rewired it. This will keep the motor from burning up if the blade jams and gives me a power receptacle on the saw for a LED light. I could do this because I mounted the saw on a Little Giant movable table I bought for cheap from Craigslist. Note, I used 4" channel iron to raise the saw from the table and I used the cart to store my shorter metal material.

Just for completeness, I also installed a brass plug in my gear box to fill it with oil when in the vertical orientation. I am using synthetic MT90 which is supposed to be brass safe and last 30X as long as gear oil. I added 7 oz of oil. I heard that one should have filled 200 ml of oil in the box, which is really hard to do w/o tilting the saw. The plug also allow one to remove the oil if it needs maintenance, etc. w/o making a real mess.
 

Attachments

  • Motor_Starter_small_1.jpg
    Motor_Starter_small_1.jpg
    176.6 KB · Views: 117
  • bandsaw stand small.jpg
    bandsaw stand small.jpg
    198.5 KB · Views: 125
  • MT_90_Brass_Plug_small.jpg
    MT_90_Brass_Plug_small.jpg
    188.5 KB · Views: 120
I also added a motor starter and power receptacle to the saw when I rewired it. This will keep the motor from burning up if the blade jams and gives me a power receptacle on the saw for a LED light. I could do this because I mounted the saw on a Little Giant movable table I bought for cheap from Craigslist. Note, I used 4" channel iron to raise the saw from the table and I used the cart to store my shorter metal material.

Just for completeness, I also installed a brass plug in my gear box to fill it with oil when in the vertical orientation. I am using synthetic MT90 which is supposed to be brass safe and last 30X as long as gear oil. I added 7 oz of oil. I heard that one should have filled 200 ml of oil in the box, which is really hard to do w/o tilting the saw. The plug also allow one to remove the oil if it needs maintenance, etc. w/o making a real mess.

Can you explain the "motor starter", how does it shut down the motor when it stalls?
 
Can you explain the "motor starter", how does it shut down the motor when it stalls?
A motor starter is essentially a circuit breaker sized for the specific load. The FLA of my motor is 6.7A. I bought a starter module that will trip at 6.4A. When a motor stalls, the amperage goes way up (hence the burning of the windings). With a starter, the breaker will trip. Typically, one sizes the starter for about 15% higher amperage than the FLA of the motor. I want to be easy on my motor and undersized the breaker. Since I have a hydraulic down feed, I can control the load on the motor (in general) unless something jams.

Does that help? I think that starter and module cost me like $25 total from eBay. There are a lot of these on eBay and they are cheap, relative to buying one at a motor shop. Be sure to order the ‘heater’ that is correctly sized for the FLA of your motor. A lot of the eBay starters may have a heater in them, but they are probably the wrong amperage. Either ask the seller for the correct heater(typically, the sre exchangeable) or find someone who’s selling the correct heater for your starter.
 
Last edited:
Bandsaw clamp

The standard vice cannot reliably hold objects less than about 25 mm in length. Sometimes it is necessary to hold small or odd shaped objects for cutting on the bandsaw. The clamp shown in the header photo can cope with many of these difficult clamping problems. It was constructed from a piece of 6 x 75 x 100 mm steel plate. At one end is a vee block with two projecting lengths of M5 studding as shown above. Above the vee block is a clamp bar made from 10 mm square steel bar which was drilled to fit over the studs. The clamp bar was also drilled in the centre for an M5 screw.

The vee block was made by taking a piece of 25 x 25 mm square bar and cutting it at 45 degrees using the band saw.. The two pieces were then screwed to the plate from below using M4 countersunk screws.

At the other end of the plate has two more M5 studs that are Loctited into the steel plate. These are spaced to accept the clamp bar.

This photo shows the clamp holding a piece of 50 mm diameter steel bar

--------------------------------------------------------------------------------


Here it is holding a piece of 10 mm bar. Note that the centre screw of the clamp bar is used to hold the piece in the vee groove.

--------------------------------------------------------------------------------


In this photo the clamp bar has been moved to the other end of the clamp and it is holding a piece of 1/2" square bar.

--------------------------------------------------------------------------------


Here it is clamping a short piece of 6 mm steel.

--------------------------------------------------------------------------------


This shows the clamp mounted in the bandsaw vice ready to cut a small piece of steel.

--------------------------------------------------------------------------------


This photo shows some small pieces that have been cut from short stock. The scale can be judged from the matchbox.

--------------------------------------------------------------------------------

I have used this little clamp often. Apart from the ability to cut small pieces of stock it is also useful when an angled cut is needed on a piece of flat plate. The angle can be accurately set up with the clamp on the bench and then the set up is simply tranferred to the bandsaw for cutting.

View attachment 1486 View attachment 1487 View attachment 1491 View attachment 1492 View attachment 2334 View attachment 2335 View attachment 2336
This clamp is absolute genius. I love this creativity.
 
Back
Top