Setup and Continuing Saga of the Charter Oak 12Z

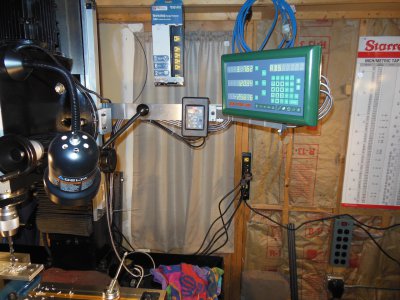
Ok, so I got El Hefe and Blue back up and running after moving the machines around. Had to move/relocate the DRO display on Blue to the right side as there wasn't room on the left where it used to be. Modified the mount and re-routed the cables. No biggie.

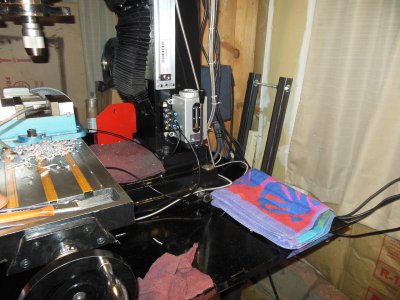
Here's a picture of the relocated remote for the Danfoss. Now it's off the head/out of my way, and it is subjected to less vibration out there. I really only need to use it to push the 'hand on' button (manual mode) and to set or adjust the frequency. It appears that the VFD is already programmed with a 3 sec startup profile so I just use the fwd/off/rev switch to start/stop the spindle without worrying about being too hard on the motor on startups.
DSCN4269.JPG


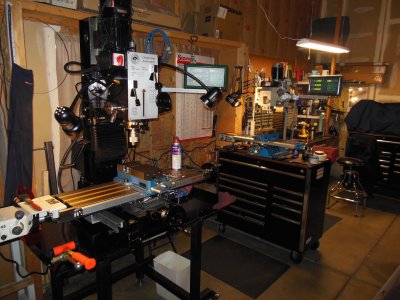
So this is now where the milling stations will reside, probably until I move. I am starting to like the arrangement already, even though it looks kinda like a kludge. I don't have to walk as far from machine to machine, and the tooling in Blue's tool box is closer now. Organizing these this way will allow me to put the 1340GT right next to the little SB. :)
DSCN4271.JPG

DSCN4269.JPG DSCN4271.JPG
 
Looking good Bill I wish I had your ceiling height.

Yea, it's somewhere between 9 and 10 feet to the ceiling. And the front bedrooms are above me, so it keeps a little bit more heat in there. Once I move the Jeep out I will have 15' wide by 20' deep of room to play with/expand into. Should be plenty for the next 2-3 years.
 
Mine is completely wacko. Sometimes it is blank, sometimes it shows all of the LED elements, sometimes it shows zeros, sometimes it shows all eights... (you get the picture). And it is not the sensor on mine. :(

As things settle down I will pull the display board out of the box and look real good at it under my magnifier. Hopefully that will uncover the problem. Until then, the motor runs fine. I just go by pitch now and the beat frequency off the spinning endmill (trick my old mentor taught me).


Thanks Bill everything looks great on the new mill. Thanks for all the pictures
 
Well, the one-shot is installed and functional to the saddle. I'm taking a break from taking this thing apart to do things to it so removing the head and milling the head mount for grooves will have to wait for a bit. Hand oiling the column/head is easy, and it doesn't move much compared to the X and Y axis.

It ain't pretty, but it's functional. I was running out of room because of the Z-axis scale. It is nothing like the factory install, but they don't mount Z-axis scales on the column. I may have to come up with a different scheme for the manifold location and the running of the lines. Maybe I can locate a source of the hard and flex lines that are used on the big boys and come up with something that looks a bit better. It is nice feeling all that oil squishing through the ways though. :)

DSCN4272.JPG

DSCN4272.JPG
 
Today I figured that I'd rather use the mill than work on it. :)

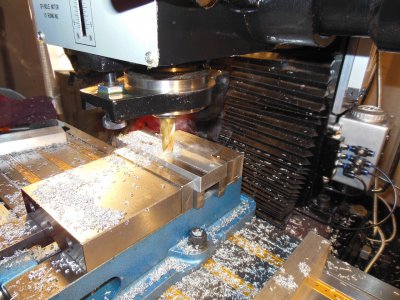
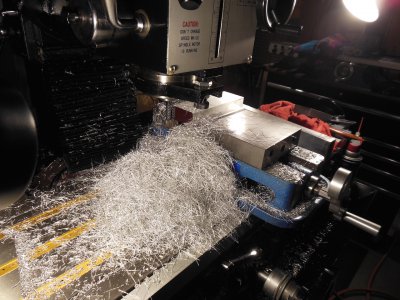
Just to make some chips I thought I'd start sizing some 7075 for a pair of soft jaws. Gives me an opportunity to play with the mill a bit and get used to how it behaves/cuts.

DSCN4276.JPGDSCN4277.JPG

Never personally owned a machine that I could actually use a 3/4" endmill. I'll have to start looking at larger (above 3/8") cutters on Ebay as I don't have but a couple.

DSCN4276.JPG DSCN4277.JPG
 
Looking good Bill, that's a respectable pile of chips. I also spy a replacement chrome hand wheel handle. What's up with your way covers though?
 
Looking good Bill, that's a respectable pile of chips. I also spy a replacement chrome hand wheel handle. What's up with your way covers though?

I have two CI handwheels that I will be fitting to the X and Y screw ends to get rid of these plastic wheels. I hate plastic wheels. For now, I just borrowed the handles so I can grab something other than plastic. :)

If you are referring to my Z axis cover, it is currently hanging loose until I can figure out how to remount it, or replace it with something different. As it came from the factory, it doesn't permit the head to get down all the way to the table or even my vise without compressing the cover and bending the bottom bracket all to heck. I don't like the reduced rigidity of extending the quill any more than I have too, and now that I have the DRO Z-axis scale on the head instead of the quill like the factory does it I no longer need use the quill other than for zeroing Z, drilling holes, or the infrequent plunge cut.

When I install the belt drive conversion I will be eliminating that drill press type rod and clamp on the front of the head/quill (at least the clamp currently does catch the slowly leaking oil from around the gear shift levers) and replace it with a much smaller aluminum ring that will attach to a digital scale for more accurate quill movements when I do need to use it.

It was fun making that pile of chips. :))
 
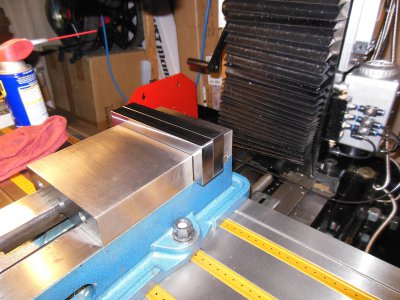
Soft jaws! Mild steel on the vise, with another pair of 6061 for when I need really soft jaws. :)

Having 6" jaws in a 5" vise works for me quite well. I don't have to deal with a overly large and heavy vise by having the 5 instead of the 6 but derive some of the benefits of the 6 by having the wider jaws. Best of both worlds to me. I'll put .1" grooves in them tomorrow.

DSCN4279.JPG

EDIT: Oh, and I found out today my belt drive conversion is being made right now. :thumbzup3:

DSCN4279.JPG
 
Back
Top