Setting-up the PM 1236-T Lathe

vtcnc, I am new to lathe work and greatly appreciate the heads-up!
I think your solution for the material extended a short distance through the headstock looks great and I'm sure will do the job safely. The stuff that will catch you off guard is proportionally longer and thinner. Here is an egregious example I posted some time ago that will give you a sense of what I'm referring to by using the term "bar-whip"

Bar Whip in a Lathe
 
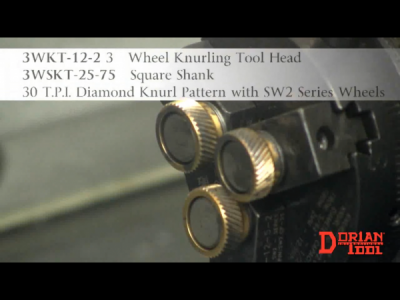
That video is frightening and is now permanently etched in my mind. I am hoping to knurl some 3/8" titanium rod with a Dorian 3-wheel knurling tool soon; a perfect candidate for “bar whip” since I will be knurling long, thin rod:
291174
I will definately keep the rod as short as possible after watching the video you linked in your last post

Sometimes the advantage of a Forum like H-M is not necessarily learning new techniques but learning from other’s mistakes. Thanks-TK
 
Last edited:
“Leveling” and a Discussion on Vertical Miasalignment

View attachment 285823

First of all, my favorite work shirt is pictured above. I will explain this picture more fully later but for now let me just say that I might possibly be the only man alive that has set himself on fire leveling a lathe. More on this later.

For a newbie like myself the term leveling creates a lot of confusion; it really is an untwisting of the lathe ways that uses a level to accomplish the untwisting. I am going to quote John.K again from the beginning of this thread because he said it so well:

A lathe does not need to be level in any axis............it makes no difference to the accuracy..................however being level means an accurate level measurement tool can then be used to check for bending or twisting of the bed,and such corrected .......and later on used to check for wear...........

The untwisting ended up being much more straight forward than I anticipated but I would recommend a time when you are not in a hurry. Also make your changes in very small increments. Although I think I mentioned earlier that it took a quarter turn of the jack screw, my notes indicate that it was only a one eighth turn; so be patient. It’s pretty satisfying when you get it just right.

I did the alignment a couple of different ways. Many sources say to put a precision level directly on the ways. Well, this does not work with the PM 1236-T because the v-ways are a different height and the level is too far out of level to be useful. I think you can see this with this picture:

View attachment 285841

I decided to take the compound off the carriage and place the level on the carriage. I liked this approach because you are not repositioning the level, which can produce errors and since the carriage is what holds the tool in position and is ultimately what determines the height of the cutting tool. I placed tape on the the lathe at four evenly spaced intervals and took readings with the Starrett precision level by moving the carriage to each position using the carriage. I was careful not to let the level change position. It really is surprising how exquisitely sensitive the machine level is. These are the steps I took:

1.) level precision level using the leveler on the casters at the headstock end
2.) take readings at positions 1,2, and 3
3.) adjust the jack screw at the tailstock end
4.) back to step 1

Here is my set-up and my results:

View attachment 285842

View attachment 285844

View attachment 285845

View attachment 285846

You can see that it took eight tries to get it to where I felt I couldn’t get it any better, which was under 0.0005”/foot for the length of the bed. I am going to stop here for a bit. I have a very important date with a three year old to go to “Little Mermaid”. I will tell you about the shirt later today but just let me say that it is a lesson in “the enemy of good is better” .

The problem with leveling using the surfaces on top of the carriage is that there is no way to know their relationship to the precision surfaces that contact the bed ways. The ways have two flats on them that are machined parallel to each other, placing something like 123 blocks on those flats and placing your precision level on them ensures that you are in fact leveling the working surface of the bed. As with anything there are multiple ways to skin the preverbal cat. You have obviously put a lot of thought and effort into how you are approaching the installation of your machine. In the end how it cuts is the most important thing.
 
Mikey, she sounds beautiful. You will have to send a photo sometime. By the way, I ordered a spare cross slide leadscrew and nut for my lathe and will adjust to zero backlash as you recommended. No such adjustment available for my compound though.

What I do on the compound, when I have it installed, is to keep it locked. I have found the compound is the weak link in all small lathes, Since you have a taper attachment and tailstock offset device you may consider removing the compound and making a cast iron block the height of the compound and mounting your QCTP to that and using a hard dowel to lock it into position square to the spindle axis. You would be amazed at the rigidity it adds
 
TDA, I agree with you, but I think you may agree that when using a very sensitive precision level moving the precision block and level from one spot to another can introduce some errors. When the level is on the carriage it is less likely to shift position slightly and affect your reading. As you read on, you will discover that I used a notched precision block to read directly from the ways. I was fortunate, and I think it is a tribute to PM, that the readings from the top of the carriage and the Ways agreed. You will see how it cuts later in the thread. Thanks for your input!
 
TDA, I agree with you, but I think you may agree that when using a very sensitive precision level moving the precision block and level from one spot to another can introduce some errors. When the level is on the carriage it is less likely to shift position slightly and affect your reading. As you read on, you will discover that I used a notched precision block to read directly from the ways. I was fortunate, and I think it is a tribute to PM, that the readings from the top of the carriage and the Ways agreed. You will see how it cuts later in the thread. Thanks for your input!

The plastic on the top of the precision level is there to insulate the level from changes due to heat from your hands. You can breath on one and watch the bubble move so HVAC, lights all that stuff effects them. Simply moving the level either by hand or by cranking the carriage causes the level to vibrate and it needs time to settle. As with all precision instruments they are fussy. As far as your notched block is concerned there are two issues. A) cutting that notch out would alter the precision surfaces and render it inaccurate unless it was re-ground after being altered. B) Using two blocks, one on each flat increases the distance between the contact points and therefore the accuracy of the level, and yes those levels are structurally made to be supported that way, is increased. Ive read the end and your lathe test cuts show it's well aligned, as I said earlier more than one way to skin the cat. There are many ways to look at things, in the end the test cuts and performance in parts production that meets the users needs is the goal.

I have a lathe that is made in the same factory as yours, (different importer), but essentially the same machine, but an earlier model. It cuts quite well with essentially the same accuracy you achieved. My goal was to get it here, get it cleaned up, aligned and making parts. Some mods were done but much less involved and much less expensive than what you did. Truck to running was about 10 days, which included a DRO install but no coolant. You enjoyed what you did and that's what matters, more than anything really; life is way too short to not make time for what we enjoy.

I spent years repairing and rebuilding machines, I wanted something in the shop that let me make parts and not be a project itself and that made me happy. Since then, I replaced the halogen light when I got tired of the heat on my hands, As my eyesight has faded further I want more light so thats on the list, as is a 3 phase conversion and VFD. Both dependent on the success of back surgery #7. We are not far apart, if you are out my way or looking for a trip you are always welcome for a shop tour, what Im sure would be an enjoyable conversation, and a beverage or two. In the mean time, enjoy your machine!
 
TDA, all good points. You are probably correct that the 2-4-6 block is no longer accurate but it was a very inexpensive block and as long as it gave me reproducible results I was OK with sacrificing it for the cause.

Thanks for the invite to Hartford, I may take you up on the offer and let me know if you are ever in Milwaukee, I might be able to scrape-up a beverage or two also.

Good luck with your back surgery!
 
Thanks, surgery is done its the long wait to see if it actually helps when all is healed and I get to give it a fair test drive. My docs are all in Milwaukee so depending on where you are I'm there on a semi regular basis. Let me know if I can help with anything and have fun with the lathe and the grand daughter. Great thing about grandkids, nieces and nephews is you can spoil them and then send them home.
 
Thanks for the sound level information, @Titanium Knurler that’s very helpful! I’m currently trying to decide between a variable speed lathe, or a geared head lathe.

Apart from the added weight of a geared head lathe, my concern is whether it’s significantly more noisy than a variable speed lathe. Your helpful measurements suggest not.
 
Back
Top