

-
Welcome back Guest! Did you know you can mentor other members here at H-M? If not, please check out our Relaunch of Hobby Machinist Mentoring Program!
You are using an out of date browser. It may not display this or other websites correctly.
You should upgrade or use an alternative browser.
You should upgrade or use an alternative browser.
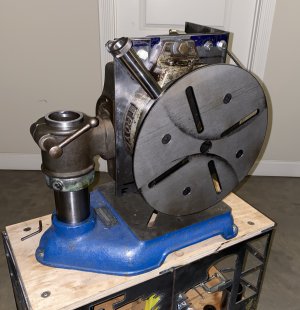
Repurpose old rotary table as welding positioner.
- Thread starter Tmate
- Start date
I posted this a while ago
 www.hobby-machinist.com
Welding Positioner
Not really a day project more like a couple of weeks. This is my latest project, a welding positioner. I have a shaft and sprocket to weldup and I thought it would be a nice project. I checked the cost of a commercially available unit, but the prices are ridiculous. So why not attempt at...
www.hobby-machinist.com
- Joined
- Jul 15, 2020
- Messages
- 421
Interested in how that motor works out, I’ve been eyeballing that setup for a project.
Got the motor and hooked it up. Runs quietly and smoothly. I'm working on a mounting bracket for it now.
Attachments
- Joined
- Jul 15, 2020
- Messages
- 421
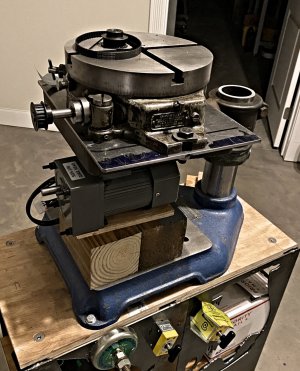
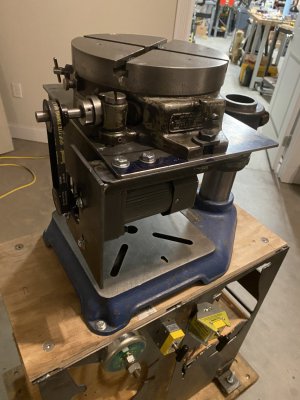
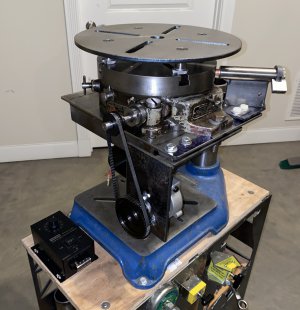
Finished up the rotary positioner today. With the timing pulley arrangement as shown, top of the table has a speed range of zero to 1.5 rpm. An almost infinite combination of pulley sizes are available to adjust the speed range. Of course, the optimal table rpm varies with the diameter of the piece being welded.
Attachments
- Joined
- Jul 15, 2020
- Messages
- 421
Status report on positioner project:
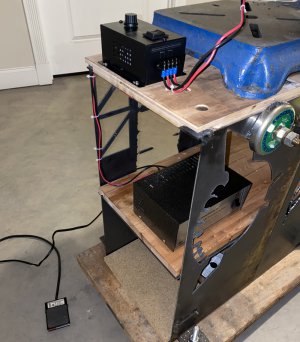
The motor shown above ran fine, but had to have a wiring change to run in reverse. Also, the capacitor didn't like it when you turned it on at a pre-set speed, ruling out the use of a foot pedal.
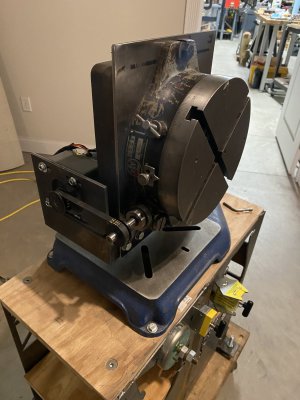
I went with a variable speed DC motor from Motormakers. It had a slightly slower top speed, but I was able to make up for it with a different timing pulley ratio. I used an 8 amp Radio Shack power supply and a speed control i picked up from Amazon. The setup works fine with my foot pedal.
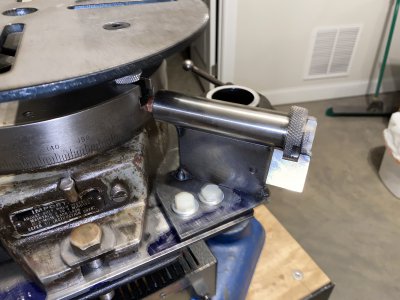
The ground is connected to a spring loaded brass rod (brush) that rides against the edge of the table on the work side of the bearings. The bracket that holds the rod is insulated from the rest of the unit via nylon bolts, with nylon washers between the bracket and the plate below it. Ground cable is either bolted to the vertical flat part of the bracket or clamped to it.
The brass rod, spring, etc. can be accessed from the rear without having to remove the bracket.
My first attempt with the positioner is pictured below. Travel speed was probably a bit low. I'll have to play around with it to get the feel of it.
The motor shown above ran fine, but had to have a wiring change to run in reverse. Also, the capacitor didn't like it when you turned it on at a pre-set speed, ruling out the use of a foot pedal.
I went with a variable speed DC motor from Motormakers. It had a slightly slower top speed, but I was able to make up for it with a different timing pulley ratio. I used an 8 amp Radio Shack power supply and a speed control i picked up from Amazon. The setup works fine with my foot pedal.
The ground is connected to a spring loaded brass rod (brush) that rides against the edge of the table on the work side of the bearings. The bracket that holds the rod is insulated from the rest of the unit via nylon bolts, with nylon washers between the bracket and the plate below it. Ground cable is either bolted to the vertical flat part of the bracket or clamped to it.
The brass rod, spring, etc. can be accessed from the rear without having to remove the bracket.
My first attempt with the positioner is pictured below. Travel speed was probably a bit low. I'll have to play around with it to get the feel of it.
Attachments

- Joined
- Oct 7, 2020
- Messages
- 2,116
Good job! That looks really nice and darn handy to have on top of that.
- Joined
- Feb 1, 2015
- Messages
- 9,626
Looks great! One useful addition would be a foot controlled potentiometer for hands free speed control.

 www.adafruit.com
Foot Pedal Potentiometer - Sewing Machine Speed Controller
We've had a foot pedal switch in the store for a while but some people have contacted us asking if there was a way to retrofit it to perform variable speed control, like a potentiometer. ...
www.adafruit.com

- Joined
- Apr 23, 2018
- Messages
- 6,568
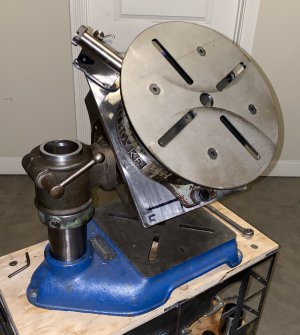
What type of production are you doing with the torch holder? Obviously it will take some tweaking to get the bacon sizzling right, so it seems production-oriented. Looks much more like a rotary positioning table now, with the multi-angle setup.
Now I have one more important question to ask the seller when shopping for rotary tables...
I would not dismiss the need to protect your bearings. Electric arc does crazy stuff to bearings, none of which is as good as the original mirror finish:


Now I have one more important question to ask the seller when shopping for rotary tables...
I would not dismiss the need to protect your bearings. Electric arc does crazy stuff to bearings, none of which is as good as the original mirror finish: