Quick Carriage stop

an e-stop can be included in a carriage stop, but obviously it will be a bit more complex as it needs to shut off and brake the spindle/gears immediately.

That said - for threading control you can do one of the following to avoid running into a shoulder:

1. cut a relief cut at the end of the threaded part so you don't have to thread all the way to the shoulder
2. thread from left to right (carriage moves from headstock to tailstock) - that way you start at the shoulder, and never have to worry about hitting anything. keep in mind to stay with a LH or RH thread you would need to position the cutter accordingly when moving in "reverse"

A third way to do this is to stop the lathe and turn the chuck by hand. (you can make a hand crank for the spindle for this) I prefer a relief when possible. And of course there is always use a Die.
Yes this is soley for use manualy I do power feed up to it but then I go by hand. Thanks to all for the possitive feed back.
 
100_0359.JPG

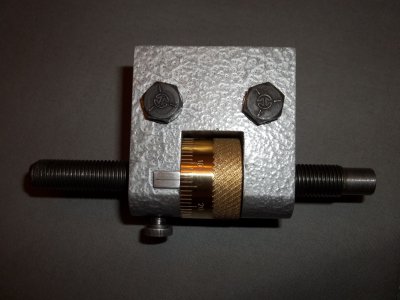
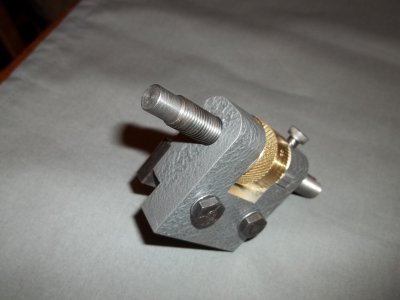
I made one for my Atlas lathe with a brass dial I also made a lock on the shaft so I don't bump it and change my setting.. Ray

100_0359.JPG
 
A couple of nice carriage stop mark and Ray.

Ray-how did you do the engraving of the numbers and lines on your brass nut? How did you do the hammered finish?
Michael
 
Please forgive a stupid question but how does this work? It would seem to me the right way to do it would involve an e-stop switch. I am obviously needing to learn more on this because I need one too.

Basically you set up a stop to cut a shoulder on a shaft face. Specially if you are cutting several copies of the same part. Also useful if your lathe dosen't have a carriage clamp to lock it in place. I probably confused you by now, sorry.

- - - Updated - - -

A couple of nice carriage stop mark and Ray.

Ray-how did you do the engraving of the numbers and lines on your brass nut? How did you do the hammered finish?
Michael

The finish looks like krinkle paint. Some tool-boxs are also painted like that too. You can get paint that when it dries looks like someone took a ball-pein hammer to it too.
 
A couple of nice carriage stop mark and Ray.

Ray-how did you do the engraving of the numbers and lines on your brass nut? How did you do the hammered finish?
Michael

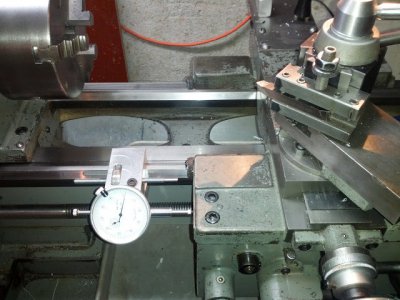
Hey Michael, you left Sharon out, that was the one with the nice indicator. I like that and it is in the work for mine I left extra meat on the body so I could make additions if I want.
 
You're right. I did inadvertently leave Sharon out. Sorry.
Suffice to say they are all better than the one that I've got. Which is none. I had one for my previous lathe but haven't had a chance to make one for the new machine.
Michael
 
100_0360.JPG
A couple of nice carriage stop mark and Ray.

Ray-how did you do the engraving of the numbers and lines on your brass nut? How did you do the hammered finish?
Michael

I have an indexing head on my lathe I borrowed a carrage stop from a friend ground a cutter to a point and set in scribbing the lines. The numbers are 1/16 stamps I got from Grizzly. The paint is hammertone paint by krylon I really like there paint it takes a couple days for it to completely dry but after it is a couple weeks old it is tough as nails and stays put

100_0360.JPG
 
Last edited:
Another job to add to my to do list.It just grows and grows >:shrugs:
 
I've made a very similar stop for my Hercus AR (Southbend 9 inch clone) but I included a micrometer head for precise adjustment. It makes turning square shoulders a breeze. I would love to have an auto disengage feature for the power feed too but for the moment I'm doing OK with hand-eye coordination and finish the last little bit by hand.

Moe
 
Back
Top