- Joined
- Dec 28, 2021
- Messages
- 17
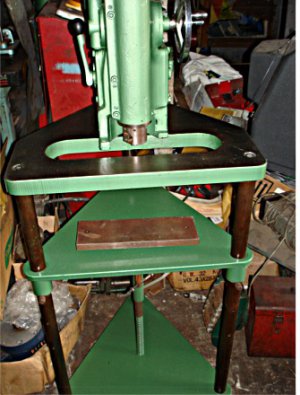
A couple of months ago I bought a nice old Van Norman 944 boring bar , complete and in great shape. I'm no stranger to this type of equipment , my reason for purchasing this is , as a career and as a hobby , I rebuild engines , primarily motorcycle engines , rather than outsource cylinder bore work , I've decided to equip my workshop to do this in house. In addition to the Boring bar a couple of months ago , in 2020 I bought a used Sunnen Honing machine and have been outfitting it since then to equip it for doing several types of bore sizes , bushings , rod fitting etc.
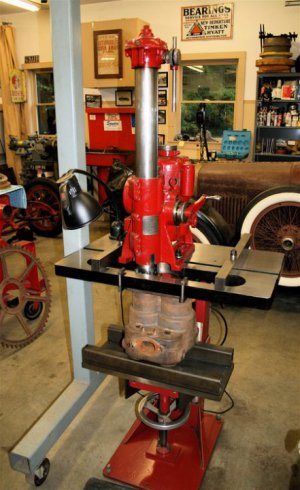
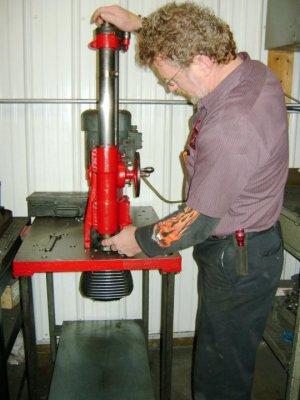
In the past I've worked at a few shops that do engine machining , re-bores , valve & seat work , crank rebuilding , at those places , I was the guy that did much of that kind of work . I'm semi retired at this point and over time have been equipping my home workshop to expand my capabilities to include precision cylinder boring & honing . When boring motorcycle cylinders , most of those engines have removable cylinders that need to be mounted in a stand or fixture of some kind and a portable boring bar is then used to re-size the bore . Smaller , more compact cylinders can be bored out using a bench mounted boring bar such as a boremaster , I've worked at a couple of shops that have those machines too.
I have been trying to find a used boring bar stand for a few months now , knowing that this was not going to be easy to find , my back up plan was to build one , so that is what I am going to do.
I started by finding a slab of steel , 15 1/2" X 15 1/2" X 1 5/16" thick , it was torch cut on two sides but roughed in to the size I wanted as a top for the table.
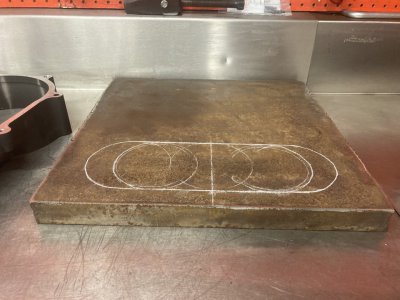
I used one of the milling machines at work to square up & surface the "chunk"
View attachment IMG_1261.MOV
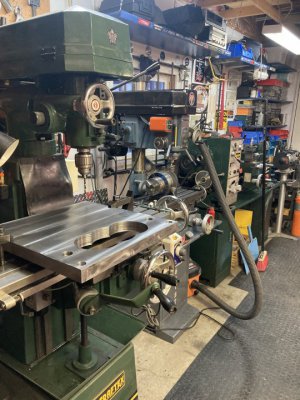
At this point I could take it home to finish it on my smaller machines , I have a mill / drill and a small knee mill . The mill drill can be run slow enough to bore a hole with a hole saw , don't laugh guys , some of you are not gonna believe this but I used a hole saw to cut two 4 1/4" holes and a 4 1/2" hole in this plate , which is now , after being surfaced on both sides , is 1 1/4" thick . I took my time ( lots of it ! ) and I wasn't cheap with the cutting fluid . The hole saws survived ! and can be used another day.
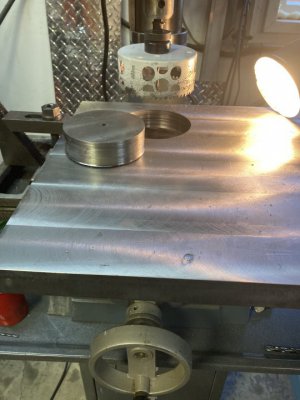
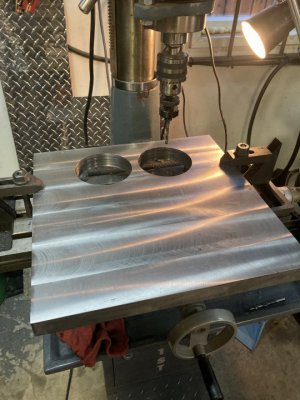
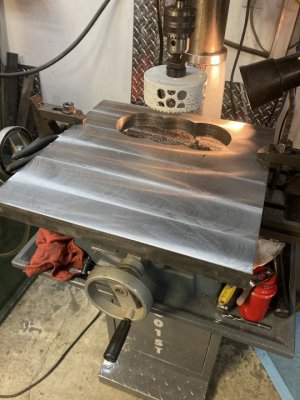
I moved over to the knee mill for the next bit , which consisted of , drill and thread two holes for the jacking mechanism that will be below the table , drill three holes and thread them , for the hold down / anchor bolts that hold the boring bar to the table , and then drill / counter bore the four corners to attach some legs.
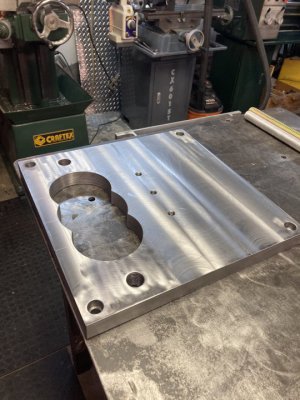
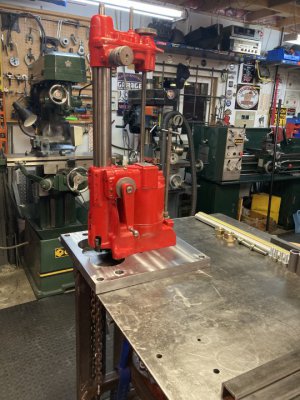
As of today , Jan 1st 2022 , This is where the project is . I've prepped some pieces and I have to buy some more steel tubing for the base .
I've got some pieces of 1 1/2" x .188" wall tubing cut for legs , there are going to be some 1" square stock pieces that will be drilled and threaded then welded into the tubes that make up the legs . Those will be bolted to the bottom of the table with 1/2" socket head cap screws , where I have counter bored the table on the four corners.
I'm still finalizing the design for the base and the clamping arrangement that will hold the cylinders up against parallels under the table .
All of this is a work in progress and I will be updating this thread as I proceed with the project over the next few weeks.
In the past I've worked at a few shops that do engine machining , re-bores , valve & seat work , crank rebuilding , at those places , I was the guy that did much of that kind of work . I'm semi retired at this point and over time have been equipping my home workshop to expand my capabilities to include precision cylinder boring & honing . When boring motorcycle cylinders , most of those engines have removable cylinders that need to be mounted in a stand or fixture of some kind and a portable boring bar is then used to re-size the bore . Smaller , more compact cylinders can be bored out using a bench mounted boring bar such as a boremaster , I've worked at a couple of shops that have those machines too.
I have been trying to find a used boring bar stand for a few months now , knowing that this was not going to be easy to find , my back up plan was to build one , so that is what I am going to do.
I started by finding a slab of steel , 15 1/2" X 15 1/2" X 1 5/16" thick , it was torch cut on two sides but roughed in to the size I wanted as a top for the table.

I used one of the milling machines at work to square up & surface the "chunk"
View attachment IMG_1261.MOV
At this point I could take it home to finish it on my smaller machines , I have a mill / drill and a small knee mill . The mill drill can be run slow enough to bore a hole with a hole saw , don't laugh guys , some of you are not gonna believe this but I used a hole saw to cut two 4 1/4" holes and a 4 1/2" hole in this plate , which is now , after being surfaced on both sides , is 1 1/4" thick . I took my time ( lots of it ! ) and I wasn't cheap with the cutting fluid . The hole saws survived ! and can be used another day.


I moved over to the knee mill for the next bit , which consisted of , drill and thread two holes for the jacking mechanism that will be below the table , drill three holes and thread them , for the hold down / anchor bolts that hold the boring bar to the table , and then drill / counter bore the four corners to attach some legs.


As of today , Jan 1st 2022 , This is where the project is . I've prepped some pieces and I have to buy some more steel tubing for the base .
I've got some pieces of 1 1/2" x .188" wall tubing cut for legs , there are going to be some 1" square stock pieces that will be drilled and threaded then welded into the tubes that make up the legs . Those will be bolted to the bottom of the table with 1/2" socket head cap screws , where I have counter bored the table on the four corners.
I'm still finalizing the design for the base and the clamping arrangement that will hold the cylinders up against parallels under the table .
All of this is a work in progress and I will be updating this thread as I proceed with the project over the next few weeks.
Last edited:


