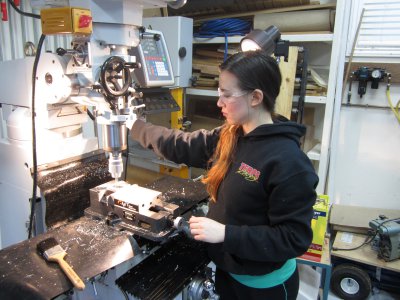
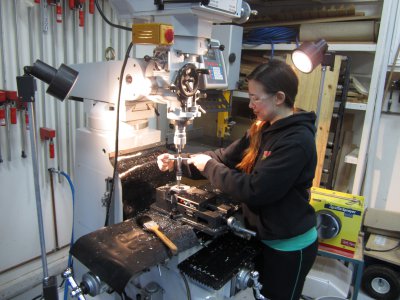
I have had my mill now for close to two months and have been making changes to my machining area as I go. The first thing I needed to work on is lighting. The two car garage stall where my "toys" reside has 6 four bulb fixtures in the ceiling. The problem is my ceiling is 12' tall and the actual light intensity on the mill is ok but not great for close work. I didn't order the halogen light with the machine because my area just gets too hot. in the summer. My preference was LED lighting so I prototyped a couple of floor standing LED lights.
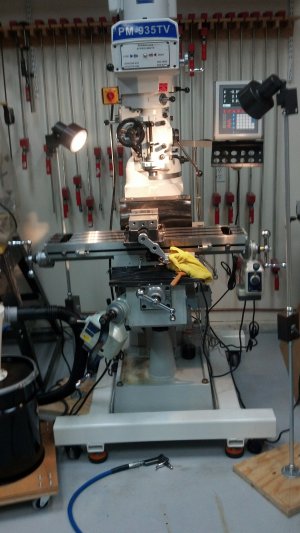
I picked up two PAR38 LED spot light bulbs from Costco for around $15 dollars each and cobbled this together with some outdoor fixtures, EMT tubing, and outdoor receptacle boxes. The stands are 14" x 14" double stacked pieces of scrap plywood with galanized plumbing flanges bolted on. The only change I have done so far is cut the height on the rear light by roughly 9 inches. Each of the bulbs puts out 950 lumens of cool light. The color temperature seems to be right where halogen is. I eventually rebuild the setup out of aluminum but it's good enough for now. The nice thing is I can use the fixture elsewhere in the garage if required.
I started out cleaning up around the mill with an old Lowes mini shop vac. The filter was always clogging up with chips and oil. Several folks have used Oneida Dust Deputies and have been very happy with them so I decided to try one. Most folks think the home cyclone vacuums are a new thing but they have been used for years in industry. So I decided to build my "chiperator" for cleaning up in the shop area.
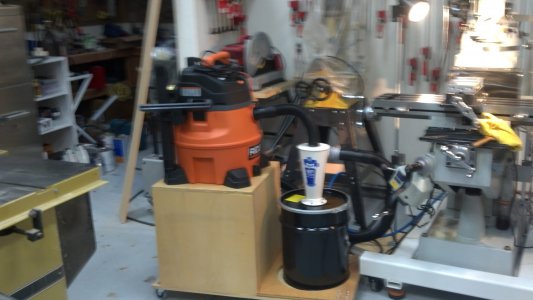
I built a plywood platform with casters to hold the setup. The 10 gallon metal dust deputy sits on the 3/4" plywood base and is held in place by a second layer of plywood with a hole cut in it. I purchased a Rigid 1450 shop vac as a vacuum source. The shop vac is mounted on a plywood box to reduce the number of bends on the vacuum hose to the Dust Deputy. The box also functions as a storage area for the vacuum hose. I mounted the shop vac to the box using the screw holes for mounting the feet to the vac. This thing works great. Almost all of the oil and chip debris ends up in the can. The only things that seem to make it back to the vacuum are sheets of paper and an occasional shop towel.
-Joe


I picked up two PAR38 LED spot light bulbs from Costco for around $15 dollars each and cobbled this together with some outdoor fixtures, EMT tubing, and outdoor receptacle boxes. The stands are 14" x 14" double stacked pieces of scrap plywood with galanized plumbing flanges bolted on. The only change I have done so far is cut the height on the rear light by roughly 9 inches. Each of the bulbs puts out 950 lumens of cool light. The color temperature seems to be right where halogen is. I eventually rebuild the setup out of aluminum but it's good enough for now. The nice thing is I can use the fixture elsewhere in the garage if required.
I started out cleaning up around the mill with an old Lowes mini shop vac. The filter was always clogging up with chips and oil. Several folks have used Oneida Dust Deputies and have been very happy with them so I decided to try one. Most folks think the home cyclone vacuums are a new thing but they have been used for years in industry. So I decided to build my "chiperator" for cleaning up in the shop area.

I built a plywood platform with casters to hold the setup. The 10 gallon metal dust deputy sits on the 3/4" plywood base and is held in place by a second layer of plywood with a hole cut in it. I purchased a Rigid 1450 shop vac as a vacuum source. The shop vac is mounted on a plywood box to reduce the number of bends on the vacuum hose to the Dust Deputy. The box also functions as a storage area for the vacuum hose. I mounted the shop vac to the box using the screw holes for mounting the feet to the vac. This thing works great. Almost all of the oil and chip debris ends up in the can. The only things that seem to make it back to the vacuum are sheets of paper and an occasional shop towel.
-Joe


