On VN-12 How are the dove tails of the ram lubricated?

Evan,

I'm sorry that I haven't been able to keep up with you. Hopefully you still have the table off, as there are several things about the lube system that you should check.

I think it's best to have the table gib out when removing or installing the table. I also have some suggestions on how to use your lift to install the table.

Let me know where you're at.

axe,

I don't see a problem using a impact tool on the bearing retainers. If I have one that turns out to be tough to remove I'll probably build some sort of tool that uses a deep well impact socket as part of the pin wrench. However, I wouldn't go nuts using it. I would soak everything down with a good penetrating oil (WD40 is not a good choice) and give it a few bursts with the impact tool. If that didn't break it loose, I would soak it down again, wait 24 hours and repeat. Eventually it will come loose. Heating the casting with a heat gun or quartz light might help as well. Soak with penetrating oil; heat; cool; soak; wait; heat; try impact wrench; soak; wait; repeat...

Cal
 
You caught me at the right time. The table is still upside down on the work bench. I did put the saddle back on, but I did not adjust the gib so it would be very easy to remove again. Thanks for taking the time to educate us on the workings of the VN-12.

Evan R.
 
axe, Good point on the penetrating oils. It’s a good idea to check the MSDS before heating something that you’ve used them on.

Evan,

There are 4 lubrication points on the saddle:

In the front of the saddle, in the middle is a screw that should be stamped ‘OIL’. That oils a hole that leads to the cavity on the bottom of the saddle. You need to make sure it’s not plugged by blowing through it with brake parts cleaner. I pulled a 2” long plug of congealed oil out of one.

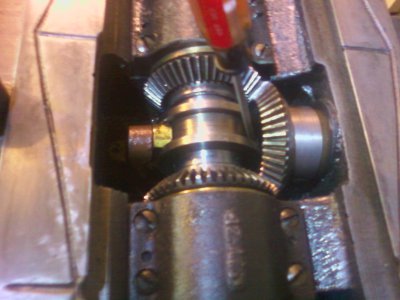
On the back of the saddle near the right rear corner is an oil cap that oils the feed gear bearings. The cap leads to a horizontal passage along the back of the saddle. There are 3 holes drilled down at an angle from the passage that lead to the bottoms of the big sleeve bearings for the feed gears. The passage also intersects the stub shaft for the center bevel gear, lubricating the gear via oil passages cut into the shaft. These oil passages are easiest to check when the gears are out.

gotta run, more later…

Cal
 
VN-12 Saddle and Table Lubrication, cont.

Saddle lubrication points, continued:

The next two lubrication points have to do with the feed drive worm.

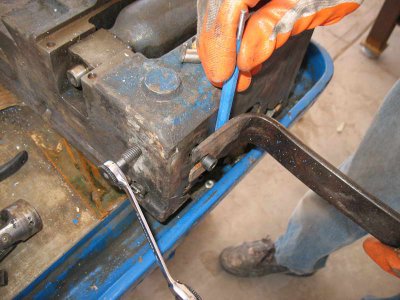
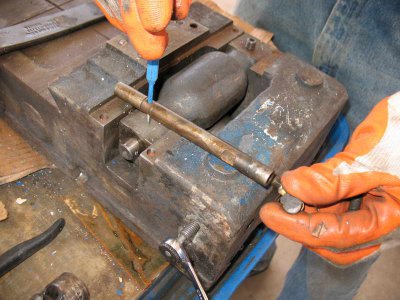
The oil cup on the right side of the saddle, towards the rear, provides oil for the worm’s rear bearing and (IIRC) keeps the oil sump for the worm full. Like the bevel gears, the worm is supposed to run in an oil bath. The oil cup is actually in the end of a tube that forms the pivot for the rear end of the worm housing. To remove the worm housing you need to back out a set setscrew on the back of the saddle. You can then pull the tube by threading a bolt into it and drawing it out. I think the thread in the tube is either 5/16-24 or 3/8-24; anyway, whatever it is, it’s a fine thread (UNF).

The other worm lube point is on the front of the worm gear housing. If you push on the button in the center you will find that it’s spring loaded, like a large ball oiler. You just push it back and squirt oil in. This oils the front bearing and may supply oil to the worm reservoir.

It’s probably a good idea to pull the worm housing and give it a good cleaning. It’s likely to have trapped dirt and swarf over the years.

Two other lube points on the saddle (which I forgot about earlier) have to do with the cross-feed drive shaft. The oil cup on the little U-shaped casting that sits above the universal-joint on the front end of the drive shaft, just drops oil onto the U-joint. There is usually also an oil fitting on the yoke of the U-joint itself.

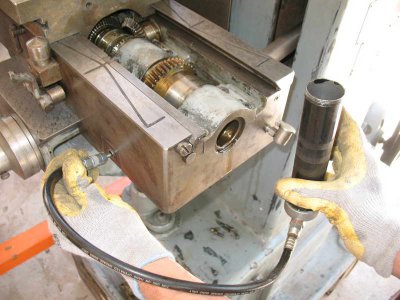
For an oil gun, I use a small grease gun, held upside down, with a hose and a Lubrimatic Needle Point Adapter from Ace Hardware:
http://www.acehardwaresuperstore.com/components/com_virtuemart/shop_image/product/316361.jpg

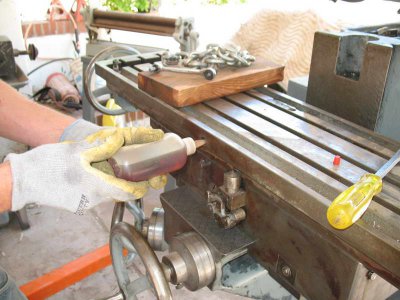
The table has one lube point: There is another “OIL” screw on the front of the table, in the center. The hole is drilled across the table casting from front to back and supplies oil passages on the front and back ways. You should also blow this passage clear with brake parts cleaner to flush out any debris.

Cal

IMG_8580.jpg IMG_8583.jpg IMG_9246.jpg IMG_9249.jpg
 
Thanks for all the info and pictures. Glad you caught me.

I caught the oil hole to the recess under the saddle. It was remarkably clear.
As you said, the tray under the feed gear was full of years of oil residue and swarf. I scraped and cleaned.

I got some brake cleaner and blew out the oil feed channels with it (main bearings, knee slide, and table dove tails). They seemed clear, but I made sure to "lather, rinse, repeat".

Now I have a helpful hint to give back. The small stub shaft that holds the back miter gear is held in by two flat head screws. You suggested to use a small copper wire to hook one of the screw holes and pull the shaft out. I tried this for 5-10 minutes and the shaft was just not moving.

I centered the dog clutch and pressed the center of the stub shaft by sliding a small screw driver down the groove of the dog clutch. The stub shaft made sucking sound as it popped out the back of the saddle. It was held in by a film of thick oil. Here is an-after-the-fact photo to make it clear:
Photo0417.jpg

Evan R.

Photo0417.jpg View attachment 95451
 
...

Now I have a helpful hint to give back. The small stub shaft that holds the back miter gear is held in by two flat head screws. You suggested to use a small copper wire to hook one of the screw holes and pull the shaft out. I tried this for 5-10 minutes and the shaft was just not moving.

I centered the dog clutch and pressed the center of the stub shaft by sliding a small screw driver down the groove of the dog clutch. The stub shaft made sucking sound as it popped out the back of the saddle. It was held in by a film of thick oil. Here is an-after-the-fact photo to make it clear:
View attachment 42230

Evan R.
Evan,
I've been meaning to get back to you on this and thank you for the great tip. :thumbsup:

Did you get everything back together?

Cal
 
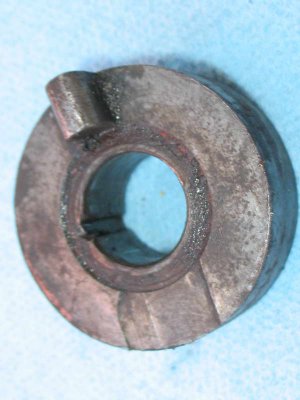
on your dog clutch for the left hand wheel with the graduated dial, are there two "nubs" for the hand wheel to engage with, or just one? from the exploded diagrams it looks like there are supposed to be 2 teeth spaced 180 degrees apart. from your picture though it looks like you only have one. my machine only has one, but it looks like the other was sheered off, not sure though. any help is appreciated thanks
 
on your dog clutch for the left hand wheel with the graduated dial, are there two "nubs" for the hand wheel to engage with, or just one? from the exploded diagrams it looks like there are supposed to be 2 teeth spaced 180 degrees apart. from your picture though it looks like you only have one. my machine only has one, but it looks like the other was sheered off, not sure though. any help is appreciated thanks
The only one that I've had apart had just one lug on the male part. There are machining marks on the opposite side, but that may be original.

IMG_8333.jpg

Cal

IMG_8333.jpg
 
Hello All,

Sorry to disappear for so long. Long story that would bore all of you...

Cal, I got everything back together. I had to use a motorcycle lift and some packing to get the table up and mounted. I've used the mill a few hours and it is a joy.

I am a novice, my only other experience has been on a Smithy 3-n-1 machine. In steel I was used to taking 2-3 thou cuts if I wanted accuracy. At 10 thou, I would sometimes slip the mill head to the side. Anything above 10 chattered and risked braking the cutter. Aluminum was much easier to mill. (The lathe on the other hand is very nice 12x20).

In the VN-12, I took a 50 thou cut and the motor didn't even change tone. What a pleasure... Power feed what a pleasure...

I just moved my shop from a smallish 2 car garage to a large 3 car garage. I don't have it all back up and running yet. It will take me a week or two (or twenty) to get it back into shape. Oh yeah, the rest of the house came too, but after moving all the heavy equipment, it was almost an after thought.

I'll post pictures of my moving adventures later tonight.
 
Back
Top