New Enco 12 x36

do you have any way to lightly face the back of the 3 jaw where it registers against the backplate? I'm not sure how accurate reading off the side of the chuck is in determining run out as it could be several thou out and a test bar could still run perfectly true. Can you mount decent sized true bar in a 4 jaw (even on your 9x20) then stick your 3 jaw on backwards onto the bar, holding on with the jaws? You can then read off the back and the side of the chuck.

At present it sounds that your jaws are not parallel with the bed/ spindle. Could be that your jaws are cocked in the chuck body or that the back of your chuck isn't perpendicular to the spindle. Theoretically, facing the back of the chuck should cure both of those possible problems. I was contemplating this self same problem on the ancient OE chuck that came with my ancient lathe - in the end I just bought a new chuck, although now I have to make a backplate for it..
 
I might try that on the 9x20. The only real good test bars I have right now are .500 x about 6" stainless. From a long ago company inventory reduction, should be ground and very precise as they were used in a chart recording instrument.

From a Q&D test by running the test indicator on sections of the chuck face, the chuck body may turn out to be pretty good. I took it apart and cleaned it good, wire brushed the scroll and jaw threads, oiled, etc. It operates much smoother now. I didn't bother to return the jaws to their original locations since none are marked and neither are the slots. I intend to center punch numbers on the jaws and move them around to see if there is a better position. If not, I think I'll be "porting" out the jaws. I have some long shank carbide burrs used for cylinder head porting, that might be worth a try. Or I'll have to fab a Dremel / die grinder mount like most people.

I have a 4 jaw that came with the lathe - I haven't even unpacked that one yet. This might be the time to check out the other chuck.
 
Out of curiosity, how does it spin the test bar after cleaning? Is it a cone shape or does it move the same distance/shape next to the chuck and 4" out?
Dave
 
Out of curiosity, how does it spin the test bar after cleaning? Is it a cone shape or does it move the same distance/shape next to the chuck and 4" out?
Dave

I'll check when I get home and report back here. I did something similar but "sloppy" and I think it was the same deviation, but I'll do a proper check and document. I see where you're going with that.
 
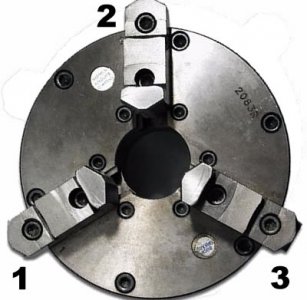
ChuckGraphic.jpg
Referring to the above picture - numbers are arbitrary and only for referencing indicator readings:

I put the .500 test bar in the chuck and found the lowest point using the test indicator on top of the bar. "Zero" came in between jaws "1" and "3". The indicator mount base is on the cross slide.

Reading next to the jaws:
Jaw1 - .0025
Jaw2 - .0065
Jaw3 - .0015

Moving out 4" using the carriage and dragging the indicator down the top center of the test bar, the test indicator read low by .001. I did not re-zero so as not to screw up the indicator, so I just took readings again and added back .001

Reading 4" out:
Jaw1 - .0025
Jaw2 - .0060
Jaw3 - .0015

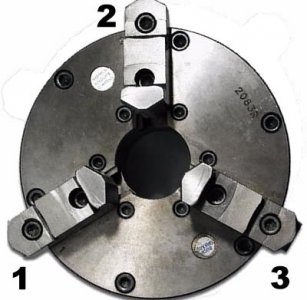
ChuckGraphic.jpg

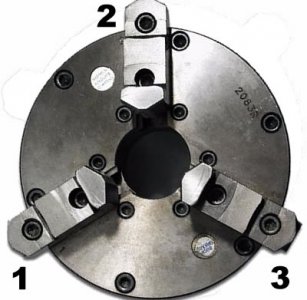
ChuckGraphic.jpg
 
Last edited:
So it seems the jaws are true enough and you just need to get the chuck centered to the spindle centerline. Ray C did a thread on fixing a 3 jaw that would be worthwhile. The jist of it is to have enough room in the mounting of the backing plate to the chuck so you can mount the backing plate to the chuck loose enough that once you get it on the lathe you can tap it until centered with the spindle centerline. The carefully remove the assembly and torque the backing plate down.

Dave
 
Hmm - I may have enough to do that already. Will test that theory when I get a chance. I didn't note (previous post) exactly where the outside of the chuck was .005 out, but that variation might be enough to bring it on center.

I did unpack the 4 jaw last night - looks pretty good but needs a good cleaning.
 
So I backed up a bit last night. I took the chuck and plate off and measured the spindle face. Looks in spec at .0005. I removed the pins from the chuck mounting plate to check the back side. I put a sheet of 400 grit wet/dry on the surface plate and soaked it with WD-40. Swirred the back of the plate around on that to make sure there were no burrs. Put it back together and mounted it. It takes an 11" breaker bar and a 3/8 extension to put enough torque on the cam locks to get a repeatable .0015 TIR on the face of the mounting plate. I tried all three positions and the original one was most repeatable, with effort. Once I could get the .0015 three times, I took a very light cut on the mounting face which brought it down to the .0005 of the spindle. So I think I did the best I could with the plate.

I lightly buffed the back side of the chuck on the surface plate to make sure it was clean and put it back on the plate. Ran out of time, and will try to work on it some more after the game tonight. Plan would be to tap in the chuck using the outside diameter then start rotating the jaws around to see what the various readings might be.

I was partially mistaken about the jaws - there is what appears to be a 4 digit part number on them. But where you'd expect to see a number there is nothing. And no stamped numbers or other markings anywhere on the chuck.

Ahh, you'll probably be back out there by the half. Brees is gonna light 'em up. Carolina's D has gone downhill this season.

BTW, good job on getting your RO down to spindle specs.
 
My 12 x 24 also came with a similar red can - but my oil can is smaller - maybe the can size is related to the lathe size?
 
Back
Top