New Cincinnati 1-B ToolMaster owner/masochist - spindle bearings question.

westcoastr

H-M Supporter - Gold Member
H-M Supporter Gold Member
Joined
Aug 30, 2021
Messages
37
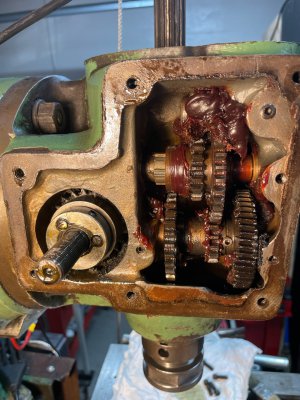
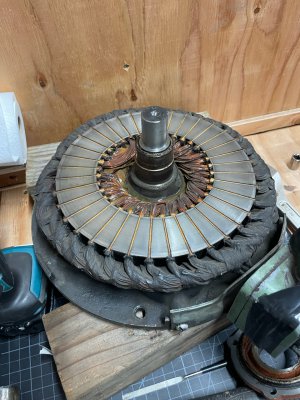
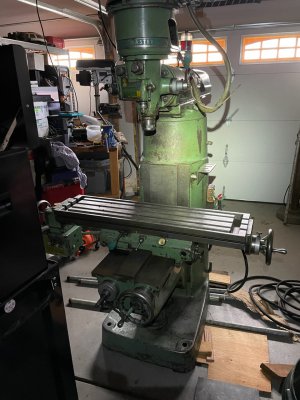
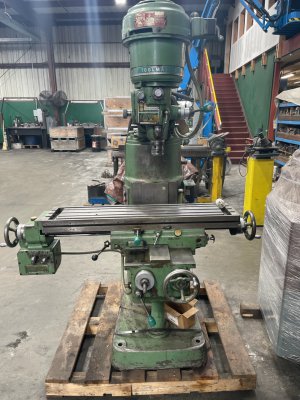
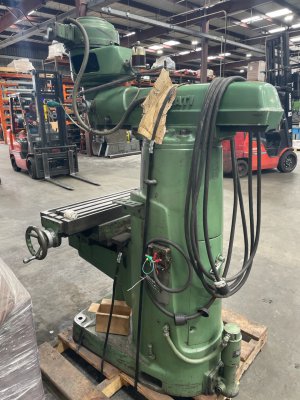
Well after years of "machining" metal without owning any machine tools, my shop (1.5 garage bays lol) is shaping up. Picked up a very nice Toolmaster (with collets!) that started its life making vacuum tubes for GE and then the maintenance department for 30-40 years for a factory making earthquake bolts. After running it for a few months I have the head completely apart to clean and fix any small issues. The spindle TIR was 0.0002" and basically everything works. Just inspecting, fixing seals, and cleaning the massive amounts of grease the previous owner injected everywhere (grease in an oil system drives me crazy).

Given the new look of the top spindle nut, I don't believe anyone has looked at the bearings since it was built in 1957. While it appears they are original New Departure bearings, and seem ok currently, I'm wondering if anyone has "upgraded" a Toolmaster to a 5-pack bearing stack like the BP boys have been doing (2 sets of duals at the bottom and a single at the top)? NOS bearings are cheap and will go that route for now, but wondering if there is a potential to make the Toolmaster "better-er".

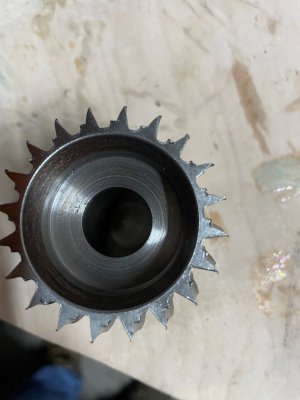
Over all the internals are in great shape, though the down feed clutch spiral gear has been worn down into a thing of real beauty (and is so sharp it will make a great blender blade). I bent the step pulley a little, buggered the quill stop jam collar (easy to turn on my lathe), and of course the quill spring is a Rube Goldberg contraption. But certainly can't complain. Not sure when I'll get to the inspecting the tables and lower parts of the mill, but I'll attack that when I figure out my permanent 3-phase plan (just running cheap VFD's for my machines currently).

Anyways, hope to share some knowledge, but mostly buffooneries. If anyone got a wild hair and added some extra bearings to their spindle, let me know!
 

Attachments

  • clutch auto downfeed spiral gear.jpg
    clutch auto downfeed spiral gear.jpg
    197 KB · Views: 13
Wow, that is one worn gear alright!

Sorry I have no experience or advice for your bearing questions.

You've been a member since 2021, but that's your first post.
Welcome to the group.

Brian
 
I’d fix what needs to be fixed and leave the rest alone.

We need some pics of the whole machine though ;)

John
 
Wow, that is one worn gear alright!

Sorry I have no experience or advice for your bearing questions.

You've been a member since 2021, but that's your first post.
Welcome to the group.

Brian
Yea my first machine was a Sheldon lathe, so I’ve mostly been on the Sheldon site….
 
I’d fix what needs to be fixed and leave the rest alone.

We need some pics of the whole machine though ;)

John
I wish I could follow that advice but I seem incapable. My OCD demands I take everything apart, causing more issues, and then let it sit in pieces for 6-8 years…

I really was about to start putting the head back together yesterday when I thought “wouldn’t it be nice to strip the paint off and repaint”?
 

Attachments

  • IMG_4127.jpeg
    IMG_4127.jpeg
    477.4 KB · Views: 21
  • IMG_4098.jpeg
    IMG_4098.jpeg
    465.2 KB · Views: 17
  • IMG_2502.jpeg
    IMG_2502.jpeg
    390.5 KB · Views: 18
  • IMG_2458.jpeg
    IMG_2458.jpeg
    465.5 KB · Views: 20
  • IMG_2459.jpeg
    IMG_2459.jpeg
    453.3 KB · Views: 22
Thanks for the pictures. I have a Toolmaster 1B as well. Mine has had a few PO changes so it is nice to see how things should be.

On the back, is that a coolant pump?

What collets came with yours?

I have no answer for your question and look forward to what you find out.
 
Thanks for the pictures. I have a Toolmaster 1B as well. Mine has had a few PO changes so it is nice to see how things should be.

On the back, is that a coolant pump?

What collets came with yours?

I have no answer for your question and look forward to what you find out.
Nice, I wonder how many of these are still out there….

Yes I’ve got the coolant pump (I believe 3 phase of course). I haven’t tried it yet. And not sure if I will, last thing I want is a sump full of rotting coolant if I don’t use it everyday. I run a Kool mist on my lathe and will prolly add one to the mill.

I got a decent set of collets. 3-4 “A” with the mini adaptor, and 10-12 full size “C” type. I could use a few more, but I might look into just using my ER40 chuck. Or if I really get crazy, converting to something else.

Regarding the bearings, I probably call some bearing houses and see what they recommend.
 
Great to see another Toolmaster, I'm a big fan. Is your down feed gear box intended to be grease lubricated? Mine is an oil bath (the quill feed quit, so pulled the down feed box apart - a little pin was sheared off). The machine is mostly original, the paint and finish are still in pretty good condition. Some of the little shifter knobs had been snapped off - it was a bit of a project to get that funny half hour glass shape. The new knobs worked out great (on my machine the originals are a black plastic) - the turquoise blue would have been hard to match.
 
So I don’t see anything in the manual about greasing the down feed. You literally add oil in the area so greasing wasn’t needed. But the previous owner greased it and the schmoo picked up all the metal filings and made a nice lapping compound. Huge mess.

I won’t grease the head except the motor, even the spindle bearings, they get oil as well. Oil is your friend, oil everything all the time.

I also need to fix a few handles and stops, but that will have to wait. I did install a DRO.
 
I wish I could follow that advice but I seem incapable. My OCD demands I take everything apart, causing more issues, and then let it sit in pieces for 6-8 years…

I really was about to start putting the head back together yesterday when I thought “wouldn’t it be nice to strip the paint off and repaint”?
Those bearings are better quality then you can buy today.
Do Not Spin (not at all) them without oil on them and NEVER with air.
Clean debur, clean, clean test each assembly.
.0002 is all you can hope for and is MORE than adequate.
 
Back
Top