- Joined
- Aug 15, 2014
- Messages
- 75
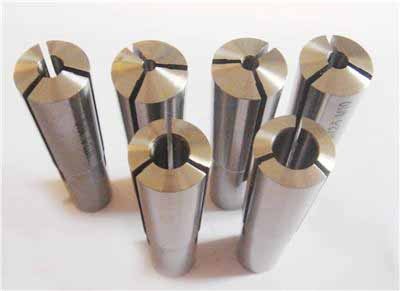
Just need a few more MT2 collets like these to fit the cutters you're using. They're pretty much one collet per cutter size. You'll be happier with that. The end of the collet will be pretty much flush with the end of your spindle and be much more rigid. Rigidity is something to always be striving for in machining. Might look like a big solid piece of metal you've got there, but it'll flex a surprising amount and cause more leverage to flex your machine.

Two of the most important things to learn is keep the cutter as close to the spindle as possible, and keep the area of cut as close to the vise top as possible (while still being able to make successive cuts and finish the job without unclamping it). Though the work holding part of it tends to be more of a "oh crap, it moved and screwed up the cut/cutter" instead of a "it's not cutting well" kind of thing.
This should also help. Feeding slower is no big deal, but try to get in the ballpark for the rpm/sfpm caluclation. http://www.custompartnet.com/calculator/milling-speed-and-feed
Here's a chart of common materials to get the SFPM from to feed into that formula: http://www.vm68.com/stuff/sfpm.html
The fundamentals are feed, speed, and depth of cut. Feed, handcranks. Speed, spindle rpm. Depth of cut, depends on the rigidity of your setup and the strength of the cutter, and will take some experience with your machine and setup to determine. Nothing wrong with smaller DoC as you're learning too, it'll just take more passes to get the job done. It'll take some practice to get a good feel for it.
I agree, the tool holders are probably reasonably hard, and that makes the challenge go up a few levels. I'd start with maybe 35 SFPM, so if I was using a 1/2" endmill, it would go something like this: (35 x 3.8) / .5 = 266 rpm for a high speed steel endmill. And then RPM figures into feed rate meaning the slower the cutter is turning, the slower you'll need to feed it. Making more tool holders from mild steel would be fantastic practice and a greater likelihood of first time success than trying to tackle an unknown steel in an unknown state.


