I had exactly the same problem. And, there was no original tool post. A file fixed it in a few minutes. The steel was kind of hard, but it seemed that as soon as the file started biting, it became much quicker. A square and a sharpie are helpful in fitting the nut.
-
Welcome back Guest! Did you know you can mentor other members here at H-M? If not, please check out our Relaunch of Hobby Machinist Mentoring Program!
You are using an out of date browser. It may not display this or other websites correctly.
You should upgrade or use an alternative browser.
You should upgrade or use an alternative browser.
Lit Milling Work Needed?
- Thread starter Kroll
- Start date
All that is required here is some material removed from the bottom of the T-nut. Everything else can be left alone. Just grind it off if necessary. A belt grinder with a 40 grit belt will make short work of that job.
"Billy G"
Look at the second fuzzy picture. It's hard to see but I think we are being shown there that the top doesn't fit ether.
B
Bill Gruby
Forum Guest
Register Today
Now that's a tough call. He would have to say it to know for sure.
"Billy G"
"Billy G"
- Joined
- Apr 23, 2011
- Messages
- 2,476
As many others have already stated and this is where a "machinist" comes into his own, don't buy, or pay someone else, to do what can be simply done yourself. There is much satisfaction to be gained from using your imagination, brain and tools to make something that works for you. "If" the narrower part of the T nut doesn't fit then it's not by much and a quick lick with a file would fix that. As far as the thickness goes then that could be fixed just as easily with a grinder, sander or file also. "If" Kroll really wants a machined finish to the bottom and doesn't have another toolpost then simply weld a suitably sized nut to a piece of flat bar and voila instant T nut.
And you have learned something along the way.
cheers Phil
And you have learned something along the way.
cheers Phil
- Joined
- Jul 26, 2011
- Messages
- 4,142
Ericc: your suddenly easy-to-file-part might have just had a superficial case hardening ala Asian= .002" deep!
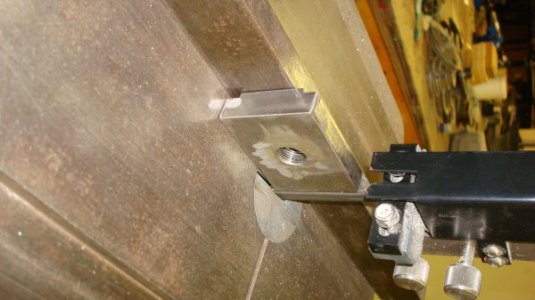
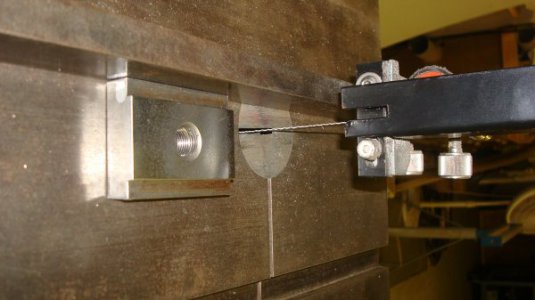
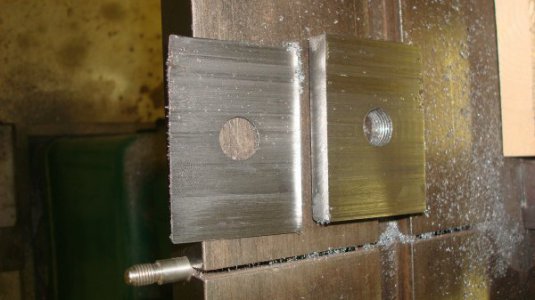
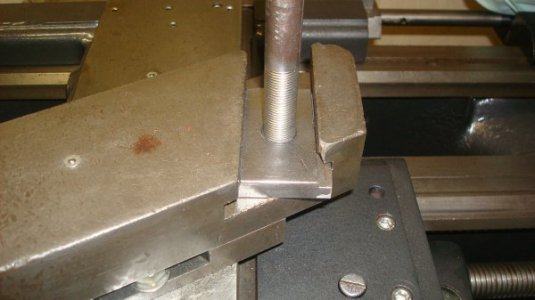
Guys what a positive turn out,the generosity here is what makes the forum the best there is.Membership trying to teach each other offering advice and offering their time and material.At the end of my day dealing with issues where I work,I come home and read all the post which put a big smile on my face,I just can't say thanks to all enough.Guys taking ya'll advice and figuring if I mess up my t-nut I have a fantastic back up plan(Ya'll) Like King said I was just so focus on those 4 sides I never gave the bottom side a though.So I took the advice and remove material off the bottom trying to keep it as flat as possible.So I removed about 1/16 off the bottom using my BS feeding it slowly.When the part got to warm to the touch,I would pull the part out,rub some of that Lube on the blade and start back.After that I did have to sand some off the bottom and remove alittle off the sides.It fits and does have alittle play up/down but that's OK.Daryl thank you again for offering to help out,guys heres some pics of what I did.Taking one step at a time----kroll 


- Joined
- Feb 2, 2013
- Messages
- 3,627
taste the victory! 

- Joined
- Sep 19, 2012
- Messages
- 3,063
The pages of telephone books are a good source also, tho they are getting scarce.Can't you just clamp it bottom side out in your 4 jaw chuck and turn the excess metal off with your lathe? Or maybe you have no other tool post? You could make a temporary nut to hold your tool post down. Just take a piece of mild steel that will slide into your T slot. Drill and tap a hole to accept the hold down bolt. Use it while turning down your real T nut. A slip of non clay paper under each side of the tool post will greatly help it to not revolve under pressure while cutting. A brown paper bag has no clay in the paper.
Sent from somwhere in east Texas by Jake!

