Just picked up a BP

Yes, the machine tags are sometimes an easy restoration. But to get them off is another story. Most of the time they are attached with drive screw fasteners/twist rivets. And those things are not intended to be removable. If you are not careful you can damage the tag in your removal process. I have tried a Dremel with an abrasive disc, worked kinda OK. But lately have found TIG welding a piece of metal on top of the rivet head so you can grab it better works the best for me. This is TIG welding small stuff, you may what to practice first! And try and remove the fastener just after you have welded the thing so it’s all nice and hot. And yes, with this technique, the paint will burn in your welding areas, so keep that in mind...Good Luck.
 
My welding skills are at best pathetic, so I may just have to live with it. I will try a q tip and see if I can get some of the green off the tag.

Go more paint on it today. The head is painted now along with the ram. Now I'm working on the column and base. I need to get some filler to fill the deep grinding makes on the base.


Dale,

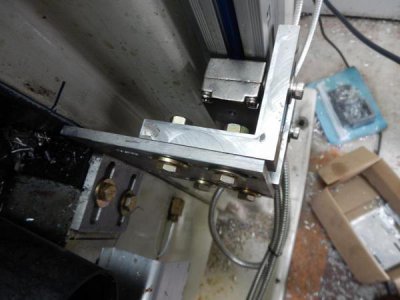
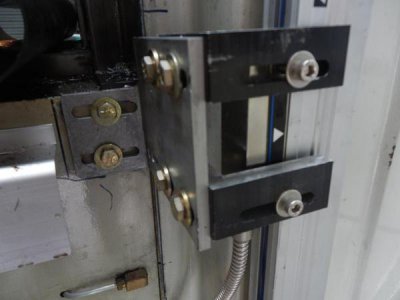
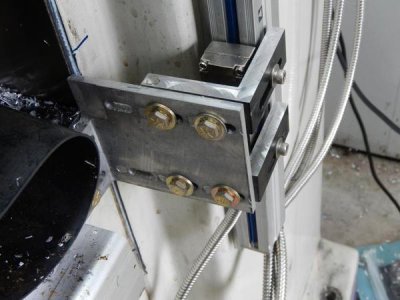
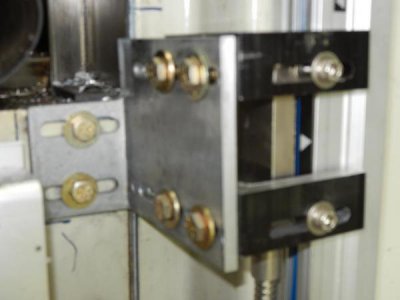
What did you do for the Z axis scale mounts? I'd love to see what you came up with. I don't need to reinvent the wheel, so if you happen to have pics of your install that would be very helpful and give me a starting point.
 
View attachment 79731View attachment 79732[/QUOTE]

Hi alloy,

You are doing a great job! I have to ask about your Kurt swivel base. It was SO rusty before. How in the heck did you get it SO clean? You did a really amazing job! The divisions and numbers are SO clear. Can you share any of your secrets? Thanks, Bob.
 
I used my glass bead cabinet. It was a siphon feed sandblaster, but I added a Harbor Fright pressure blaster and converted it to a pressure blaster.

Works pretty well. You have to stop and refill the pressure pot, but it's way faster than when it was siphon feed setup.
 
What size motor does your machine have? I wound up putting a 1.5 KW hitachi on my J2 and it works great :) Let me know if you need any help with programing or hooking it up. I went for a three-wire setup with Jog button for tapping and it works pretty good. One thing I HIGHLY reccomend is a braking resistor. I put one on mine after a couple of months and went from waiting ~30-40s for the spindle to stop down to 4-5s. The resistor will help keep the DC voltage inside the drive from getting too high during deceleration.

Another cool thing about the three wire setup is the ability to reverse the spindle just by changing the switch. The drive decelerates to a stop and then reverses, also great for tapping.
 
It has a 1 hp motor, 4.2 amps. I got this VFD off Ebay and the description says is comes with the braking resistor installed.

http://www.ebay.com/itm/331047068188?_trksid=p2059210.m2749.l2649&ssPageName=STRK:MEBIDX:IT


rdhem2 (Russ) kindly offered to help me wire it up. I bought a new rotary switch and picked up a potentiometer from Radio Shack, and Russ has a E-Stop switch. I've never needed to use an E-Stop on a manual, but it sure couldn't hurt to have it.

So is there a different braking resistor that I can put in the VFD, or is the one in it going to be able to slow the motor down? I will probably need help with programming after I get it up and running. For now I just want to finish the sanding and painting and get power to it and start making my Z axis scale mounts. I'm s tired of sanding, but another day or so and it will be done. I got some bondo last night at Walmart to try and fill the deep grinding marks on the base. I don't need much, just a skim coat.

Does anyone know how to get the knee shaft handle out? I pulled the handle off it, but the shaft turns just a little then stops. I'd like to be able to get it out and sand around the handle before painting.

I found this write up on a rebuild, it helps, but noting on removing the locking shaft. Not found of the yellow in the pics, not as bad as the green on mine, but the color sure grabs your attention :)

http://neme-s.org/Shaper Books/bridgeport_j1_head_2_0_01 Rebuild.pdf
 
The installed breaking resistor should do the job. It really depends on how fast you want to stop the motor. I think I have mine set for about 2 seconds. If you set the decel too low, it will trip the drive out no matter what resistor you use, and the resistor value is limited by the amount of power the breaking transistors will take.

When deceling the motor becomes a generator, and dumps power back to the DC bus on the VFD. The breaking transistors will only handle so much power, and when the DC bus voltage goes too high, the drive will trip out to save it's self, and the motor will then coast to a stop.
 
I used my glass bead cabinet. It was a siphon feed sandblaster, but I added a Harbor Fright pressure blaster and converted it to a pressure blaster.

Works pretty well. You have to stop and refill the pressure pot, but it's way faster than when it was siphon feed setup.

Thanks for the info alloy. I looked at the pressure blasters on the HF website. They are sized from 20 lb. to 110 lb. I guess the advantage of the larger ones is less time spent refilling. They look like a good way to go. Did you use any special blast media or just regular glass beads? Do you use a certain grit for everything or switch depending on the job at hand? Thanks!

Bob
 
I goth the 80lb unit at HF. At the time I didn't want the 110lb one, but now I wish I'd have gotten it. One word of advise, DO NOT get the HF blast cabinet. It's the biggest piece of junk I've ever seen. I spent two days putting it together and trying to seal it up from leaking. And All I got for my efforts was something that even when converted to a pressure blast setup was terrible. The light is a joke, the vent setup sucks all your media out with the vacuum. I finally (and thankfully) got $75 out of it. Good riddens. I picked up a commercial siphon cabinet and gave it a try. Even with my 18 cubic foot two stage compressor it was painfully slow. So I took the foot pedal off, ran my hose from my HF pressure pot and never looked back. I'm very happy with how it performs.

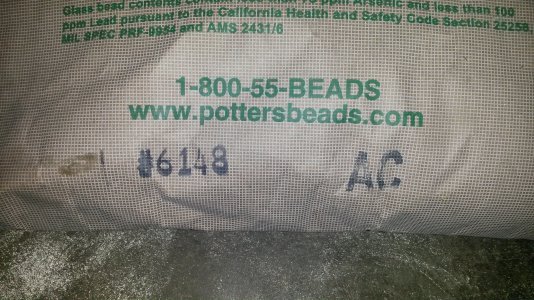
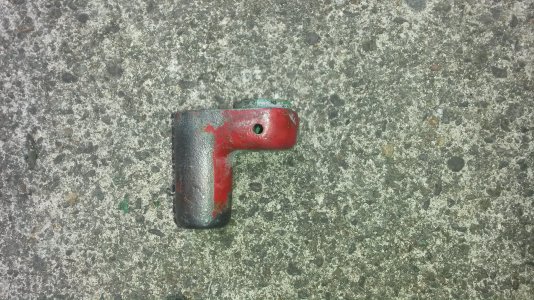
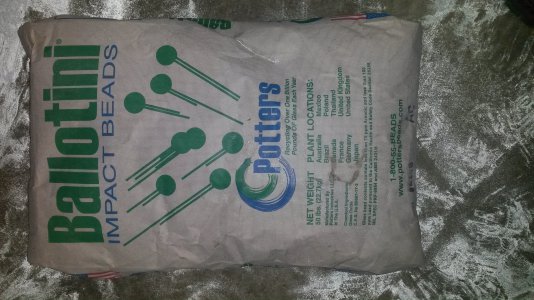
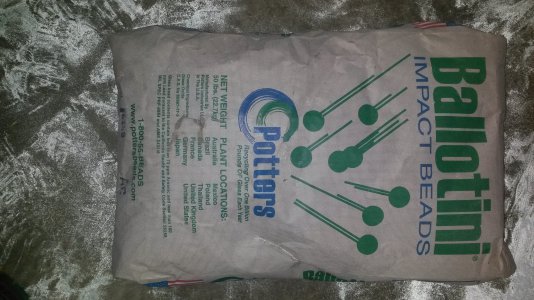
Her are pics of the glass beads I use. As I understand they aren't the finest grade, just a middle grade that cuts faster and gives a much nicer finish than the fine ones I was using. One some of the small prts like handles and nuts, bolt head I'm using a wire wheel on my bench grinder. Works pretty fast. You can see on the handle how it takes it off. I did this handle in about 2-3 minutes. I could have blasted them, but that would have taken much longer.

I got some primer on the column today, still have to do the bodywork on the base, get the knee sanded and primed. Then comes the power feed and motor. That's not going to be much fun. I'd like to take it off all together, but from what I read the lead screw is longer for this type of power feed. I will have no power to it, it's also 3 phase and it's just not worth it to me to buy a VFD for the feed unit.
20140719_103356.jpg20140719_103447.jpg20140719_105511.jpg

20140719_103356.jpg 20140719_103447.jpg 20140719_105511.jpg 20140719_103356.jpg 20140719_103356.jpg
 
Dan,

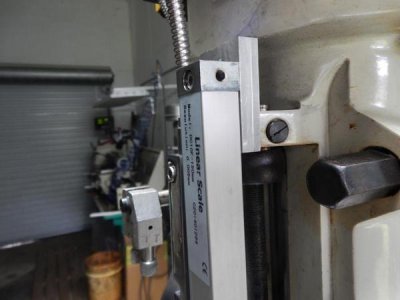
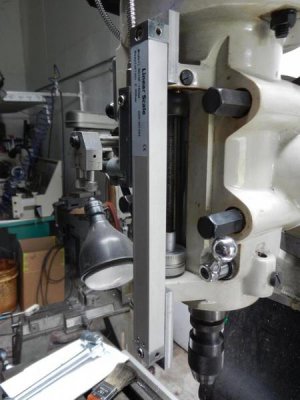
Here are the photos of my Z install we were PMing about.

Top view:

DSCN0414_zpsd6c721f7.jpg

Corner profile:

DSCN0415_zps3eddb454.jpg

Top corner:

DSCN0416_zps4ed774b4.jpg

Blurry side view:

DSCN0417_zps71a02b67.jpg

And my temporary swarf shield (need to find time to make a real one):

DSCN0427_zps95b0530c.jpg

Here's a top and bottom of the K (quill):

DSCN0419_zps54a37d70.jpg

DSCN0418_zps61998cce.jpg

I just installed the K and am having issues getting it to repeatedly return to Zero. Installer error I'm sure but I installed the rest of them and they repeat very well. Kinda stumped on this one.

Dale
 
Back
Top