Jet 1336pbd rewire.

ABnormal

Registered
Registered
Joined
Mar 23, 2022
Messages
13
Just finished a complete teardown, deep cleaning and rebuild of my late 80's vintage jet lathe and I want to wire it for 220v now instead of the 110v that it was set up for.

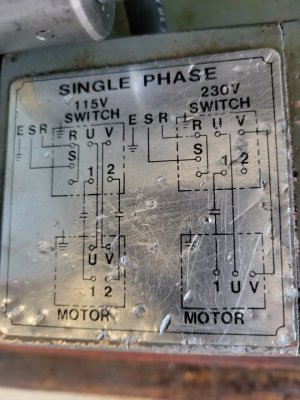
I followed the diagram on the switch housing and it didn't work. Put power to it and flipped it in forward and nothing. Flip it to reverse and the motor makes a fairly loud humm but doesn't turn.

Nothing popped, smoked or sizzled so I don't think I messed anything up but something isn't right.

Apparently these issues are pretty common when rewiring these import machines from what I've seen.

I'm pretty strong on the mechanical side of things but electricity is a work in progress.
 
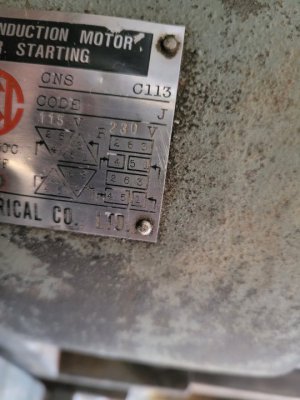
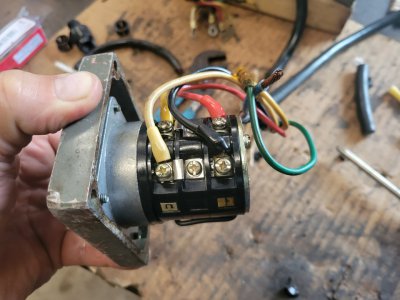
Insufficient data... Post some pictures of the electrical cabinet and the schematic you are working off, and the motor wiring diagram. Has the motor been replaced, is the control transformer dual voltage, did you change the fusing/overload relays (if it has one) for the different amprerage at 220V. What changes did you make for 220V operation from 110V. The manual for the 1340PDB only states 220V, I could not find one for the 1236.. Ultimately you may be better getting a 3 phase motor and running it off of a VFD, it will give you more control and better surface finish.
 
Yes, now is the time to change over to 3 phase with a VFD, you'll be happy you did....
 
Oh, and welcome. You've come to the right place regardless of what you want to do with this.
 
I'd love to change over to the vfd setup but it's just not in the cards right now. I've had it about ten years and it's been in dire need of repairs since I got it. I would use it occasionally for the odd repair job around the house but it finally got to the point where I just had to tear it down and fix it. One thing led to another and next thing you know the whole thing was in pieces.

All original motor, not dual voltage that I know of.

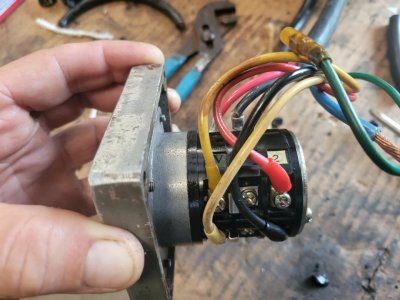
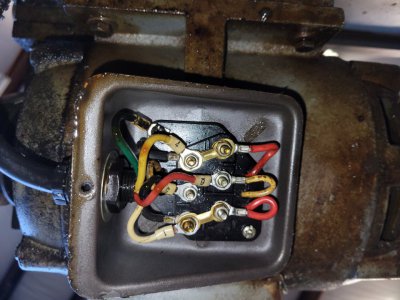
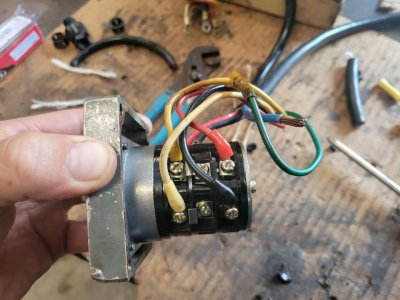
Anyway. Pics inbound. 20220501_112341.jpg20220501_112359.jpg20220501_095421.jpg
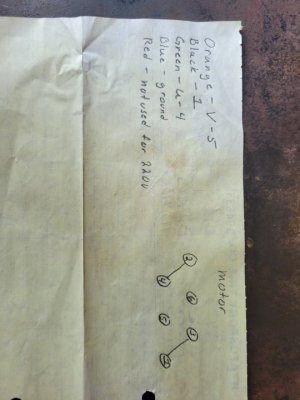
The little chicken scratch drawing is how it is now. Wire color and the corresponding letter or number that it's connected to.
 
Abby: You need to strap the motor for 220- let me cogitate on it for a bit and I will return
It IS a dual voltage motor
-M
 
Abby: You need to strap the motor for 220- let me cogitate on it for a bit and I will return
It IS a dual voltage motor
-M
Talking to a guy on another forum that said the same thing. He said to bridge terminals 2,6 and 3 together.
 
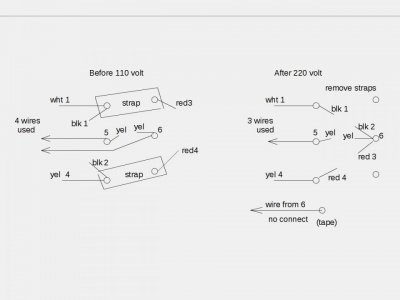
This is what you need to do: (you can actually leave the straps in place and just move the wires as shown)
motdetail220vz.jpeg
 
Last edited:
This is what you need to do: (you can actually leave the straps in place and just move the wires as shown)
View attachment 405729
I think I see what you're saying here there's just one thing confusing me. What you have labeled as wht 1 and yel 4 are opposite of the picture of the original wiring.

Now its my turn to confuse you. Do I need to look at that as a mirror image when moving the black and red wires or are black 1 and red 3 in the correct positions ?
 
Back
Top