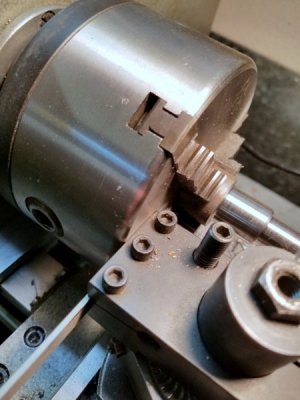
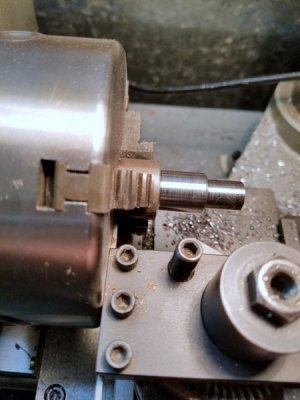
I think I have a parting problem........

I agree with above comments on upside down tools, I also like to do threading upside down and in reverse. Magic. If a screwed chuck make a rear toolpost and fit a chamfer tool as well, you won't regret it.
Could I also suggest locking the compound AND the sasddle and making absolutley certain that the blade is at 90 degrees.
I'll post a pic of toolholder from scrap that works for me this evening.
In the meantime have a look at this vid.


Cheers,
- Barry.

I've seen the YouTube video that Barry posted and I'm going to try it as soon as I get a little break in spring work.

Bob
 
Definitely use the power feed. Hand feeding is difficult to get the feed rate correct and consistant. Its okay for smaller work.

Sent from my SAMSUNG-SM-G900A using Tapatalk

Woah you should never power feed on the x axis when parting on a manual lathe. The reason for this you ask, the surface speed decreases on the tool the smaller the diameter gets, that is a quick way to kill a tool.

But in all honesty I usually don't recommend to any of my students on using the power feed on the x axis at all on a manual lathe for that same reason. A lot of the time you will set your feeds and speeds to the outer diameter and the outer 1/4 of the part has a great finish but as you get closer to the center you end up with galling on the face of the part, and just a crappy finish overall. That is because of the different surface speed with the center running slower then the larger OD. If you have ever watched NC machines run you would be able to see they make up for this by speeding up the spindle the closer you get to the center of the part, this creates a constant surface finish on the part. I have found I can get a smoother surface finish about everything I run on a lathe by feeding the x axis in by hand and I can usually do it a lot quicker then messing around with the feed levers.
 
Keep your hand on the speed control potentiometer and turn it as you watch the Tach readout on SFM to keep the SFM constant.

That only works if you have a potentiometer, geared head lathes cant do that. Most of the lathes larger then benchtop lathes and a good amount of benchtop lathes are geared heads and don't have any speed variation other then the gearing available.
 
Actually I have, I have even run Clausing lathes that came with potentiometers from the factory. The one flaw with your argument you have is that the feed on all the geared head lathes is run in relation to the rpm. You can run 100 rpm or 10,000 rpm but if you set your feed rate at .001 on the gearbox of a geared head lathe it will move that much regardless of how fast the spindle is moving so you still have the same problem with finish if you are feeding with the x axis power feed.
 
I think we should just agree to disagree. In practice, I have found that keeping the SFM constant (by varying the RPM) makes powered parting-off a breeze compared to hand feeding, and results in a lot fewer broken tools, inserts and mishaps - on the same lathe as the OP.
 
I am going to disagree with not using power feed for parting as well. In truth there is no need to even have a variable speed as diameter of the cut decreases. Regardless of surface feet per minute changes the rate of feed per revolution remains the same because the power crossfeed is directly dependent upon the gearing of the feed screw. Most materials have a wide range of SFPM at which they can be cut. The published recommendations are mostly for efficiency and to prevent premature tool wear. If the rate of cross feed is set to remove "x" thousandths of material per revolution that feed remains the same regardless of diameter. The only thing that changes is the surface feet per minute and that actually gets lower as diameter decreases. Regarding finish of the parted surface, if finish of that surface is critical, reliance on a parting tool is fallacy to begin with in 99% of cases. Parting tools, even when properly set up, do not necessarily produce a truly flat surface without dish or crown, precisely 90 degrees to the axis of the work. Parting blades tend to be thin in cross section and will flex minutely even under the best conditions. In nearly all situations a parted surface should be faced to final dimension and finish to assure proper dimension, flatness, finish and assure a perpendicular surface. The only exceptions to this I can imagine are when a further operation will eventually be performed on the parted surface or that surface will be welded to something else.
 
I just parted off a piece of leaded steel today on my MaxiMat7. I presume everyone already knows this but I took a couple of photos showing how I make sure the blade is perfectly perpendicular to the piece in the chuck. I place the blade up tight against the face of the chuck which is perfectly perpendicular to the piece in the chuck.

20170328_205451.jpg

20170328_205519.jpg
 
So, after many epic, nay legendary, parting disasters I finally discovered a couple of things that actually allow me to part just like those guys on You Tube. Tried out my knew found knowledge whilst parting with quick change tool posts on both small and large lathes with QCTP holders having a parting tool holder (0xa and BXA size)

#1: Parting blades are beveled on top - -apparently for a reason. All my blades are beveled. The high edge sits up against the inner edge of the tool holder, and contacts the upper clamp portion of the holder. But it can And does rock over to the side if not installed correctly. If not careful, when you tighten the holder down, the blade will kick out a little bit at the bottom of the holder, and then cant's sideways a hair -due to the beveled top edge. So it's basically not straight up and down, like it's supposed to be. The work then will impart twist in the blade after one cuts into the work over 1/2", because of sideways pressure on the edge of the tool caused by the slot in the work. The work essentially turns the blade into a pretzel - until it decides to explode, implode, break, or shatter. OR in my case, the last time, jumped right out the holder and flipped across the shop, with a very loud bang. Very surprising. Even more so, when it came up intack. That's when I noticed the beveled top edge and possibility of cant in the mounting bracket.

My fix is to now hold steady finger pressure on the blade when I install the blade in the holder. If held flat against the machined inner surface, it seats nicely and cuts perfectly. So apparently I wasn't been paying sufficient attention to how I mounted the blades. Not so, anyone! Easy Steven parting with the blade mounted properly - except for #2 below...

# 2: skinny little blades are no good. I kept breaking and jamming smallish, thin cutting blades on my 14" lathe. Even after checking mounting per lesson # 1 above. So Switched out to an old Armstrong parting blade, maybe 1/8" thick. Cut like butter. I will henceforth only use skinny little blades only on my little precision 7" Dalton Lathe - with small parts, say under 1" OD.

Iam a happy camper now- until my supply of ancient dull grey Armstrong blades gets used up.

Glenn
 
Last edited:
Back
Top