Heavy 10 Paint

Don T

Registered
Registered
Joined
Jun 1, 2020
Messages
45
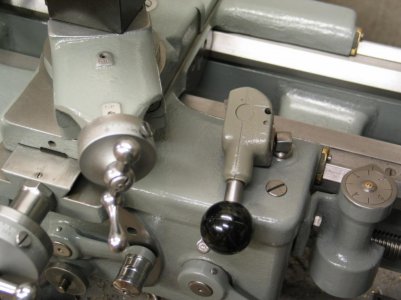
I am getting ready to put my Heavy 10 together. I just got done pouring a slab for it. (A whole different ordeal). Anyway about how much paint do I need to paint the whole lathe. It is the type in this pic complete with base. Thanks
 

Attachments

  • IMG_1156.jpg
    IMG_1156.jpg
    105.4 KB · Views: 38
  • IMG_1904.JPG
    IMG_1904.JPG
    1.2 MB · Views: 41
Oil based enamel in my experience goes a long way. I would think a quart would be plenty, and use in conjunction with a hardener for best results, and longevity. Mike
 
Oil based enamel in my experience goes a long way. I would think a quart would be plenty, and use in conjunction with a hardener for best results, and longevity. Mike
Is that spraying it or using a brush? Thanks
 
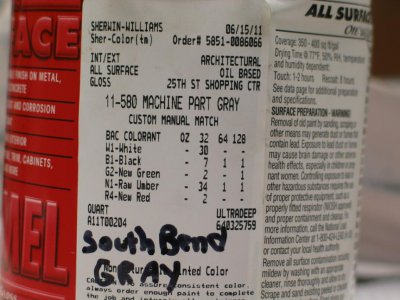
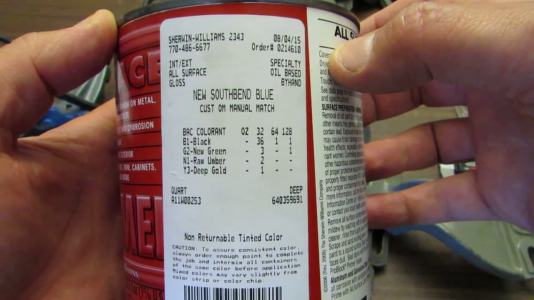
The requirements for machine paint that will resist the fluids it encounters, be tough, yet still resist chipping. The recommendation is a 1K Alkyd Enamel. There are many suppliers of this type. The best are those sold for agricultural machinery - Like Ford Tractor Blue. One US supplier is Sherwin Williams. This I discovered when one resourceful individual figured out the South Bend paint mix codings.

South Bend Gray.jpg _ IMG_4310.jpg

South Bend Blue Sherwin-Williams.png

Old and new. I don't know when the change happened.

South Bend colours- old & new.png


Oil-based enamel ends up good, but it takes days to harden off. Yes, you can spray these. I was about to try with one of those low cost airless electric spray guns, but up to now, I only used brush, and in some cases, a rattle can. I have yet to open my can of 1K Alkyd. The one can of quart size should be enough.
 
Either way. Spraying will require thinning before use. Follow the product instructions. Mike
Definitely - and it's a messy business finding out. The little viscosity estimator funnel provided I found awkward. I made up smaller amounts to put in the spray gun container by transferring some paint by small ladle into the cut-off lower part of a milk carton. Then some estimated 5% thinner. I test while using nitrile gloves by filling the test funnel, and letting go the blocking finger, and counting 25 Missippi's, adding a little thinner each time, and trying not to overshoot the right point.

I am certain there are slick, spray-painting experts here who know how not to make a mess. I found the whole business very task-intensive, and getting everything cleaned up to the point I knew there would not be enameled-up orifices and permanently messed up tools took longer than I liked. I can fully appreciate why some folk would only ever use a rattle-can.
 
Mixing can be a challenge. I've done enough of it over the years that it has become kind of second nature knowing what your gun likes, but I always use a large piece of cardboard to set my pattern and check viscosity. If it runs on the cardboard just add a little more paint and stir it in the gun cup. There is a range that will work, and while it's a little more effort, spraying with a decent gun definitely leaves a nice finish. I spray straight thinner through my gun after use, and totally disassemble and clean my gun inside and out. really only takes a few minutes, and I've been using the same old #7 Binks for 40 years. Mike
 
Brushing is fine. I have no problem doing it that way I just thought I might use more paint brushing instead of spraying. But if 1 quart will do the job brushing that's great, Thanks for all the help.
 
This is what I was going to buy. I found it on another post.
 

Attachments

  • South Bend Paint.jpg
    South Bend Paint.jpg
    91.4 KB · Views: 26
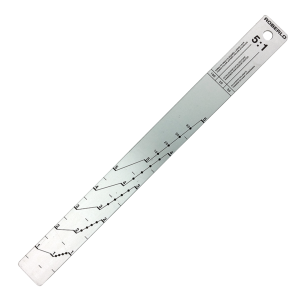
Check with your Sherwin Williams dealer the may have a graduated mixing stick. The stick is graduated with marks indicating the correct amount of reducer for a given amount of paint. Automotive paint supplies will definitely have this. This is of course if you are going to spray the paint. Don't for get to use paint filters before putting the paint in the gun.
Here's an example
61515_Roberlo_Graduated_Aluminium_Mixing_Stick_5-1_@2x.png
 
Back
Top