Grizzly GO 727 mill has grown

100_0423.JPG


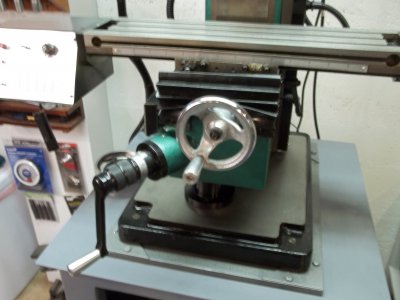
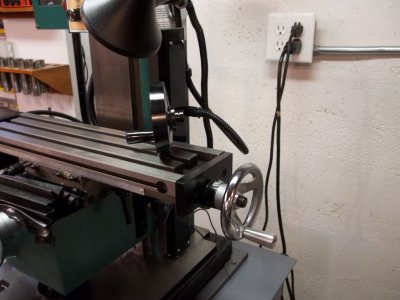
I made another small modification to my mill I never cared for the aluminum and plastic handles of the mill so I got a pair of traditional chrome spoked one's from grizzly remachined them to fit and then made my own aluminum handles. I have a habit of grabing the outside of the wheel and turning it slowly for fine adjustments and I just could not get use to the square cornered aluminum ones.

- - - Updated - - -
100_0422.JPG

Another shot of the crossfeed and knee handle.

- - - Updated - - -
100_0424.JPG

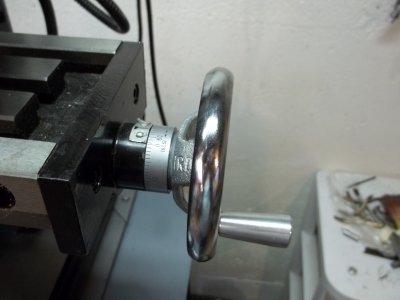
There was enough meat on each handle to machine for the dial.
100_0423.JPG 100_0422.JPG 100_0424.JPG
 
Hope this goes right this time
Iron man,
I've been looking at mini mills. However I'm not really comfortable with a lot of the designs, until I saw the Grizzly go727 or the Sieg u1. I'm only a couple hundred miles from the Grizzly store north of Seattle so I'll be able to get a first hand look. Your modifications have really impressed me and I'm now leaning even more towards this particular machine. Thanks.
Silence Dogood
 
I have added a Grizzly angle table to my arsonal of stuff and with the increase head height it works great I am now making another modification I am making a new spindle and motor arangement that will stay for the horizotal part that way I dont have to pull the motor off the top everytime I want to go with a horizontal cutter. I will post some pic's soon.. Ray
 
Ray,
finding this thread and being prevented from reading it until I signed up made me sign up. I've been away from a serious shop for about 55 years, but now have time and wherewithal to get into it again. When you say you "slugged" the tube with aluminum, what did you mean?

thanks much for all the detail you have provided.

john


A friend of mine gave me a chunk of aluminum I did not have anything to make out of it so I bored a hole through the center and pressed in a steel 1 1/4 dia. shaft through the center about 14" long. I then machined both surface's without taking it out of the lathe so they where both perfectly flat and square with one another.

I then cut down a piece of 6" square tubing so the outside measured 5 1/8 X 6" I put the aluminum rectangular aluminum (slug) inside the steel tube. I then placed a plate on the top and bottom to cap the ends I clamped it down hard to the aluminum slug giving me a nice flat surface to clamp to with the 1 1/4 shaft still sticking through each end I then welded everything up. I then chucked it up again in my lathe and surfaced both ends and then cut off the shaft flush with the plates.

Now did I have to do all that NO I did it because it seemed like a good use of material. If I had to do it over and I may I would just use the heavy square tube leave it hollow. I would then screw in studs on the back of the dove tail piece and put nuts on the inside to hide how it was secured this would also allow more adjustment but I spent a lot of time getting this one right and it works great. I did not have to go as tall as I did I could have just stayed at about 3" high and for the most part that would be enough. It is a worth while and easy conversion it is no different than a lathe bed extension except I made a longer lead screw. Ray

- - - Updated - - -

You maybe interested in this thread as well...

http://www.hobby-machinist.com/showthread.php/17466-One-last-Modification-on-the-GO727
 
Last edited:
Thanks much, Ray, for the added detail. Did you heat treat the added dovetail way or was cold rolled good enough? I'm having to really plan my approach to all of this because I'm going to have to bootstrap my shop (use early tools to modify themselves).

There's a big difference from moving into a shop that's been performing for 40 years and starting from scratch. Looking at your mods carefully, it really does make you wonder why that column couldn't have been 3 inches taller, as you say, probably enough.

best regards,

john
 
Ray---I just read through all your posts on this thread and really enjoyed how you totally improved your mill and with all the information on how each improvement was done--very good job---Dave
 
Thanks Dave As far as the cold rolled it is hard enough the way it is the most I have entered into the new area is only a couple of inches so far on stuff I have machined I have found a place I can purchase small quantity of cast iron I could make a new dove tail out of that but I doubt I will. On these small mills you can do very accurate work but since you dont have the weight of a big mill all your gibs need to be tighter than normal otherwise your machine gets the shake's on heavy cuts. That is why I moved the lead screw I could not tighten up the gibs to stop any play without the table hanging up it all works fine now and I learned a great deal working on it to boot.
 
Last edited:
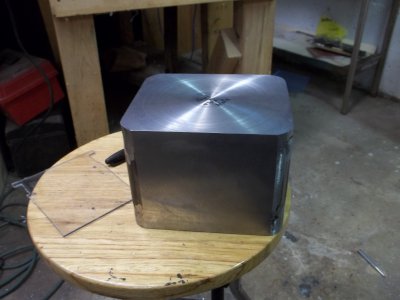
100_0389.JPG


Here is a better shot of the block after I cut the shaft off I machined three sides and bondo'ed and painted the rest. Ray

- - - Updated - - -

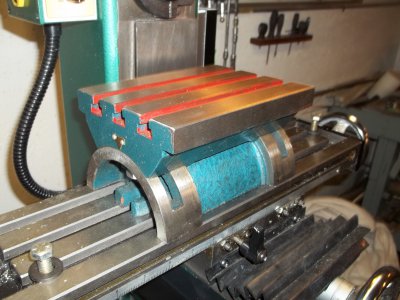
100_0468.JPG

With more head height I can buy taller toys to play with. Ray

- - - Updated - - -

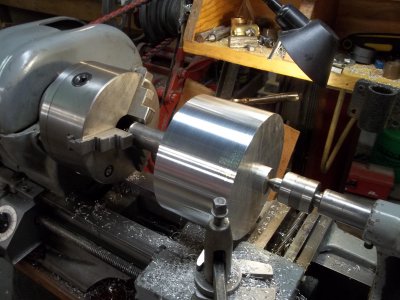
100_0379.JPG

Here is the aluminum slug I machined and then I squared it up to fit in the tube. Ray

- - - Updated - - -

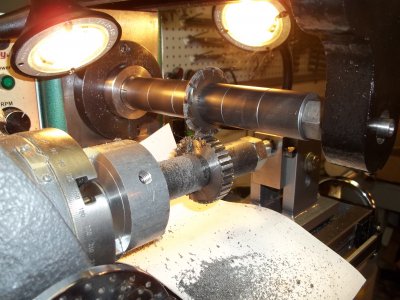
100_0574.JPG

And with the additional height I am able to cut gears this is something I really wanted to do.. Ray

100_0389.JPG 100_0468.JPG 100_0379.JPG 100_0574.JPG
 
Last edited:
Thanks again Ray. Very helpful.

It appears that there is nothing notchy about the transition from the original to the new dovetail - which I would think would bespeak a very high level of craftsmanship in a challenging alignment problem - matching geometry and alignment of the extension with that of the existing way.

BTW, whose dividing head is that?
 
Last edited:
Back
Top