- Joined
- Nov 27, 2012
- Messages
- 7,855
The stock platen for my Jet 2x42 sucks. I can easily flex it just pushing it with one finger. Also out the box it wouldn't even line up with the belt. It wasn't square with belt anyway & I would have needed to slot the slot. 
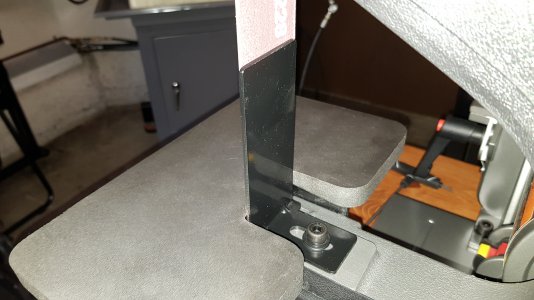
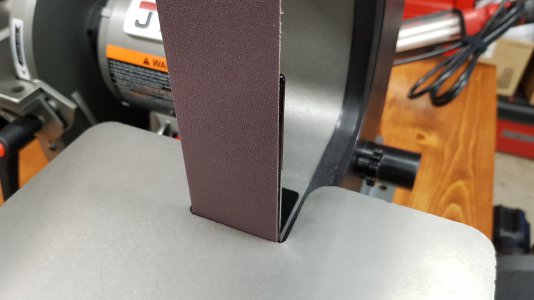
I wanted to make a new beefier & longer platen, decided to use pyroceram glass. If you are not familiar with pyroceram, it's commonly used for fireplace doors since it withstands high temperatures. Knifemakers commonly use it for the platen on their 2x72 belt grinders. Pretty flat & wears much slower than hardened steel for this use.
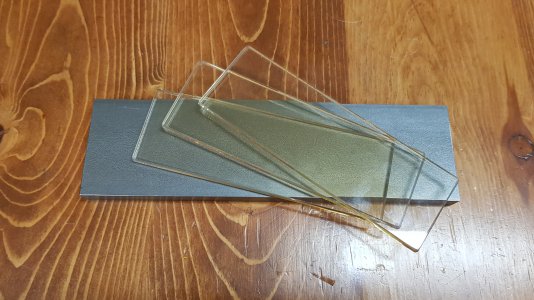
Here's what I started out with. A piece of mild steel & 6"x2"x0.195" pyroceram. There's a seller on ebay that sells it in various lengths. The stortest they have listed is 8" but they can cut you any length you want. I paid $13ea shipped for my 6" lengths.
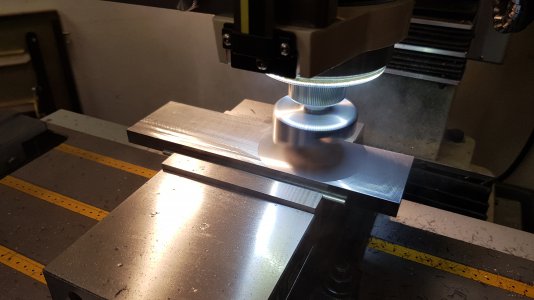
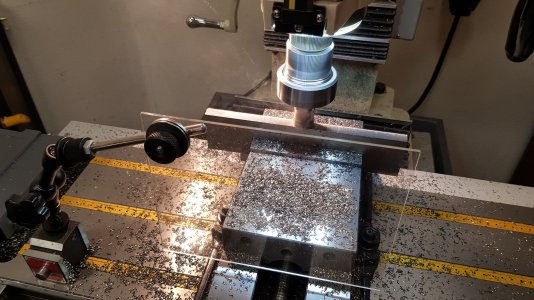
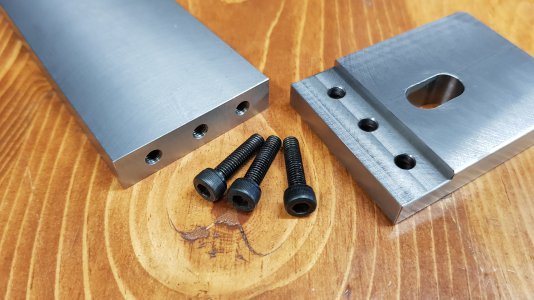
I made my mount in 2 pieces to bolt together for a few reasons. Squared, milled to size, drilled some holes, tapped some threads, yada yada...
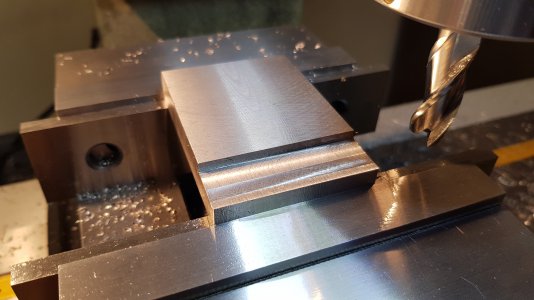
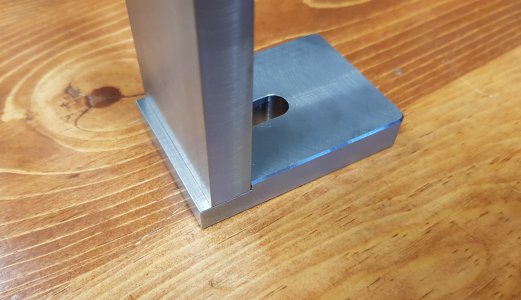
It's recommended to make a ledge for the glass platen, in case it comes loose the ledge will help prevent the glass from getting sucked in between the belt & the contact wheel. Can be as simple as using 2 screws to make a ledge/stop or bolt on or weld on a plate. Pyroceram when it breaks cracks into very sharp pieces unlike tempered glass.
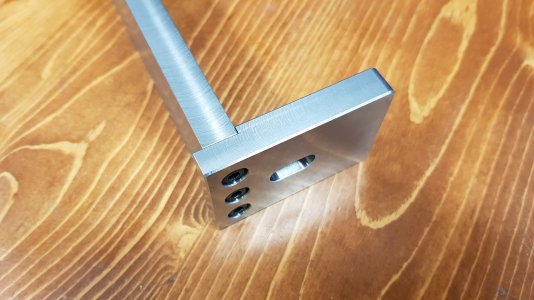
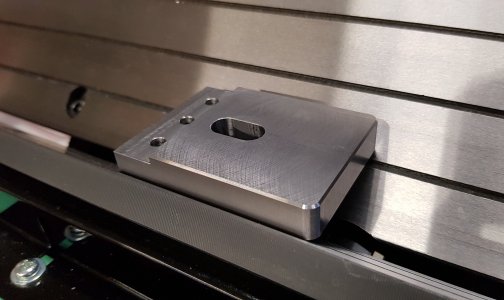
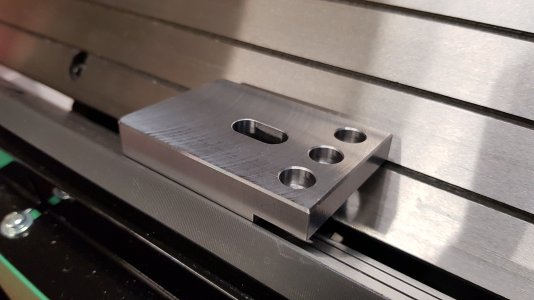
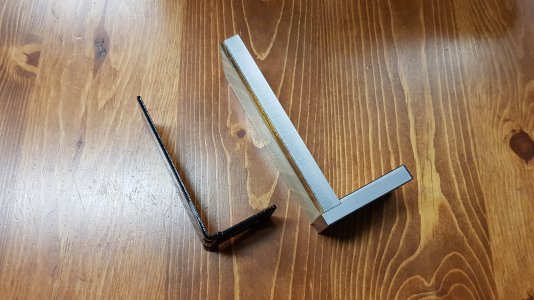
One of the reasons for my 2 piece design is that I can easily incorporate the ledge without adding any additional screws. I probably went overboard using 3 screws to bolt the pieces together & such long screws. I also needed to make the mounting slot off center because of the mounting hole's location on the sander.
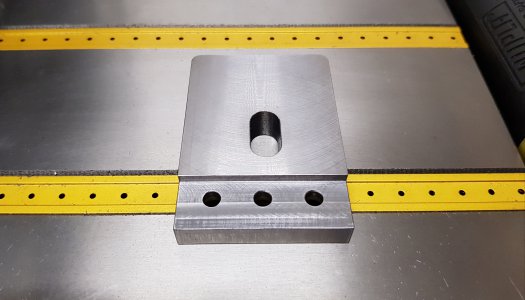
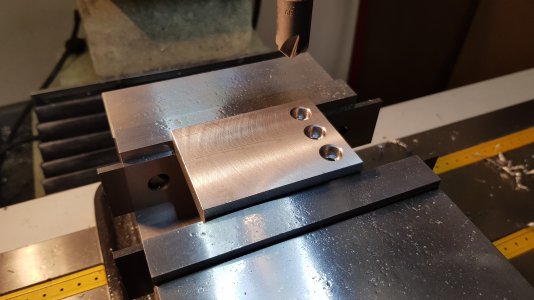
Some finishing touches using a corner rounding endmill & chamfers with my cheater machine.
The most common method used to attach the pyroceram to the backing plate is JB Weld (original formula, not the Kwik set) since it's the cheapest & most readily available epoxy that can withstand high temperatures. I choose not to use a high temp epoxy. I'm using double sided tape, carpet tape to be exact. I have used carpet tape for many uses. It is very strong, fabric reinforced, & not excessively thick.
Although I am a knife enthusiast, I'm not a knife maker, I won't be making any knives or reprofiling blades. I also won't be grinding lathe tools, well maybe, this is a just general purpose use belt sander for me. There are some knifemakers who have also used carpet tape to attach the platen on their 2x72 grinders without delaminating. I'm confident it will do just fine for me. Using carpet tape will make it much easier to replace the pyroceram in the future. With JB Weld the task can be much more time consuming with some people resorting to shattering the glass as well as needing to clean/scrape all the old JB Weld off. This platen will probably last me a very long time so no big deal anyway.
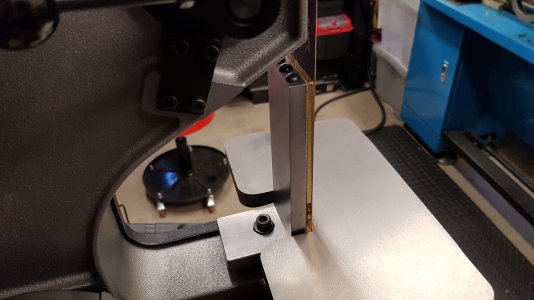
Funny, the color of the carpet tape I'm using is very similar to the color of the pyroceram. New platen vs old.
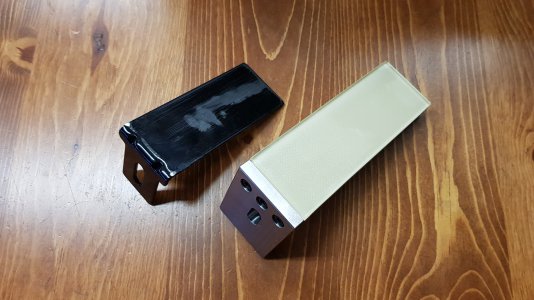
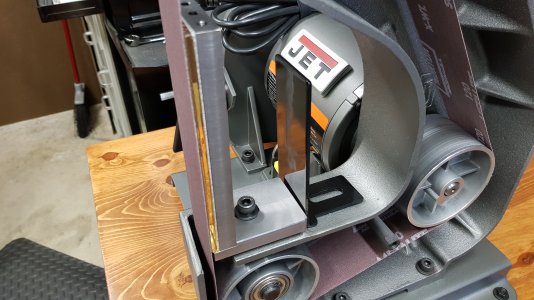
I also made a set of holes on the other end of the backing plate. Maybe not needed but this allows me to flip the platen when it wears & get longer life using the other end. I threw some screws in the holes to protect them from filling with grinding dust.
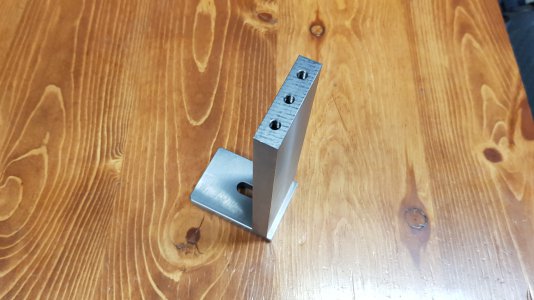
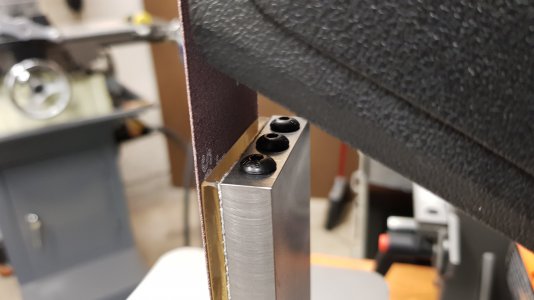
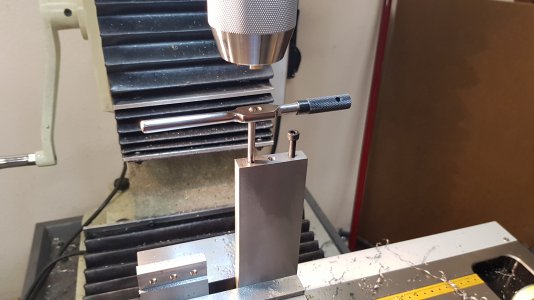
I'm very happy with the way it turned out, so much better than the stock one. I had planned to make a bracket to support the top end & bolt to the housing but it's pretty stout for being free floating. I can't really see it flex if at all with just my eye when applying pressure to it. Probably overkill for my needs but hey, that's what we do right? Thanks for looking & if you made it this far!
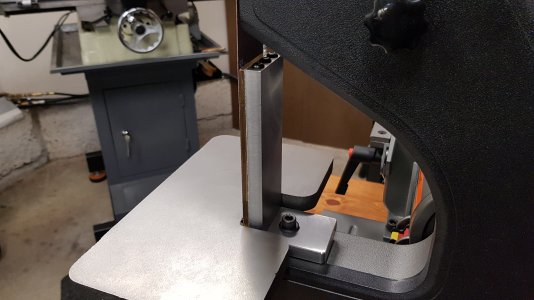


I wanted to make a new beefier & longer platen, decided to use pyroceram glass. If you are not familiar with pyroceram, it's commonly used for fireplace doors since it withstands high temperatures. Knifemakers commonly use it for the platen on their 2x72 belt grinders. Pretty flat & wears much slower than hardened steel for this use.
Here's what I started out with. A piece of mild steel & 6"x2"x0.195" pyroceram. There's a seller on ebay that sells it in various lengths. The stortest they have listed is 8" but they can cut you any length you want. I paid $13ea shipped for my 6" lengths.

I made my mount in 2 pieces to bolt together for a few reasons. Squared, milled to size, drilled some holes, tapped some threads, yada yada...


It's recommended to make a ledge for the glass platen, in case it comes loose the ledge will help prevent the glass from getting sucked in between the belt & the contact wheel. Can be as simple as using 2 screws to make a ledge/stop or bolt on or weld on a plate. Pyroceram when it breaks cracks into very sharp pieces unlike tempered glass.
One of the reasons for my 2 piece design is that I can easily incorporate the ledge without adding any additional screws. I probably went overboard using 3 screws to bolt the pieces together & such long screws. I also needed to make the mounting slot off center because of the mounting hole's location on the sander.


Some finishing touches using a corner rounding endmill & chamfers with my cheater machine.


The most common method used to attach the pyroceram to the backing plate is JB Weld (original formula, not the Kwik set) since it's the cheapest & most readily available epoxy that can withstand high temperatures. I choose not to use a high temp epoxy. I'm using double sided tape, carpet tape to be exact. I have used carpet tape for many uses. It is very strong, fabric reinforced, & not excessively thick.
Although I am a knife enthusiast, I'm not a knife maker, I won't be making any knives or reprofiling blades. I also won't be grinding lathe tools, well maybe, this is a just general purpose use belt sander for me. There are some knifemakers who have also used carpet tape to attach the platen on their 2x72 grinders without delaminating. I'm confident it will do just fine for me. Using carpet tape will make it much easier to replace the pyroceram in the future. With JB Weld the task can be much more time consuming with some people resorting to shattering the glass as well as needing to clean/scrape all the old JB Weld off. This platen will probably last me a very long time so no big deal anyway.
Funny, the color of the carpet tape I'm using is very similar to the color of the pyroceram. New platen vs old.


I also made a set of holes on the other end of the backing plate. Maybe not needed but this allows me to flip the platen when it wears & get longer life using the other end. I threw some screws in the holes to protect them from filling with grinding dust.


I'm very happy with the way it turned out, so much better than the stock one. I had planned to make a bracket to support the top end & bolt to the housing but it's pretty stout for being free floating. I can't really see it flex if at all with just my eye when applying pressure to it. Probably overkill for my needs but hey, that's what we do right? Thanks for looking & if you made it this far!


