G9249 (12x37) Lathe Restoration

PC ; I was in high school at Fortuna Calif. in those years, took me a while to appreciate the high desert after
growing up in the Redwoods.......

Beautiful country, but neither the wife or I can handle the extreme hot and cold of the area. Sad too because there are some reasonably priced properties in the area and not too far to drive to visit her relatives in the Bay Area (Martinez).

I grew up in Tillamook and we may end up buying a piece of land there to build our retirement home on. Still have some childhood friends that live in the area, so it would be nice to know people there.
 
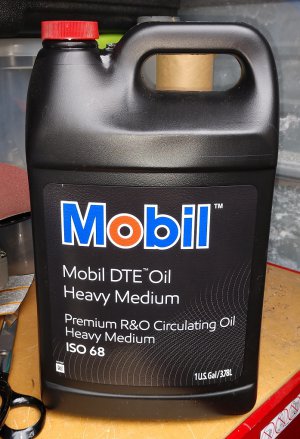
So yesterday, I got some of the oil that the manual recommends for my lathe. $36 per gallon from Graingers. I also purchased a couple of oil cans from HF. I ended up having to fill the can up twice by the time I filled all the ball oil points and the three cases to the full. Oddly enough the main gear box took the most. I would fill it to the center of the oil glass then look over and it was gone. Not pouring out anywhere. As I continued to add I would rotate the chuck by hand and could watch the level drop. Finally stabilizing.
This is the oil I purchased.
Grear Oil - Way Oil.jpg
 
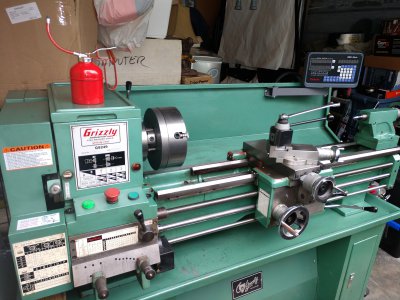
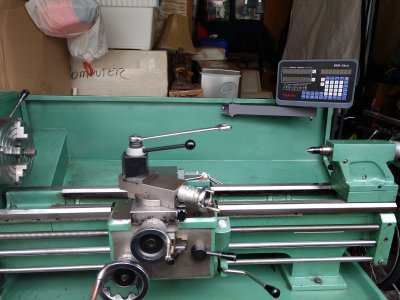
Today, I completed the installation of my DRO. Started this yesterday with the Y Axis (Cross Slide) and completed it today with the X Axis (Carriage). It took me almost 4 hours to install the Y Axis and today it took me 7 hours to install the X Axis and the monitor. Had to make a couple of trips to ACE hardware for items. But was able to use the provided brackets so no fabrication was necessary. Although I may make some changes down the road to the carriage attachment. Sadly, I was unable to test it as the small light fixture in my storage unit would not allow me to connect a screw in outlet and power it up. So will have to pack my UPS unit from my reloading equipment to storage and test it out. Although I have powered it up here in the boat and everything was working then. But not the same.
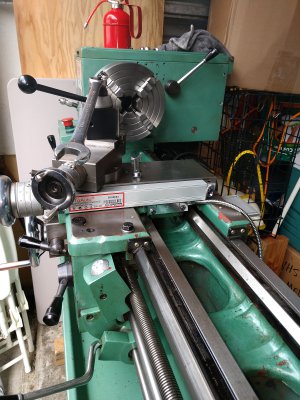
Here is an image of the Y Axis (Cross Slide). Not a lot of room and I current cannot use the Cross Slide lock so will have to fab up some spacers to extend it out to allow the new lock that I purchased to be installed and used. I need about 1 inch. That will leave me plenty of room to access the oil fill port, ball oil and carriage lock.
Y Axis.jpg

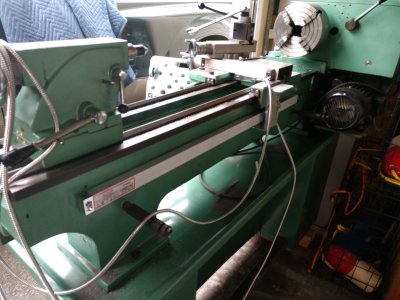
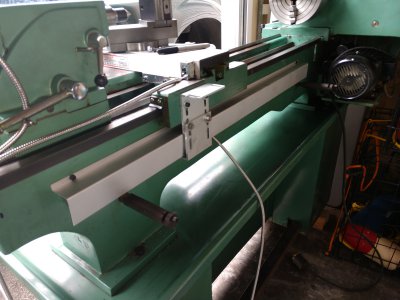
Here is the installation of the X Axis scale. This actually went much smoother than I had anticipated after I got the splash shield off. That took a little time as the allen head bolts were hard to access. Only 1/4 turn at a time.
X Axis Scale.jpg
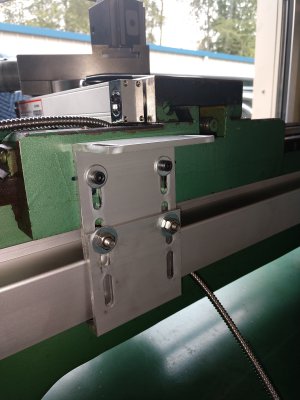
Here is an image of the bracket config that I used to connect the carriage to the scale slide. Luckily, I was able to use two of the brackets, one from each of the scales that I purchased to make this work. I couldn't use the other brackets in this config. I decided to leave the upper brackets L shape in tact as I may use it for the cooling system or a light or it may be removed down the road. But until I figure that out it is being used to help route the cables from the two scales.
X Axis Carriage Attachement.jpg
 
Here are a few more images of the installation.
This is the X Axis with the shield installed. I can't figure out how to install the shield on the Y Axis with the limited room I have. Will have to think about that more. Maybe when I add the spacers to allow for the Cross Slide lock I will free up some room.
X Axis Scale with Cover.jpg

Here is a couple of shots of the DRO Monitor installed. I put it to the rear to keep it out of the spray from the turning chuck as I intend to add a cooling system. Also, I have to access the panel over the gear box to change the belt to adjust speeds. So could not conveniently attache it to that end. I think this makes it very easy to access without putting you near the chuck, out of the way of spray and easy to access.
DRO Monitor 2.jpg
I will have to add a brace from the splash shield to stabilize the shield as it is not a very secure attachment at that end. I the cables from the scales will follow the carriage very well, but I want to add like a small weight to keep the cable from bunching up. Sort of like the water hose from a kitchen faucet spray unit under the sink. But not sure on that.
I made one mistake when I was setting this up. Before I had the cables from the scales secured, I moved the carriage back from the forward most position and didn't realize that the X Axis (Carriage) scale cable had hooked on the scale shield. It ended up opening the metal spiral jacket around the wires. I was able to bring it back together so it looks normal but if it was water proof before, it isn't any more. Kicked myself for this after being so careful.
Now the lines run up and are locked onto the L shape of the X Axis bracket this keeps the cables well clear of anything that could snag them.
DRO Monitor 1.jpg
 
Last edited:
Here are a few more images of the installation.
This is the X Axis with the shield installed. I can't figure out how to install the shield on the Y Axis with the limited room I have. Will have to think about that more. Maybe when I add the spacers to allow for the Cross Slide lock I will free up some room.
View attachment 335984

Here is a couple of shots of the DRO Monitor installed. I put it to the rear to keep it out of the spray from the turning chuck as I intend to add a cooling system. Also, I have to access the panel over the gear box to change the belt to adjust speeds. So could not conveniently attache it to that end. I think this makes it very easy to access without putting you near the chuck, out of the way of spray and easy to access.
View attachment 335985
I will have to add a brace from the splash shield to stabilize the shield as it is not a very secure attachment at that end. I the cables from the scales will follow the carriage very well, but I want to add like a small weight to keep the cable from bunching up. Sort of like the water hose from a kitchen faucet spray unit under the sink. But not sure on that.
I made one mistake when I was setting this up. Before I had the cables from the scales secured, I moved the carriage back from the forward most position and didn't realize that the X Axis (Carriage) scale cable had hooked on the scale shield. It ended up opening the metal spiral jacket around the wires. I was able to bring it back together so it looks normal but if it was water proof before, it isn't any more. Kicked myself for this after being so careful.
Now the lines run up and are locked onto the L shape of the X Axis bracket this keeps the cables well clear of anything that could snag them.
View attachment 335986
Nice... I have the same lathe except it's branded busybee. Mine has a 2 HP 3ph motor and VFD.. decided to install a DRO now. It's nice to see how the scales are attached to your lathe before I do the same
 
Here are a few more images of the installation.
This is the X Axis with the shield installed. I can't figure out how to install the shield on the Y Axis with the limited room I have. Will have to think about that more. Maybe when I add the spacers to allow for the Cross Slide lock I will free up some room.
View attachment 335984

Here is a couple of shots of the DRO Monitor installed. I put it to the rear to keep it out of the spray from the turning chuck as I intend to add a cooling system. Also, I have to access the panel over the gear box to change the belt to adjust speeds. So could not conveniently attache it to that end. I think this makes it very easy to access without putting you near the chuck, out of the way of spray and easy to access.
View attachment 335985
I will have to add a brace from the splash shield to stabilize the shield as it is not a very secure attachment at that end. I the cables from the scales will follow the carriage very well, but I want to add like a small weight to keep the cable from bunching up. Sort of like the water hose from a kitchen faucet spray unit under the sink. But not sure on that.
I made one mistake when I was setting this up. Before I had the cables from the scales secured, I moved the carriage back from the forward most position and didn't realize that the X Axis (Carriage) scale cable had hooked on the scale shield. It ended up opening the metal spiral jacket around the wires. I was able to bring it back together so it looks normal but if it was water proof before, it isn't any more. Kicked myself for this after being so careful.
Now the lines run up and are locked onto the L shape of the X Axis bracket this keeps the cables well clear of anything that could snag them.
View attachment 335986
Lathe is looking sooooo much better. And that DRO install came out great.
 
Thanks for the kind words.
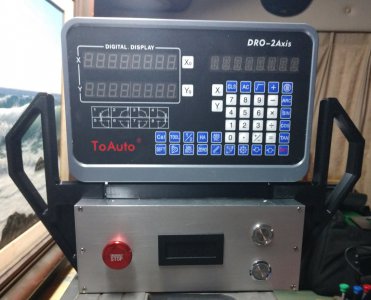
I have built a new control panel with rpm, along with an Emergency, Start/Stop and Jog button that mounts on the same arm as the DRO display. This will eliminate the start button on the old panel but will duplicate the power light and Emergency. The Start/Stop will be replaced with a rotary switch to control a cutting fluid pump in the future.
I have the new panel mounted but haven't wired it in yet. Since I mounted it to the back splash I want to add a support bar at the end near the tail stock that will run from the back splash to the base to make it more rigid.
Very happy so far with how this is turning out.
Here is a picture of the setup before it was mounted. Don't have a pic of it on the lathe, will get one next time I am out there.

IMG_20211105_122054800.jpg
 
@Papa Charlie -- Does your spindle have an 8TPI spindle nose with 2.250 or 2.440 diameter?
 
Back
Top