Enco 13x40 Spindle bent or headstock mis-aligned?

barrydc1

Active User
Registered
Joined
Jan 29, 2013
Messages
114
Hi all, especially Richard maybe. I have been reading all that i can on headstock/lathe alignment here and need some help. I have been through the whole thread that Mike posted on his troubles with his 13x40 Jet. They were helpful, but my problem is different. Here is the story:

I was using a ball turner to turn some knobs, and came too close to the chuck as I rotated the turner and crashed the chuck into the turner extension, which simply nicked the extension slide on the ball turner and pull it up out of the turret. It didn't seem like a major crash, but now I notice that I am turning a taper in a very short distance (.004 in less than 4 inches) without the tailstock involved, when it was much, much less than that before. So, thinking that my headstock might be mis-alignmed due to the crash, I set about doing the research. I've read several threads and online stuff. I have the book "Machine Tool Reconditioning" though I'm such a novice that it seems very daunting to me.

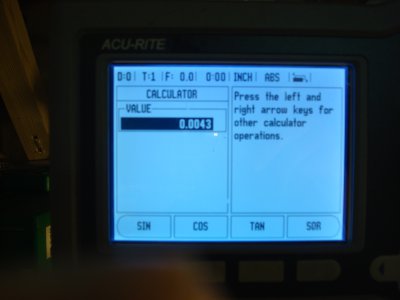
I have now tried the following. I turned a test bar using the method describe by Richard King in the 13x40 jet thread. This gives me a taper of .0043 in the 6 inches of the test bar. I also have a 5MT x 12" x 2" precision ground test bar for the spindle. So, I took the test bar and put it in the chuck on the non-tapered end and using a .0001 DT moved the alignment of the headstock until I had. .0002 run out over the 10" sticking out. Then I rotated the chuck with the test bar in it. This show some interesting results. I have made a video of this result here: http://www.youtube.com/watch?v=nSst2L_YaAw

It appears to me that the spindle is bent. Am I way off base here, or is there something else I need to do. I have not yet done a 3" facing test cut, but need first to explain how the bar can move so far without a bend in the spindle. Does that happen? Please help.
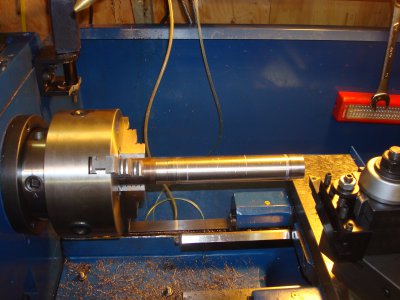
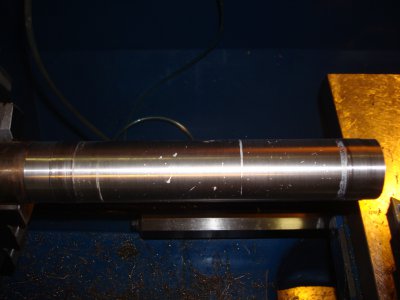
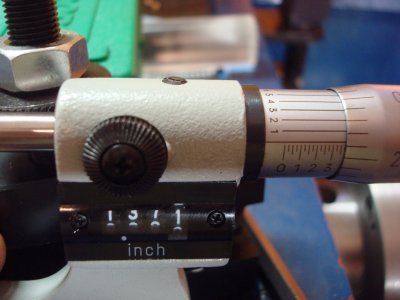
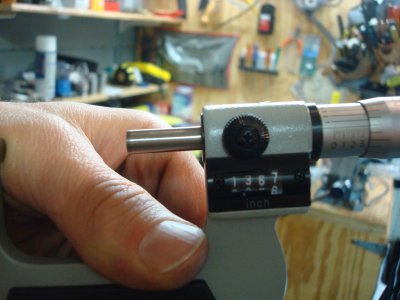
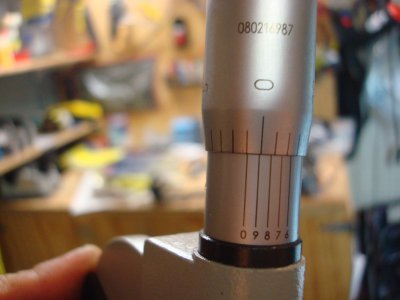
DSC09181.JPG DSC09183.JPG DSC09180.JPG DSC09186.JPG DSC09187.JPG DSC09188.JPG
 
Barry, Interesting problem. I would suggest u perfom a couple more tests to isolate/elminate possibilities. Have you checked the spindle bearings for runout? I would try rotating the spindle by hand with an indicator reading on the inside of the MT5 spindle taper. Then I would set the indicator directly on the spindle (not the chuck) insert a 2 or 3 foot long heavy bar in the spindle and lift with 70/90 lbs of force. You should see little of any movement on the indicator if the bearings are tight. It is possible that the jar moved a bearing retained a little allowing play. Indicating the spindle while rotating would show movement with a bent spindle and also if the bearings are loose or damaged. Both tests are necessary to isolate.

Good luck. Not a fun problem
 
Thanks for the quick response. I did run a DTI in the morse taper of the spindle, and have less than .0001 run-out. The test bar in the spindle with applied pressure results in movement of .0004 or less with moderate pressure in all directions. I do note that when rotating the spindle by hand that it has some drag, but assume this is bearing preload, but it really isn't as smooth as I would like or think it should be, but then again I don't have much experience with anything different.
 
Hi Barry,

I just saw this. I would tighten your spindle bearings first. Was your test on a warm or cold spindle? I am assuming your .0004" is lost motion right? That is you push the bar and let go, make your reading and pull the bar and let go and you get .0004" ?

You should not get .0001" TIR on a warm spindle.

Do you have a vee block to test your test bar? Or a granite table to roll it on like you do when you check the straightness of a pool cue. Have some bearing blue to check the taper contact? Is it real tight when you slide it in? Can you indicate the test bar in for run out by tapping the end with a soft blow hammer and then check the bed parallelism.

I would not trust the test bar and the reading you got was a fluke. So just use the turning on the tube and the 2 collar test. I just down-loaded the 2 collar test on my Scraping Forum. You look like you are doing it right though. After you turned the test bar, did you check the run out of the tube?
Sometimes it's easier to help via the phone so call me at 651 338 8141.

Bottom line is I would trust the 2 collar test before the test bar as you are following the spindle bearing axis. I have seem more people get messed up when the taper is screwed up and they figure the ground bar is perfect.

We should be able to figure this out.
Rich
 
Richard,

The spindle was not warm when I turned it with the DTI on it. Also, I'm not sure that I did what you were talking about when I put pressure on the bar to move the spindle, it was just in one direction with very imprecise pull of my hand and not reading anything as I let go besides seeing it return to normal. I will give you a call, as I would love to get this straightened out. I did print out the instructions that you gave mike for turning the test pipe, though my pipe is only 1-3/8". I do have some aluminum that I can cut down but would rather not due to cost unless it's necessary, but I sure can I have 12" of 3" 6061 and 12" of 2" 6061 solid. I'll check this thread again and see if you responded, but what is a good time to call. I have a real job too, but if you can give the time, I am willing to work with you as well. I am my own boss except that my patients really are, though I don't do emergency usually. So what's a good time to call I see you are in Minnesota and I in Montana 2 hrs with my time being 5:47 and yours 7:47? Let me know.
 
I can chat anytime from 9 AM to 9 PM CST. But before you call how about moving the head using the tube you have now. I am assuming the machine cut straight before the crash?? Did you try adjusting the bed? I hope not. If You did do you have a precision level to verify it is still straight and not twisted. I am assuming your head-stock has a swivel pin too?
 
I found this manual on the Enco site and it looks like the head-stock is just sitting on a flat surface. It's a lousy manual, so I am not sure if the head is dowel pinned or has the swivel pin and adjuster like Mikes lathe. If it has a tapered dowel pin maintaining the head-stock alignment , check to see if it's broken or bent. If it doesn't have anything accept bolts when you have it aligned, lets put in some pins.
Rich
 
I'll have this coming Friday (the 1st) free, to put some time into this. I could call then at anytime during the times you mention then.

I have made sure the lathe is level front to back all along the length and leveled the length of the lathe left to right longitudinally along the bed with a 12" precision square with level .0002 in 10". I did this re-leveling before starting any of this. The lathe cut reasonably straight before, as I had no trouble maintaining tolerances until the crash. I sadly did not do any testing prior to this when I first got the lathe besides leveling it when I installed it. I have not attempted anything regarding the bed. In the moving of the headstock that I did, it moved very predictably, and so I assume it has a swivel pin though I cannot see it. It does have the four bolts like similar to Mike's, and the adjusting bolt/block set-up. It was fairly simple to get it aligned to the test bar on the one side. There are no dowel pins, or I doubt I would have been able to adjust it so easily with just the 4 bolts loosened. I have no idea how I would install pins, as drilling and access to the area seems impossible without total disassembly of the entire headstock, spindle and gearing.

What do mean when you say move the head using the tube I have now? Do you mean re-chuck the 2 collar test pipe I made and adjust the headstock until it cuts the same?
 
Yes use the 2 collar shaft you have now. It's out .0043" right. I sounds like your head has a pin then. Just forget about the test bar and chuck up the tube and take more cuts until the far right is .0001 to .0002" Big.

I suspect the test bar has some issues. Bed time here. No problem on when you call..It's my cell and I have it close all the time.

Rich
 
Hello Richard (Mr. King) and Barry,

barry, I was reluctant to use a high $$$ piece of AL also. Use it!! The time it will save is well worth it. Or buy one. Believe me.

Rich will get it figured out.

Also I used my test bar to get me close, removed it and verifed, adjusted with the "2 collar" bar.
My experience was exacerbated by my own errors and the fact I do not have phone service at the shop and my stupid reluctance to avoid my good bar.

Rich will help you with the sensitivity with the HS bolts.

this is a great forum.

mike
Cullman now (phone here)
 
Back
Top