-
Welcome back Guest! Did you know you can mentor other members here at H-M? If not, please check out our Relaunch of Hobby Machinist Mentoring Program!
You are using an out of date browser. It may not display this or other websites correctly.
You should upgrade or use an alternative browser.
You should upgrade or use an alternative browser.
[Metrology] Dial indicator contact point alignment
- Thread starter woodgeek
- Start date
- Joined
- Oct 16, 2019
- Messages
- 6,576
I have steel tips on my two DTI and never think twice about them. I suppose if you used it all day to centre bores on a mill thus exposing the tip to more wear then carbide would be a good choice but for five times the price that's your call.Thank you gentlemen. After some investigation, the test point is definitely bent. It is quite obvious when unscrewing it. Now the question is, do I want the $8 steel tipped or $25 carbide tipped test point. lol
- Joined
- Dec 18, 2022
- Messages
- 1,675
If you are buying jewelry the expensive one of coarse.... LOLThank you gentlemen. After some investigation, the test point is definitely bent. It is quite obvious when unscrewing it. Now the question is, do I want the $8 steel tipped or $25 carbide tipped test point. lol
- Joined
- Jan 20, 2018
- Messages
- 5,628
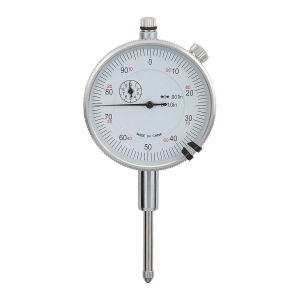
The bent tip is completely irrelevant. Replace it if you like, but it has no effect on the function of the indicator. Dial test indicators, because the angle of the tip is adjustable, are not used for actual measurement. They are only used for comparison. Dial indicators like this

can be used for actual measurement.

can be used for actual measurement.
- Joined
- Apr 9, 2020
- Messages
- 12
MrWhoopee can dial test indicators like the one shown be calibrated for linearity or just repeatability. I know the Starrett back plunger test indicators can only be calibrated for repeatability.
That’s great to know. Thank you!

Sent from my iPhone using Tapatalk
- Joined
- Apr 23, 2018
- Messages
- 6,532
The test indicator measures a swept arc. They are prone to what machinists oddly call cosine error. I do not agree that it is an error at all, it is a fact of life and is easily resolved in vector components. So it is true that a DTI can't be calibrated for linearity, but there are plenty of ways to write a cal routine for a variety of uses based on knowledge of the instrument.
Most of us use it as an indicator, to indicate and locate a difference, not (necessarily) to quantify one. That's why it is a setup tool, not a measuring tool in principle.
In a way, metrology is the science of mincing words.
Most of us use it as an indicator, to indicate and locate a difference, not (necessarily) to quantify one. That's why it is a setup tool, not a measuring tool in principle.
In a way, metrology is the science of mincing words.


