Concrete Counter Tops

F

f350ca

Forum Guest
Register Today
Hope this project fits the forum, it has a bit of everything.
This will be the third set of counters I've done over about 10 years. The basic counter recipe has stayed the same but the finishing is evolving.
The counters are built with a regular portland cement core, about 1 1/2 inch thick. It is reinforced with 1/2 rebar around the perimeter and 6 x 6 mesh through the body. Fiber glass chop is used and a water reducer to minimize shrinkage. The surface is poured about 3/4 thick using a decorative stone mixed with white portland dyed to what ever colour. This set has white 3/8 marble chips with grey dyed cement.
These are cast in my shop and moved to location. They are heavy, I wouldn't be comfortable putting them on stock particle board carcasses. These are finishing off a set of cabinets I build last winter, the bases are formed from 3/4 birch plywood with hardwood faces.

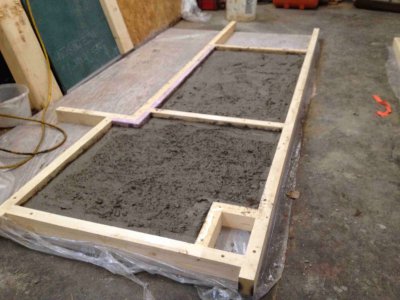
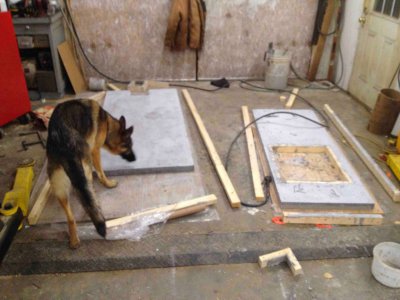
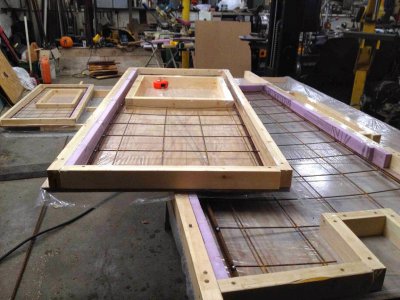
Here are the forms set up with rebar and mesh in place. The styrofoam strips keep the base portland off the edges that need to be finished.
IMG_0807.jpg

IMG_0807.jpg
 
Now some machining.
I needed a vibrator to make sure the edges and around the rebar were filled properly.
The comercial units are too big and mostly too expensive.
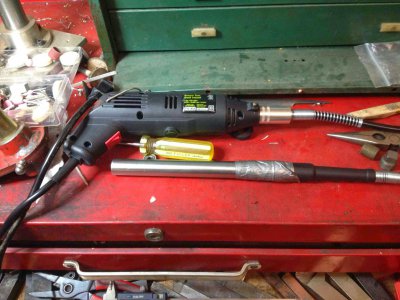
They operate at around 14,000 pulses per minute, in the range of a dermal tool, so I bought a cheap one with a flex shaft.
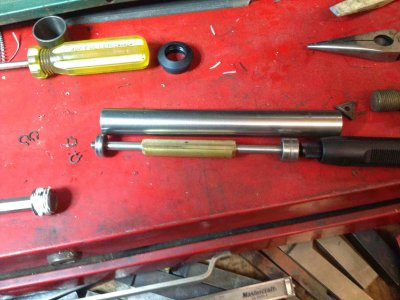
Machined up a shaft to match some small ball bearings I had and made a counter weight. The end was cut down to 1/8 to fit the collet.
Next a 3/4 inch stainless tube was bored at the ends to fit the bearings and the bottom threaded to fit a 3/8 pipe plug.

IMG_0811.jpg

A bit of good old duct tape fastened and sealed the tube to the shaft handle.

IMG_0812.jpg

Worked like a charm, wouldn't expect it to do a basement but worked great for these.

IMG_0811.jpg IMG_0812.jpg
 
Poured the counters about a week ago.
Here is the portland base in place.

IMG_0813.jpg

Its allowed to set for an hour or so to get to the point that it won't slump when the styrofoam spacers are pulled or mix into the finish coat as its poured and worked.

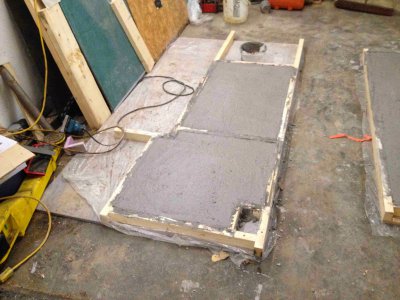
The final coat poured.

IMG_0815.jpg

The finish at this point looks terrible, all I use is stone and portland, no sand so it can't be troweled very smooth.

Forms stripped after a few days. Quality control is checking them out.

IMG_0830.jpg

The next step is to grind the surface flat and expose the marble chips.
The grinding is done with a 7 inch diamond faced cup wheel.
The first set I poured in place and ground them in the kitchen with a sander polisher. It was my house with a VERY tolerant girl friend. It was messy. You need to keep the wheel wet. Sander polishers and water don't mix. I had to wear rubber gloves and boots to control the ground loops. I was spitting sparks by the end.
The next set I built a grinder that ran on angle iron tracks down the length of the counter. The result was excellent, perfectly flat. I did this on the shop floor in the winter. I couldn't keep the wheel wet enough, the dust was wild. A mask controlled my intake but the shop was a mess, I spent a week cleaning up the shop , lathes , mill and everything else.
The plan this time is to use my sawmill frame as a base and build a grinder to run on its tracks. Now the operation can move outside, let the water and dust fly.

IMG_0813.jpg IMG_0815.jpg IMG_0830.jpg
 
Now we need to build the grinder.
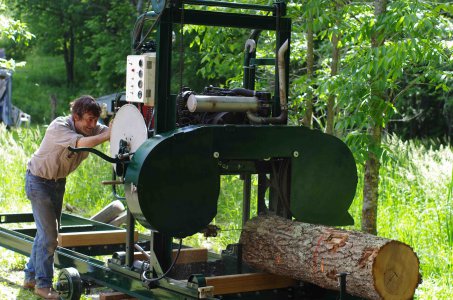
This is my home made sawmill that Im borrowing the frame from. I finished this about a year ago.

IMGP0605.jpg

The counters will sit on the log bunks, and the grinder will run back and forth on the rails the saw runs on now.

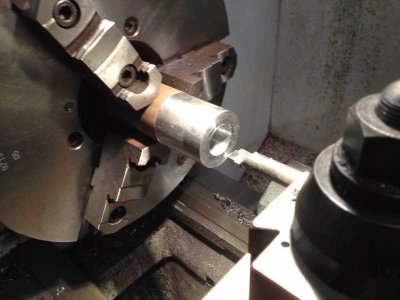
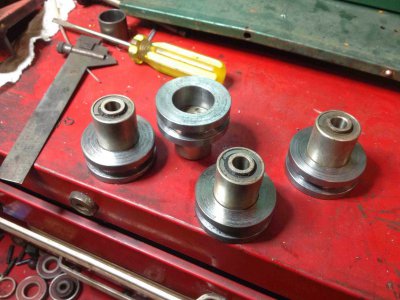
Today I made the wheels, some 2 inch shaft was bored to fit some small bearinged rollers I found in stock.

IMG_0831.jpg

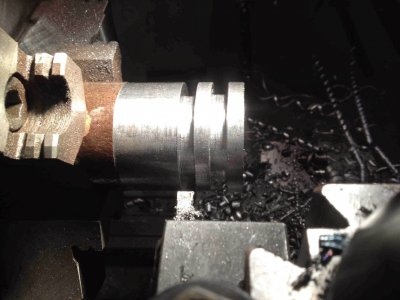
Used a parting tool to cut 1/4 inch wide groves. and part the sections off.

IMG_0832.jpg

Ready to be pressed together with a 1/2 thou interference fit.

IMG_0833.jpg

Will post more as the grinder evolves.

IMGP0605.jpg IMG_0831.jpg IMG_0832.jpg IMG_0833.jpg
 
I've always like the looks of the concrete tops. Never seen anyone grind a finish though. I think everyone else I have seen just finishes with a steel float. Are you going for a particular finish by grinding?

- - - Updated - - -

I like the dremel based vibrator tool. Good idea.
 
Thanks guys
The counters are ground to get them flat and expose the aggregate. Once thats done they get wet polished with diamond pads up to 3000 grit, then sealed, the finish is similar to granite when done.

Greg
 
Very good, can we see them installed?
 
Franz, yes the mesh gets mig welded to the rebar, mostly to keep it in place. I tack standoffs to the rebar to position it about an inch off bottom, the top coat ends up only about 1/2 inch thick, so I keep the rebar below it.
Made that little vibrator to work out the bubbles, seams to do not bad, small voids in the surface can be filled with portland before the polishing stage. Haven't tried glass yet, not sure how well it would show up, being transparent it would pick up the colour of the dyed cement I think.

Randy, hope to show them installed, we're caught up on documenting the project right now, plan to get at building the grinder today.

Thanks
Greg
 
I'd love to see some pictures or a video of the grinding and polishing process. I'm in the home remodeling business but I've never seen a concrete top in person. Everybody does granite around here. This might be something I'd try on my own house before i go trying it on a customers house.:whistle:
 
Back
Top