Another Hendey Refurbish

That is impressive. Unsupported, I get .0007 or so over about the same distance end to end with the outboard being larger. There is also a bulge between the ends of another few tenths. I am unsure how much is due to bed and if the spindle bearings might have a little play under load causing the end to be larger. With the tailstock adjusted so each end is within .0002, there is again a bulge that varies a couple of tenths which I believe follows the bed wear. Polishing takes care of most of this easily but I like to know the numbers and what others get on their machines. Thanks for the update. Dave
 
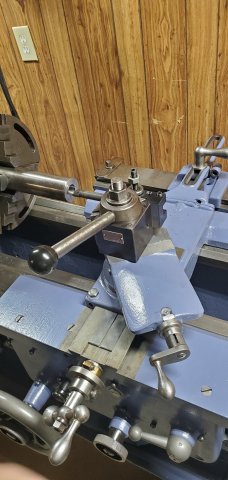
This afternoon, I played with the taper attachment on the Hendey. I set up the TA to machine the tailstock quill out to morse taper 3.

I haven't used a taper attachment since tech school... 26 years ago... so it took me a while to get my head wrapped around what I was doing...

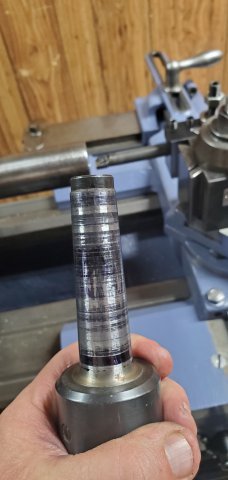
But, I managed to figure it out and machined the quill...

20211210_153311.jpg

I used a sharpie marker to color the arbor on a live center, then slipped it into the quill and turned it to see how much 'engagement' I was getting...

20211210_153340.jpg

That's a decent amount of contact, I think... it should work fine. I hope...

-Bear
 
I've been doing a little troubleshooting on the Hendey lately... I've had to adjust the pulley positions on the motor and gearbox to get the v belt and flat belt lined up a little better.

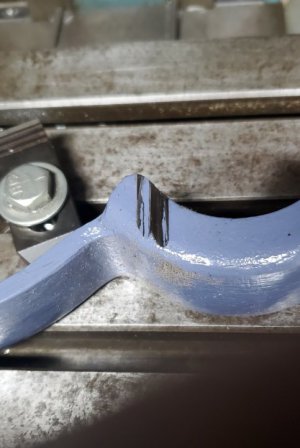
One issue is that the flat belt was rubbing the bull gear guard... I had this issue on the first Hendey project. I decided to fix this one the same way I fixed the first...

The rubbed area...

20211218_110724.jpg

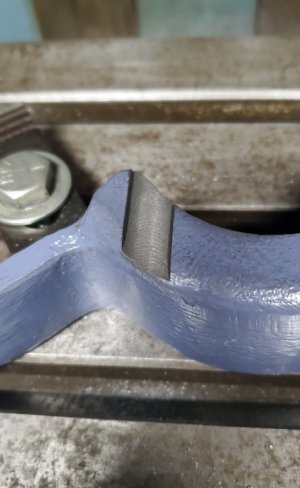
I clamped it to the mill table and did some 'selective clearancing'...

20211218_111730.jpg

I milled a slot about .070" deep... the thickness was about .200, so I still have around ⅛" of thickness. It's not rubbing the belt now.

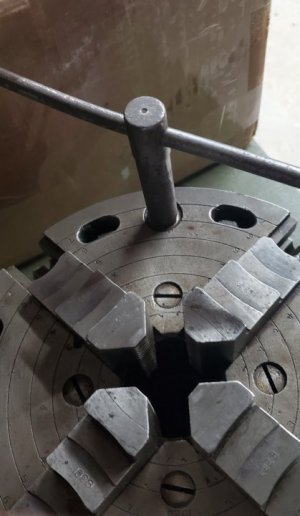
I haven't exactly fallen in love with the 4 jaw combination chuck that came with the lathe... it is not well designed. The scroll is operated by engaging a trunnion that is mounted in the face of the chuck...

20211218_123106.jpg

As I turn the scroll, the key handle hits the workpiece in the chuck... also, the chuck can't be tightened adequately... as I try to snug the chuck, the lathe spindle turns because I am turning the key along a parallel axis to the spindle instead of perpendicular to it like a regular chuck. Once I get it tight, I can't loosen it without loosening 2 of the jaw adjusters first for the same reason... it's just an awkward chuck to use.

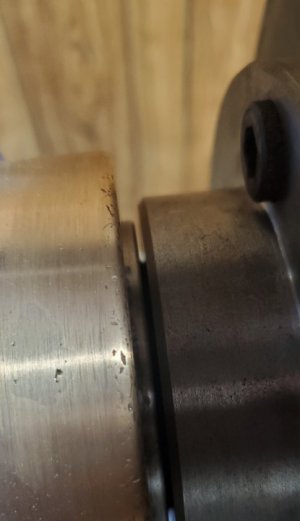
I took the Union combination chuck off Hendey #1 just to try it... and it won't thread all the way down on #2... it lacks about .065" seating...

20211218_124048.jpg

The spindle on #2 apparently has a bigger radius than #1 on the spindle... the backplate is seating on the radius instead of the spindle face...

I may be shopping for a chuck pretty soon... I sure would like a set-tru...

-Bear
 
I think many of the Union chucks had a backplate designed for a certain lathe ( Atlas maybe ) that used a slightly different thread or depth. That might be why yours doesn't seat. I do like the old Union chucks. If in good condition they were heavily made and generally steel with a higher rpm. They were making combo chucks back in the 40s or 50s. Mine had the inside jaws mucked up but I reversed them and use the outside so I don't have to swap the other chuck and they work well. Dave
 
I think many of the Union chucks had a backplate designed for a certain lathe ( Atlas maybe ) that used a slightly different thread or depth. That might be why yours doesn't seat. I do like the old Union chucks. If in good condition they were heavily made and generally steel with a higher rpm. They were making combo chucks back in the 40s or 50s. Mine had the inside jaws mucked up but I reversed them and use the outside so I don't have to swap the other chuck and they work well. Dave

I machined the backplate to fit Hendey #1... the thread is the same as Hendey #2, but #1 has a 1/8" radius at the back of the threaded area, on #2 the radius is 13/64"... I could make the backplate fit #2, but I'll just be looking for a different chuck instead.

This Union chuck is an old cast iron combo chuck that I acquired with my South Bend... it has a lot of wear on the pinions and scroll, but is still very useable.

-Bear
 
I've just discovered that the jaws on the old Westcott 4 jaw combination chuck are 'belled'... if I chuck up a piece of round stock, the jaws are only gripping it on the inner side... I can slide shim stock between the workpiece and the jaws on the outer side...

I ran the jaws down until the inner points are just barely holding a 'T' drill shank (0.358")... at that point, I can get a 0.364 guage pin to start in the outer point of the jaws... not an extremely accurate test, but I'm figuring about 0.006" taper between the jaws.

I guess I'll attempt to machine the jaws... at this point, I have nothing to lose...

-Bear
 
I've had similar experience with some of my old chucks and particularly my Union Combination which is similar to your Westcott. In my case I didn't need the inside jaws so I turned to the outside and only use that chuck for larger diameter work. Fitting a wedge between the jaws for tension and grinding or boring might help. If you have a surface grinder you could try grinding the jaws so they teeth are even but you might find that even when the jaws are correct, wear in the chuck might not make it repeatable. The old combo are nice for centering but not so much if you are doing multiples as is a new Bison Combo. Dave
 
In the last update, I mentioned that the old Westcott chuck had issues...

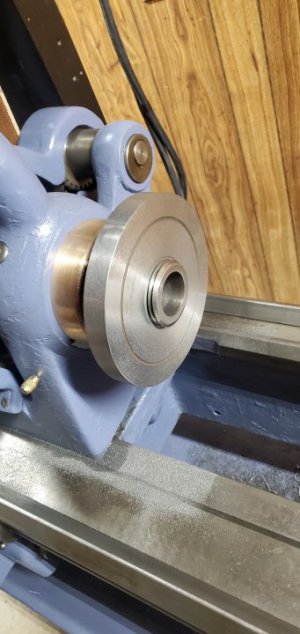
I found and bought a 9 inch Buck Set-Tru chuck and am waiting on it to arrive. While waiting, I've been working on machining a backplate for a 12 inch Skinner 4 jaw independent chuck for this lathe...

20211224_183714.jpg

This is a backplate that came with refurb #1... with a 7 ½" Cushman 3 jaw chuck that had 'issues'... I've machined it to fit the 4 jaw, but have not drilled and tapped it for the mounting bolts yet.

I've also been tinkering with the tailstock... the quill screw is too short to eject the tools... I'm debating whether to machine a new screw or drill and ream and insert a dowel pin in the end of the existing screw to make it longer... It needs about another inch.

Aside from all that, this lathe is running very well... I'm pretty happy with it.

-Bear
 
This project is not moving anywhere near as quickly as the first one did... the first one was a 'pandemic project'... I did most of the work during late fall and winter, when there wasn't a lot of distractions (like lawn care), and I was only working 30 hours per week.

I am currently working 70 hours a week and having to do lawn work, vacations, hunnydoos, (my wife is a teacher, so she is home to keep me occupied during the summer), etc...

However, I am making progress... I have managed to get the legs and chip pan cleaned, prepped, and painted. As I was painting, I realized the inside of one of the legs still had some crud built up, so I just removed the leg and continued painting.

View attachment 371188

I'll try again to get the other leg clean tomorrow and get it painted... I will also have to spend a couple of days cleaning out a place to put the lathe in my basement. I plan to do this one like I did the other... move it inside in pieces and assemble it in place.

-Bear
Is that chip pan cast iron?
My 1939 gear head’s chip pan appears to have been pressed from sheet metal.
 
Is that chip pan cast iron?
My 1939 gear head’s chip pan appears to have been pressed from sheet metal.

Yes... the early chip pans were cast iron... the later ones were stamped sheet... I don't know when the process changed.

My 4th Hendey was made in 1918, but rebuilt by Hendey in 1938, and the chip pan was added as part of the rebuild. It is a stamped pan...

-Bear
 
Back
Top