2017 POTD Thread Archive

My lathe is pretty much done! Still have a few covers to make and add the digital readout and machine light. I have time for that. Trying to get geared up to rework some parts for my client on some of the products I've designed. It's those things that come back and bit you in the a$$ that get missed and overlooked in the design process. Anyways, here's pictures of a chunkView attachment 235540 View attachment 235541 View attachment 235542 of metal and a few shaving made today on the lathe. Enjoy! Ken
I like your lathe what kind is it
 
I need more practice.
But I made plenty of mistakes .
I am trying to find something to blame it on .
My wife is not her she is at work so I can't
Blame her.
It must be my cheap welding machine
Lincoln AC 225 Amp.
Or the Rods I bought them at Home Depot that it
Looked like they was playing football with my box of rods .
The rods come out of the box with the flux busted off both ends of the rods 75 percent of the rods in the box had flux cracked or broke . I would have to burn
1" to 1-1/2" off the ends of the rods before I could
Use that rod.
Could be my back yep I am old and I can blame it on my age .
That is a good machine. and your welds are not bad looking.
 
POTD was making a tighter clearance ½” square punch to match a die. I have a project that needs ½” notches on the edge in 0.018” thick 304 stainless. Happened to have a sharp ½” square punch, but it did a crappy job shearing. Regardless of how I aligned the punch and die, ended up with a folded tab instead of a shear on one edge. I read on the web that punch to die clearance should be 20% of material thickness for plain steel and 25% of material thickness for stainless.

The die opening checked at 0.508” square, punch checked at 0.485” or WAY too much clearance for 0.018” stock. The total clearance should be 0.0045” per the on-line recommendations for a punch diameter of about 0.503". So, time to make a new punch.

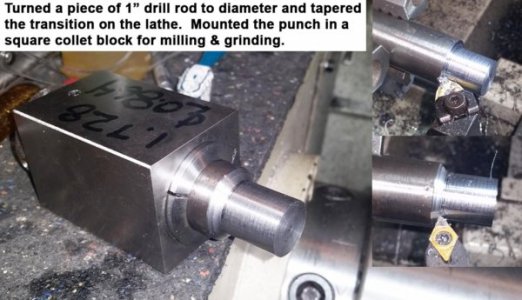
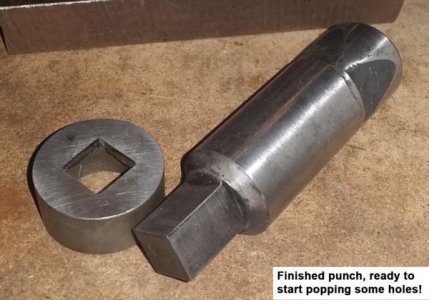
Started with a piece of 1” drill rod. My Roper Whitney #218 press takes punches either ½” or 1” diameter. Optimal punch size would be 0.503”, so Mr. Pythagorean said I needed a rough diameter of 0.711”. I chose to go a little larger since the squaring would be done to close to final size on the mill.

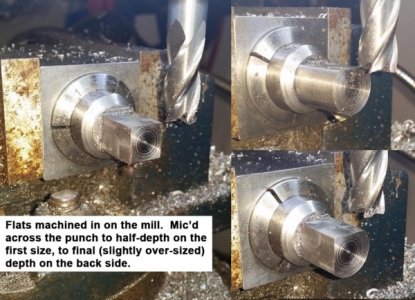
After turning to size, the punch was mounted in a 5-C collet and held in a square collet block. Went to the mill and machined the flats to a 0.510” square. Did the math on the diameter vs. half-depth and made passes to that number on the first two sides. Then went to the final (over-sized) depth on the opposite sides. Pretty simple operation using a square collet block.

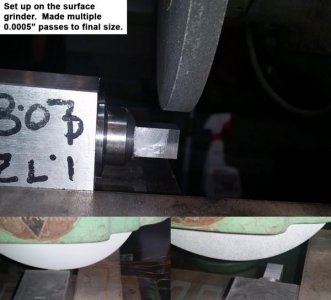
After milling went to my Delta Milwaukee surface grinder for final sizing. Dusted the last 0.007” off there. Took off 0.0005” on all 4 sides to remove the mill marks, then dusted to final size on two of the 4 sides.

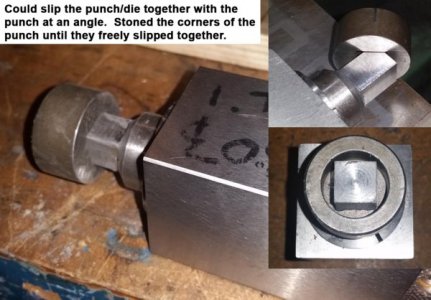
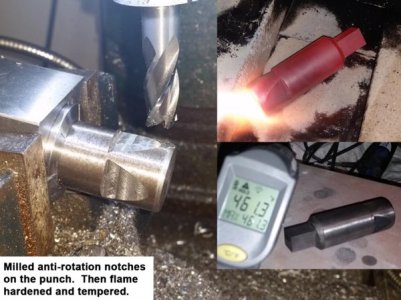
I could slip the punch and die over each other after grinding, but only if the punch was at an angle. The ½” die has a slight radii in the corners so the punch corners needed some work. Stoned in a radius on the corners until the punch and die slid over each other. Then to the welding bench for flame hardening with an oxyacetylene torch and tempering on a Thermolyne hot plate.

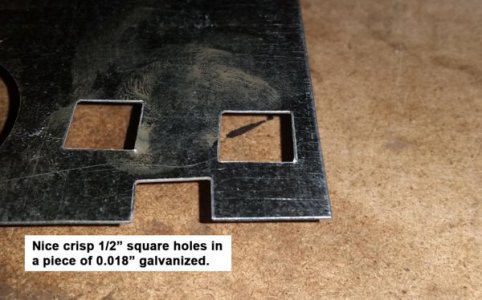
Proof in the pudding was checked on a piece of 0.018” galvanized stock, no problems and nice crisp edges. On to the next project . . .

Bruce

20170613_162648.jpg 20170613_170039.jpg 20170613_171418.jpg 20170613_185150.jpg 20170613_190650.jpg 20170613_195107.jpg 20170613_194839.jpg
 
POTD was making a tighter clearance ½” square punch to match a die. I have a project that needs ½” notches on the edge in 0.018” thick 304 stainless. Happened to have a sharp ½” square punch, but it did a crappy job shearing. Regardless of how I aligned the punch and die, ended up with a folded tab instead of a shear on one edge. I read on the web that punch to die clearance should be 20% of material thickness for plain steel and 25% of material thickness for stainless.

The die opening checked at 0.508” square, punch checked at 0.485” or WAY too much clearance for 0.018” stock. The total clearance should be 0.0045” per the on-line recommendations for a punch diameter of about 0.503". So, time to make a new punch.

Started with a piece of 1” drill rod. My Roper Whitney #218 press takes punches either ½” or 1” diameter. Optimal punch size would be 0.503”, so Mr. Pythagorean said I needed a rough diameter of 0.711”. I chose to go a little larger since the squaring would be done to close to final size on the mill.

After turning to size, the punch was mounted in a 5-C collet and held in a square collet block. Went to the mill and machined the flats to a 0.510” square. Did the math on the diameter vs. half-depth and made passes to that number on the first two sides. Then went to the final (over-sized) depth on the opposite sides. Pretty simple operation using a square collet block.

After milling went to my Delta Milwaukee surface grinder for final sizing. Dusted the last 0.007” off there. Took off 0.0005” on all 4 sides to remove the mill marks, then dusted to final size on two of the 4 sides.

I could slip the punch and die over each other after grinding, but only if the punch was at an angle. The ½” die has a slight radii in the corners so the punch corners needed some work. Stoned in a radius on the corners until the punch and die slid over each other. Then to the welding bench for flame hardening with an oxyacetylene torch and tempering on a Thermolyne hot plate.

Proof in the pudding was checked on a piece of 0.018” galvanized stock, no problems and nice crisp edges. On to the next project . . .

Bruce

View attachment 235555 View attachment 235556 View attachment 235557 View attachment 235558 View attachment 235559 View attachment 235562 View attachment 235563
Wow that's a good job on that punch and die
 
It must be my cheap welding machine
Lincoln AC 225 Amp.
Somebody told me years ago, if you want to weld 7018 with an AC machine, reverse the leads.
I tried it and it seemed to work better.
Just my .02 cents worth...
 
Back
Top