Ahhhhh.... I hadn't thought of tipping the dividing headThe made sphere/ball is perfectly round in shape with no flat spot. I’m using an Ellis dividing head and it’s angled so the cutter passes center on the outside and over the shaft diameter on the other side. On another note, you can wind up making out of round shapes if your set-up is not in alignment properly, ie: football shaped. And thank you folks for finding a video.
-
Welcome back Guest! Did you know you can mentor other members here at H-M? If not, please check out our Relaunch of Hobby Machinist Mentoring Program!
- Forums
- THE PROJECTS AREA
- PROJECT OF THE DAY --- WHAT DID YOU DO IN YOUR SHOP TODAY?
- Project of the Day Mega-Thread Archives
You are using an out of date browser. It may not display this or other websites correctly.
You should upgrade or use an alternative browser.
You should upgrade or use an alternative browser.
2016 POTD Thread Archive
- Thread starter sanddan
- Start date
- Joined
- Jun 12, 2014
- Messages
- 5,056
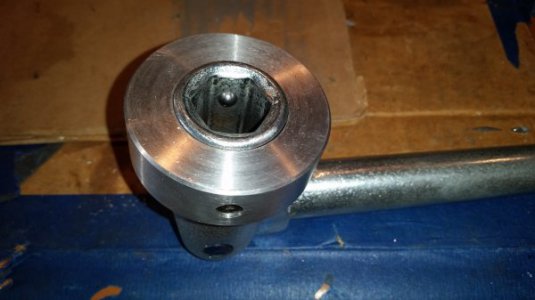
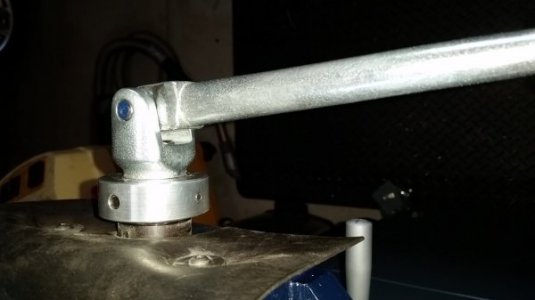
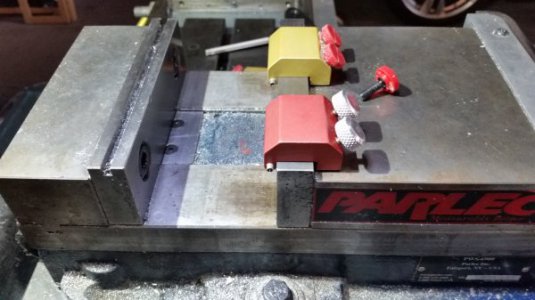
Well we all have the projects that we say we are going to do and never get done. One thing that always generates a few expletives when working is when the vice handle falls off and lands on your feet, now why do they not make some form of detent or simple locking system for the handle. Three years later, enough is enough. I have a 6" Parlec vise, very nice made in Taiwan, so no issues with it. The problem is the handle is a rough casting and there is not enough meat on the hub to install a ball detent system. So I made an adapter to hold the handle hub turned it true down to 1.249". I then turned a 6061 ring to fit over it, ID 2.50"x 3.25" x 0.75". It was pinned to the hub with two Allen screws. I then drilled two detent holes for 0.250 balls, I used a balll end mill to cut the detent hole so 0.080" of the ball was exposed, used springs and then some 5/16" cone head Allen screws to hold the springs in place. Now you would think the hard part was over, and all one would need is to drill some detents in the mill haex shaft. Well I marked the holes and proceeded to use a center punch to locate the holes to drill some shallow davits. Wrong, my nice (past tense) Starrett center punch lost it tips and didn't do anything the vice's hex shaft, ditto drills. So out comes the die grinder, and a 1/2 hour later we have some detents. PTA, but it all works well. The handles is retained on the hex shaft when turning it, easily pulls off with a yank. While I was at it, the vise stops come with plastic heads, drop them on the floor and the heads break off. Tried to epoxy it back together, but looks like crap. Turned some new heads, tapped the heads and inserted some SS threaded bolts, much better.


- Joined
- Jan 22, 2011
- Messages
- 8,031
That's the kind of stuff Friday afternoons are for. Good job.
- Joined
- Nov 23, 2014
- Messages
- 2,632
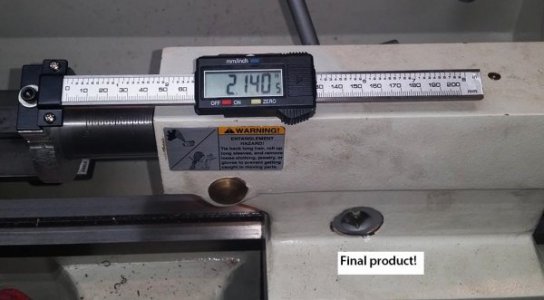
Long-winded write up with lots of photos in the Grizzly forum, but finished up installing a tail stock DRO on my Grizzly G0709 lathe.
http://hobby-machinist.com/threads/tail-stock-dro-on-a-g0709-lathe.50225/#post-422428
Bruce
http://hobby-machinist.com/threads/tail-stock-dro-on-a-g0709-lathe.50225/#post-422428
Bruce

I had posted a while back about the pancake boring head I made to use on my Burke mill. I started it a long time ago but it was kind of a flop. The dovetail was the only thing that was right. The nut was bad, the holes for the nut and screw were poorly aligned. I threw it in a corner for about a year. THEN... I needed one badly. I got it out and started reworking it. I got it to working good by making a new nut, screw and reaming the holes to align them. It came out great and I used it to do the job.
Well...... Today, I finished it up.
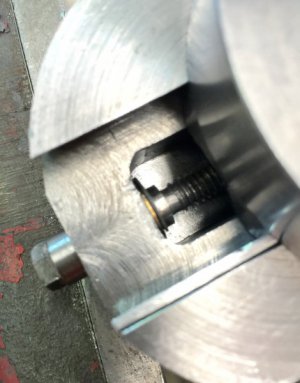 There was about .020" of back lash in the screw. You can see here where I machined a .020" brass spacer washer to remove the back lash.
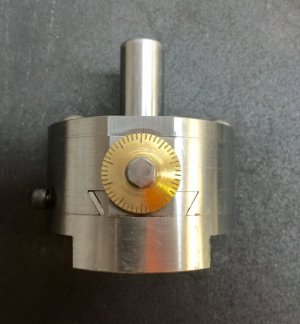
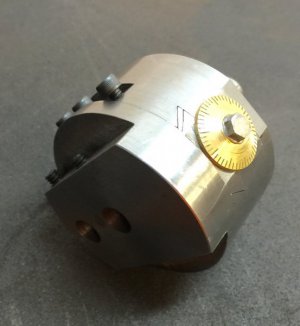
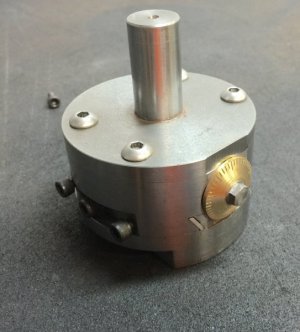 I machined a brass dial marked in .001" increments. Each division on the dial moves the slide .001". The dial is pressed on the screw. I did not stamp numbers on the dial because I have found them pretty much useless. I just count divisions for the needed cut. This dividing head is only 1 3/4" from top to bottom, making it great for tight places. It is 3"" in diameter.
I need to make a wood case for this little gem.
I'm finishing up details on projects like this that were made for completing other projects.
Well...... Today, I finished it up.
 There was about .020" of back lash in the screw. You can see here where I machined a .020" brass spacer washer to remove the back lash.

 I machined a brass dial marked in .001" increments. Each division on the dial moves the slide .001". The dial is pressed on the screw. I did not stamp numbers on the dial because I have found them pretty much useless. I just count divisions for the needed cut. This dividing head is only 1 3/4" from top to bottom, making it great for tight places. It is 3"" in diameter.
I need to make a wood case for this little gem.
I'm finishing up details on projects like this that were made for completing other projects.
- Joined
- Aug 29, 2013
- Messages
- 1,050
Once again Mark makes what I'm going to post sound silly and trivial.
Seriously, that's a beautiful piece.
Now, for my great accomplishment. I have a made-in-China DeWalt bench grinder. On the right hand side I installed the wheel I use for finer work. It's a Norton wheel that I've had for about forty years. This is the third grinder I've had it on. OK, the first grinder was actually on old refrigerator motor with an arbor. Still, it's worked really well for me and of course it came from my old home town.
On the left side where I usually do coarse grinding I just kept the wheel that came with the grinder. I rationalized it by thinking "it's good enough.. Besides DeWalt probably gets better quality wheels than the average cheap Chinese ones...".
Wrong. I was grinding down the shank on a bolt so it would clear the threaded hole when I heard a loud "DING". A segment had broken off the left side of the wheel. And I was not pushing it hard.
So now I have two Norton wheels on it as I fortunately had a coarse one on hand.
Last edited:
- Joined
- Jun 15, 2013
- Messages
- 1,199
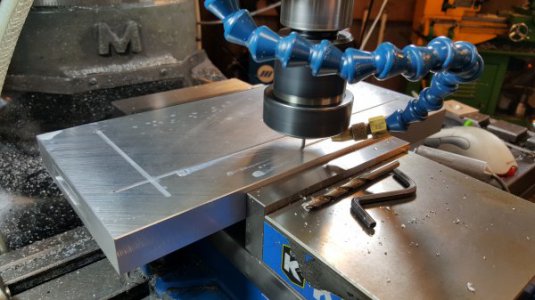
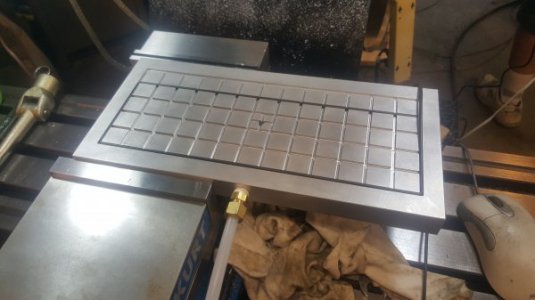
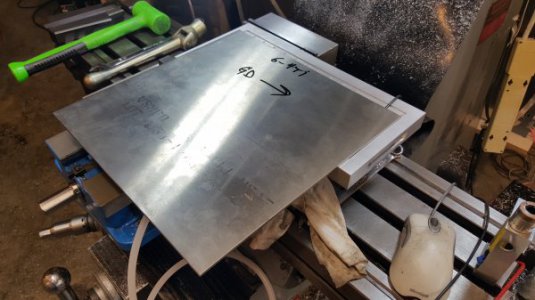
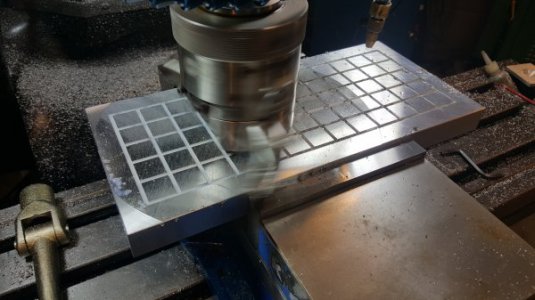
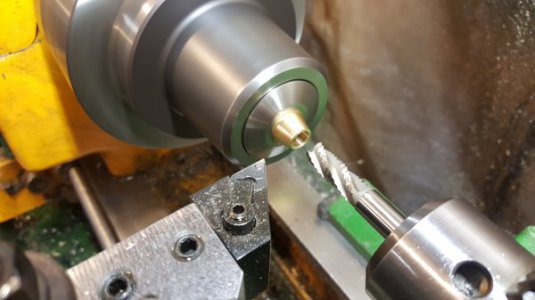
Been a long time since posted anything, but that doesn't mean I haven been busy, here's a vacuum chuck I made, it's modeled slightly after the Mitee bite vm100, 6x12.75 I machined it from 1" Alcoa MIC6 cast plate. It has slots on the sides for the clamps I made for it (not shown). I fly cut both sides and got a thickness variation of about 5 tenths across the entire chuck. The finish pass on the work side took an hour and 45mins to do, .005 doc, 1/4" minute. I'm using an electric vacuum pump, holding an 1/8th thick sheet of titanium down I pulled pretty good and couldn't break the seal.
I still need to sand blast the surface for some traction. I also intend to drill and ream locating holes for pins around the perimeter, I may also drill and tap all the squares. Additionally I would like to add larger locating pins to use it as a sub plate/pallet changer. I'm about $60 into the chuck not including the pump. Also had to make a small modification to the brass flare nut as seen being held in the Bison
I still need to sand blast the surface for some traction. I also intend to drill and ream locating holes for pins around the perimeter, I may also drill and tap all the squares. Additionally I would like to add larger locating pins to use it as a sub plate/pallet changer. I'm about $60 into the chuck not including the pump. Also had to make a small modification to the brass flare nut as seen being held in the Bison


Do you use this vacuum chuck to hold parts to machine? If so, that would scare me. Can you get a strong enough hold?Been a long time since posted anything, but that doesn't mean I haven been busy, here's a vacuum chuck I made, it's modeled slightly after the Mitee bite vm100, 6x12.75 I machined it from 1" Alcoa MIC6 cast plate. It has slots on the sides for the clamps I made for it (not shown). I fly cut both sides and got a thickness variation of about 5 tenths across the entire chuck. The finish pass on the work side took an hour and 45mins to do, .005 doc, 1/4" minute. I'm using an electric vacuum pump, holding an 1/8th thick sheet of titanium down I pulled pretty good and couldn't break the seal.
I still need to sand blast the surface for some traction. I also intend to drill and ream locating holes for pins around the perimeter, I may also drill and tap all the squares. Additionally I would like to add larger locating pins to use it as a sub plate/pallet changer. I'm about $60 into the chuck not including the pump. Also had to make a small modification to the brass flare nut as seen being held in the Bison
View attachment 135641 View attachment 135642 View attachment 135643 View attachment 135644 View attachment 135649
