2014 POTD Thread Archive

This has been keeping me in the shop and out of the cold for the last 3 or 4 days. Its a JohnDeere stretch side by side, four seater. Apparently its not nearly as tough as the tree it hit. Caught the right A frame and bent the frame sideways far enough to snap the input shaft on the diff. Then the impact went up bending pretty much every member in the front end.
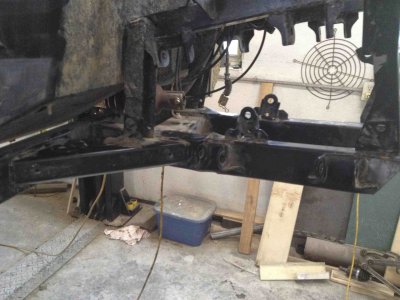
IMG_0971.jpg

IMG_0972.jpg


Made new front rails and A frame mounts then had to twist cut and bend everything back to fit them.
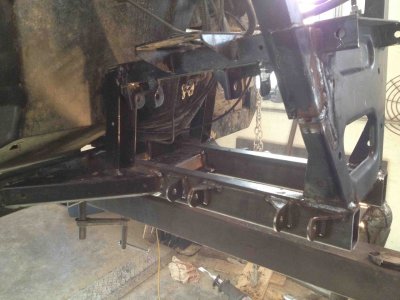
IMG_0985.jpg


Waiting for the owner to get the gear set for the diff, and right strut. Still have to weld the aluminium rack and pinion housing back together and see what can be done with the bush (or should we say grass guard).

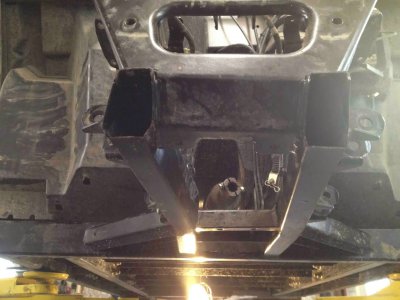
IMG_0971.jpg IMG_0972.jpg IMG_0985.jpg
 
No pics, but I knocked my tailstock out of alignment. I was cutting a piece and it looked tapered to the eye which should tell you right off that it was pretty bad. I hadn't noticed as I have not been using it lately other than an occasional center drill. I started working on it and got sidetracked into first fixing the cam lock on it because it was slipping and couldn't get the alignment until I got it stable.

Once I got the cam lock fixed, I loosened up the set screw and locking screw and turned the piece down several times and measured until I got the diameter fairly stable for the length of the part. Then I chucked up a part to start over (I had cannibalized my part for the test turning) and turned it and realized that the tailstock had shifted a bit when I tightened it down. I pulled the magnifying light over to look it over and the lamp came apart in my hand. A 45 minute side trip into making a new clamping part for the light in the semi-darkness of an LED hand light and I called it a night at about 12:30 last night.

Then tonight, the stars aligned. I pulled the collet holder off the spindle and put in dead centers for the tailstock and spindle and matched them end to end to set a starting point for adjustment. Turned a fresh piece of stock down to start the measure and adjust dance over again and when I measured it, I got exactly the same diameter down the entire length within well under a thousandth. Took off the tailstock and tightened it all up and checked again. Still good.

I finally got it all buttoned up and remounted the collet holder and now I am ready to get back to the project I was working on.

Oh, and by the way, the parts I have been working on all week are to build a pair of machinist clamps that I could have bought for under $20.

The funny thing is, it has been enjoyable rather than frustrating.
 
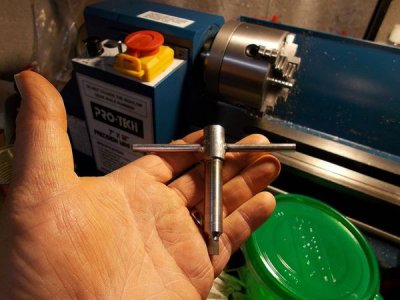
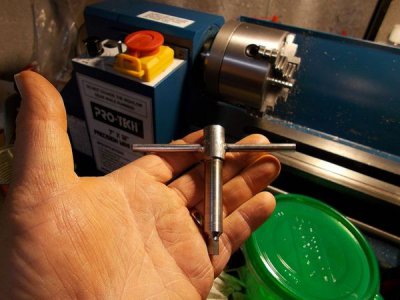
I just got a new 4" 4 jaw chuck for my Mini-Lathe, so tonight I made a second key for it:

MiniLathe11_zps7ec3d850.jpg

Started out with a 5/8" and a 1/4" Grade 2 bolts, and went to work on it. I've had good luck using Grade 2 bolts for cheap stock. They turn pretty nicely.

All done on the Mini-Lathe. I wanted to make the T bar a press fit, but my chinese el-cheapo size "D" drill made the hole about 4 thousandths too big... so I soldered the bar in with some plumbers solder. Too cold outside to get the torch out and braze it tonight.
Hi Ol' Buzzard
Just wondering why U did not Drill, Tap and use a SET SCREW / GRUB SCREW from the top on the main shaft to hold all things in place, without any more movement.
That would indeed have looked even more cool !!
Just my two cents worth !!
Take Care
aRM

- - - Updated - - -

OK, another one.

Ken
Hi Ken
Thanks for posting this.
This is so neat.
Well done.
Worth Duplicating.
No copyright here !!!
Keep 'em rolling.
Take Care
aRM

MiniLathe11_zps7ec3d850.jpg
 
Last edited:
Hi Ol' Buzzard
Just wondering why U did not Drill, Tap and use a SET SCREW / GRUB SCREW from the top on the main shaft to hold all things in place, without any more movement.
That would indeed have looked even more cool !!
Just my two cents worth !!
Take Care
aRM


At the time, I never even thought of it :shrugs:


If the solder doesn't hold though, I think that's what I'm going to do.
 
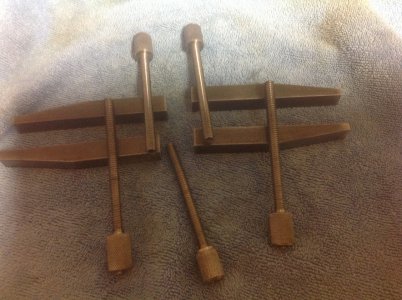
Finally progress to be had. After all the detours I made before, I was able to get the parts roughed out for my machinists clamps. A little drilling and tapping plus some fancy work and I will have them finished. Just have to decide on the retainer for the fixed screw. It will either be an external clip or an E-clip between the jaws like Starrett does it.

IMG_0300.JPG

Note the wonky shaft on the extra screw. That was from some mystery metal scrap. It wanted to twist as I was threading it. That was when I decided to go ahead and just do it all in 12L14. It cuts much more cleanly. I went ahead and did the threading with a die in a tailstock holder because I didn't want to mess with single point threading and dealing with flex in the thin shafts. I do have a follower but I didn't feel like setting it up. Also a little play is an advantage in this kind of clamp to give it some wiggle room when flexing under pressure and allows a little bit of non-parallel positioning of the jaws..

IMG_0300.JPG
 
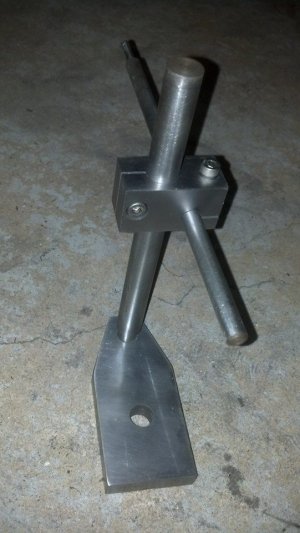
Some awesome work in here no doubt. I got some great ideas thanks to you folks. I figured I would post what I have done in school. Nothing fancy yet. The first is a self centering tap guide. I started it my second day in school which was our first day on a machine. The next is a mill stop. All told we only have about 10hr each (7 on a mill and 3 on a lathe). I figure the whole class is doing pretty good.

1450273_728632537151708_1249239834_n.jpg 941500_728632290485066_1301813190_n.jpg 1491734_767850446563250_817287798_n.jpg 1604691_767850339896594_1377865880_n.jpg 1545901_767850463229915_1559412037_n.jpg 1536455_767850296563265_525462347_n.jpg
 
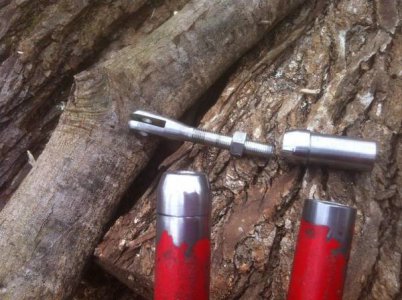
Turned these two adjustable rod end weldments to modify two Pietenpol cabane strut tensioners. Turned from 1.125 CRS. They're only under a tension load, never compression. The plane's builder wants to fish-mouth the tube before welding. Comments?

cabane_zpsf86d74df.jpg

Fishmouthing the tube gives a much longer weld bead, therefore a stronger joint. It's common practice in aviation welds. Cabanes are not an area where one would want to risk a problem. Nice work on the fork and plug.

Tom

cabane_zpsf86d74df.jpg
 
Thanks Tom.

I wish there was an easy way to leave a boss to perfectly fill the void of the fish-mouth. Wouldn't that be cool!
 
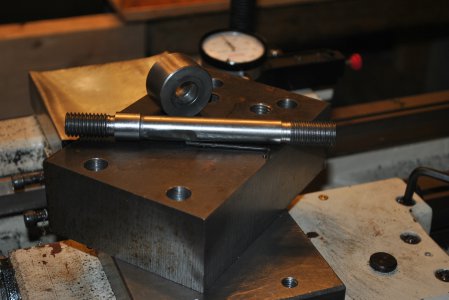
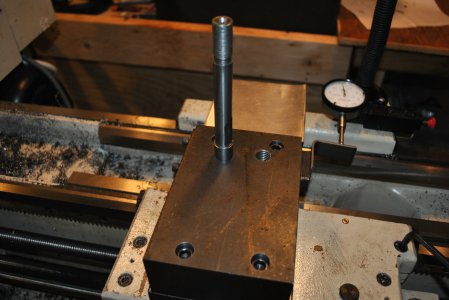
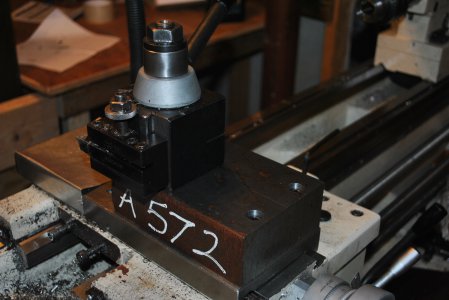
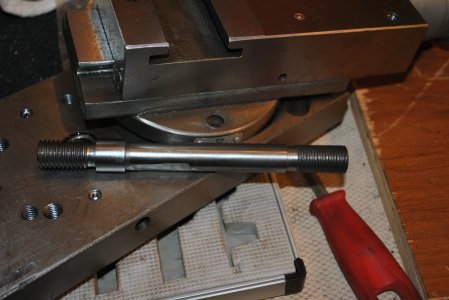
I'm in the process of building a milling attachment for my G4003G. Since it uses the factory compound slide as the vertical axis, I thought I would cobble up a replacement so I could switch from milling to turning without taking the milling attachment apart every 5 minutes. Picked up a 2 inch thick chunk of steel for the base and a one inch bolt to machine the new QCTP stud from. Ten bux at the scrap yard. Tapped the xslide for four cap screws 3/8 x 16. Rigid as all getout. The fine thread end of the tool post stud is my first ever metric thread.

DSC_0817.JPG DSC_0822.JPG DSC_0824.JPG DSC_0811.JPG
 
Last edited:
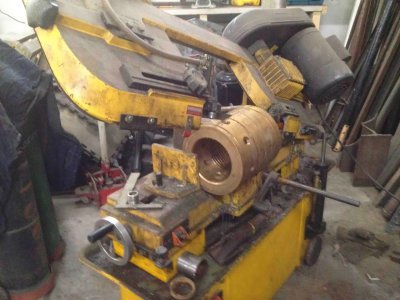
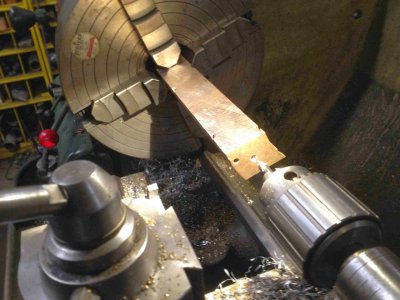
One of the very few disadvantage to rural life is the hour drive to the city when you need stock. If the foundry was up and running I could cast some brass rod but its not so here was todays alternative. Was given four of these bushings years ago, about 7 1/4 tall and 7 1/2 dia with a 1 5/16 wall. Saw out a slab.


IMG_0987.jpg


And make it round.


IMG_0988.jpg

Greg

IMG_0987.jpg IMG_0988.jpg
 
Back
Top