1940 Ford Deluxe

I doubt it... the panel is stamped from (I'm guessing) maybe 18 guage aluminum... it might be possible to clamp it to a sacrificial board, but indicating it would be difficult, and trying to machine it might destroy it. It's pretty flimsy...

On the other hand, at this point it's no good as-is... so it might be worth a try...

-Bear
I can think of another approach, but it wouldn't be cheap. Mount it to a sacrificial piece, carefully center it on your mill, re-cut using a 2-5/8" annular cutter. I've milled some pretty thin aluminum stock that way. It worked fine, but annular cutters will set you back a few bucks. There are certainly more cost-efficient ways to do this unless you happen to already have access to that size cutter. I'll check my stock. Two or three of mine are pretty large. If I have that size, you're more than welcome to borrow it. I'll let you know.

Regards

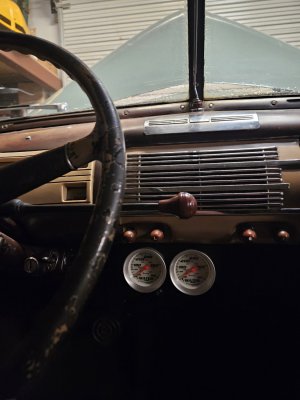
Thanks, Terry, I started early this morning fitting the guages to the panel with a sanding drum on an air motor...

I managed to get them fit without screwing the panel up.

20231114_085801.jpg

I have them installed and one of the senders routed.

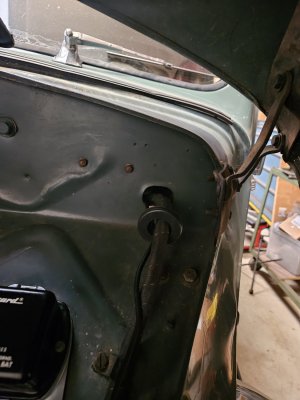
Where the main wiring harness is routed through the firewall, there is a rubber grommet inserted around the harness... I worked that grommet out of the hole and am running the senders through the hole along with the harness. The grommet is stretchy enough to work the senders through... the difficult part may be working the grommet back into the hole.

Here I have one sender routed through the hole and grommet...

20231114_085853.jpg

Hopefully, I'll be able to finish up this guage install this afternoon.

-Bear
 
Sanding drum will fix that.
Pierre

Done... thanks for the idea!

Ask the manufacturer about it?

Goto their web page, contact us, include the part numbers.

Ask why they do not fit.

They may send you what does fit.

Sent from my SM-G781V using Tapatalk

I sent Equus a message and told them about the issue... I'm not expecting anything, but will see if I get a response.

-Bear
 
Thanks, Terry, I started early this morning fitting the guages to the panel with a sanding drum on an air motor...

I managed to get them fit without screwing the panel up.

View attachment 466621

I have them installed and one of the senders routed.

Where the main wiring harness is routed through the firewall, there is a rubber grommet inserted around the harness... I worked that grommet out of the hole and am running the senders through the hole along with the harness. The grommet is stretchy enough to work the senders through... the difficult part may be working the grommet back into the hole.

Here I have one sender routed through the hole and grommet...

View attachment 466622

Hopefully, I'll be able to finish up this guage install this afternoon.

-Bear
I knew you could do it.
 
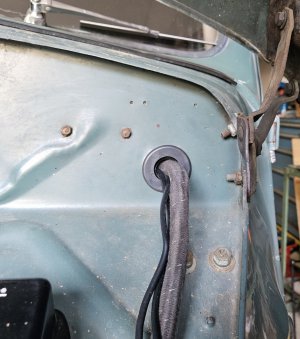
I have both guages fully installed... working the grommet back into the hole in the firewall was not a problem at all...

20231114_154119.jpg

Hopefully, I'm done with the cooling system and can move on to other things.

-Bear
 
I haven't updated this lately, so...

After finishing up the cooling system and mounting all four new wheels and tires, I fired the car up... I was all excited to see how it drove with the new rubber.

However... I couldn't get the car to run well enough to drive it... it was running very rich and was fouling the spark plugs. I replaced all the plugs with new Autolite 216s...

I hadn't done anything to the carburetor/ fuel system at all... so wth? After fooling with it for a couple of weeks, I decided probably the ethanol in the gasoline had taken its toll on the carburetor. I removed the carb and shipped it to a Holley 94 expert in New York for a rebuild.

It came back to me a couple of weeks ago, I finally found time to reinstall it yesterday. The car now runs much better, but still not very good...

So I started pulling the spark plugs one at a time and checking the compression on the cylinders. All 8 cylinders were within a couple of PSI of each other...

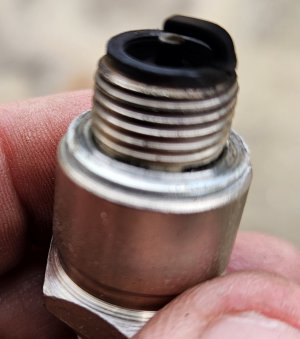
The plugs, however, told their own story. All four passenger side plugs (cylinders 1 thru 4) and cylinder 7 looked like this...
20240227_151028.jpg


They obviously have some carbon fouling from when the engine was running very rich, but the fouling was starting to burn off around the gap.

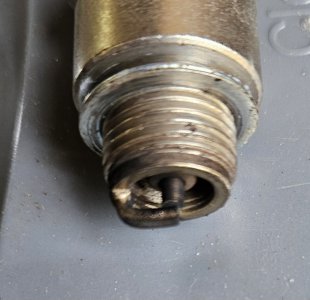
Cylinders 5 and 6 looked like this...
20240227_151435.jpg

Very little carbon fouling on these, but they had obviously been working... at least somewhat...

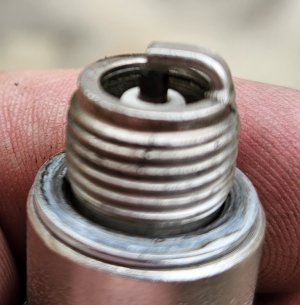
Cylinder 8, however...
20240227_150827.jpg

...looks like it was just pulled out of the box. A quick test verified plug number 8 is not getting any fire... none at all. I checked it with one of the old plugs to see if it was a bad plug, but the old plug wasn't firing, either.

Tomorrow, if I get time, I'll start checking for continuity between the distributor cap and spark plugs to see if the plug wires have issues. If the wires all check out, it just about has to be a distributor problem.

-Bear
 
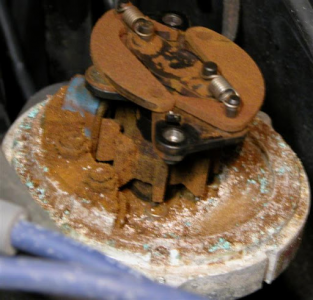
Check inside of the cap also, sometimes humidity can cause a lot of corrosion in the distributor. This is a very bad case though.
1709096538911.png
 
Last edited:
This is where the old ignition scopes came in so handy.

Go old school.


Start by doing this.

Get engine warmed up so choke not needed.

Will assume carb adjustment for best vacuum at idle.

Very slowly open throttle and observe vacuum and sound, both should be smooth.

Next, shut off and lift all plug wires from distributor, pull them out to get the "snap" to release, then place back just enough to touch.

Connect tach to engine.

Start and one at a time, lift one up and observe change in vacuum and rpm, this gives general idea of by cylinder performance, the old scopes had a switch to do this.

On each bank, note best and worst.

Note the wire positions, swap the plug wires AT BOTH ENDS and retest, this checks the wires.

The clean plug is concerning, black ones are too rich.

Stupid things like clogged mid speed port in a carb or wrong jet or float level can cause interesting things.

Doing the slow throttl roll with vacuum Guage often can find a spot where the engine response bumps.

Too large of a carb also can do odd things, too small and engine runs fine until you get to capacity and engine gets starved, too large and it just does not mix well at any speed, float usually too high to get venturi to work, but then fuel just dumps in and does not vaporize properly.


Sent from my SM-G781V using Tapatalk
 
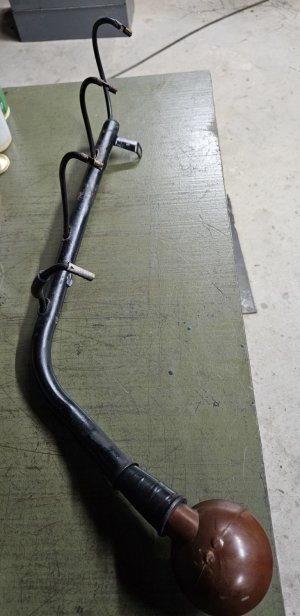
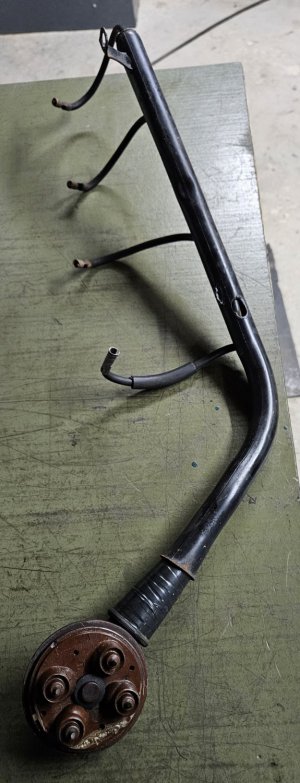
I've pulled the driver side plug wire/ distributor cap assembly off and put it on the workbench...

20240228_130632.jpg

20240228_130645.jpg

After cleaning the contacts at the ends of the wires and on the cap, I checked each wire for continuity using an ohmmeter...

Wire # 8 showed too much resistance... #s 6 and 7 were on the high side of acceptable... # 5 showed no continuity at all. On farther inspection, I realized the connector on the #5 wire has been replaced by a cheap aftermarket connector and the copper conductor in the wire isn't even touching the connector. It depends on that conductor being held against the top of the spark plug to work.

I seperated the two halves of the distributor cap to make sure the wires were clipped into the inner half securely... they were, so I reassembled the cap.

I think, at this point, I really need to replace the wires... it looks like it would be a tedious, but not terribly difficult job. The hard part will be working the new wires back through the steel tube that they are routed through.

Stay tuned...

-Bear
 
Back
Top