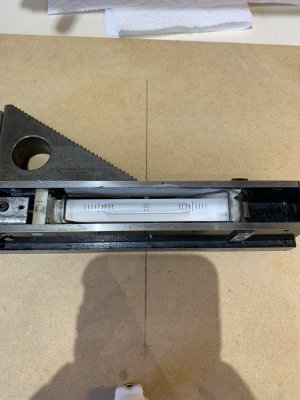
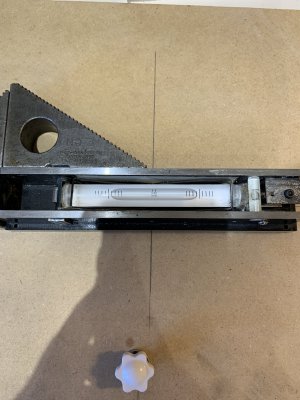
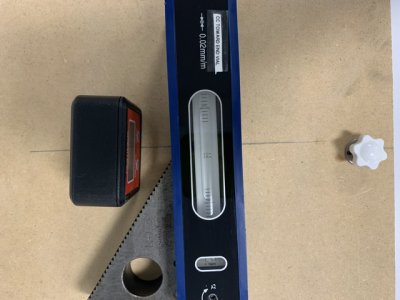
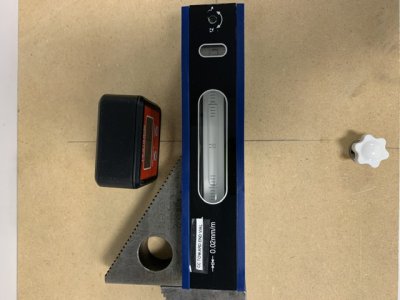
12" machinist level

@graham-xrf I don't want to hijack this thread, but to design a stand to do what you want, you need to think like a bridge designer, with the goal to minimize strain (deflection) not strength. It is pretty tricky. As you said, sometimes beefier just means more steel, not any sturdier. Ironically, strength is not important - wait for it - If you design for minimum deflection, it will be more than strong enough.....

My first lathe stand (for my 12X37, 800lbs), before I understood how to make it stiff, did the job okay, because it was intended to be used on a concrete floor. It was 2X2 by 3/8 angle iron forming a square, with 1" thick pads (for bolting the machine down) welded to them, and 3" X 3" by 3/8 legs that formed flat topped "A" formation. the long side had 2 4' diagonals of 1"X1" by 3/16 angle forming about a 48X30X24 triangle.

BUT that structure wouldn't do what you suggest. It has to be so rigid that if you lift any one leg, the other diagonal legs will be lifted without sagging appreciably. Wood, a topping material, would do okay, but not as the structure. Just a few thoughts.....

You could build a rim base, a box however high out of 10 gauge steel, with a appropriate mounting system. However to stop it from 'racking' you would need diagonals in both directions as well. As I implied earlier, it is very hard to build a rigid structure for lathe based weights.

--that is why we accept 'limp spaghetti' stands, and make the bed planar through various techniques, including leveling and the 2 collar test. That is also why we need to recheck for straight after moving a week, month and several months after.

-- one last point: the lathe is also culpable in this. If it has been twisted for a while, it will take time to relieve its twist. So you over twist it to get planar, then it 'relaxes', and over twists, and it is now bent the OTHER way. I've seen it a lot.
 
[Sigh!] I only just came across this thread, and it has still 5 little squares of past postings to click before I get through it all. It has explored the leveling deal to the limit of what can be done with bubbles on glass. What to do if the thing you are working with shifts about just because you walked across the room, or did six weeks of heavy rough cuts?

I get it that true level is a beast to get right, and has to be addressed, because the stuff we turn/mill will show the effects, depressingly confirmed by the double-ended test bar taper test. It leads me to ask..

1) If you have leveled (say) across the ways at a headstock, and the tailstock is supported in the middle on a third point, and you check level at the tailstock end, and you discover it is out, does that mean there is a true twist that has to be scraped out? Can you just deliberately set the supports to "untwist" it?

2) Suppose you adjust from under the whole lathe supports (4 points this time), and you tweak away until it is all level. Have you really left one support with zero or some little force under it, and in effect set up force to "untwist"?

3) If you do tweak on the leveling supports, do the twists and bends from the forces you set up take the iron out of shape immediately? In 5 seconds? In 10 minutes?

4) Suppose the machine has been "out of level" for ages, and has been turning tapers. Then you set the level to what looks correct. Has the iron "taken a set" ? Did the twist become permanant? If not, how long does it take to "relax out"?

I am embarrassed to ask these questions. In my recent work, I have used absolute encoders and electronic clinometers which work between 50 and 400 milli-arc seconds, but I still don't know how the restoration fine piece of semi-steel lathe bed from mid previous century is going to behave. I am getting it that my shop/outbuilding/shed/man cave (early construction stages) had better have concrete under it, and if a wooden floor, then I had better cut through and set blocks down to substrate.

Graham, correct me if I'm wrong but is the situation that you have an old lathe that you are restoring and you are concerned that it may have some bed twist and you are not certain you can get it straight and level enough to be functional?

Dabbler has already given you a lot of valuable insights but I'll try to add some opinions.

You would think that a lathe must have a solid connection to the earth if it is to be leveled and accurate but perhaps this is not entirely true. I have a Sherline lathe that weighs all of 32# or so. It has a mild steel bed set into a cast aluminum base and that base sits on a 3/4" thick Melamine ply base set on 6 rubber feet. To level it, I put aluminum foil shims between the aluminum base and the plywood and it has maintained its level for about 30 years, despite me carrying the lathe back and forth from its storage location. This lathe can cut a taper-free work piece over 4-6" and with my shop-made live center, it can turn much longer pieces without any significant taper. And it can do it to a 1-1/4" piece of steel or aluminum.

So, what does that say about solid mounting? I believe that if you can solidly mount the lathe to the ground then the more solid the connection, the better. However, the lathe can still be made to be accurate if it sits on a base that is rigid enough, even if the base itself sits on a less than solid support. IOW, if the lathe must sit on a less than solid surface then focus on making the support the lathe does sit on as rigid as you can possibly make it and you should still be okay.

Insofar as to whether or not you can untwist a bed that has been twisted for years, I believe you can. Iron, especially cast iron, moves, and it moves more than you might think. Metal can take a set but given enough force, it will move again. I say this not from a metallurgy background but from an experiential one. I have helped to level lathes (10-13") that were made in the 1940's that had been sitting for decades. Even though it took several tries to get it to resettle, they did so and we were able to level them just fine. All the lathes I am referring to sat on their own cast iron stands and those stands were sitting on solid concrete so that helped but they still moved enough to be leveled fairly easily. Now, you have to accept that the bed will not untwist in one go. It can take a preliminary leveling to get it as good as you can, then another session to get closer and then repeated every few weeks until it behaves but it will get there. I would definitely not scrape anything in an attempt to level the lathe; you will only destroy that lathe.

I think the heavier the lathe, the easier it is to level it and have it stay level. That does not mean a light lathe cannot be leveled with great precision; it can, but it takes a bit longer to settle. As evidence, I give you my Sherline and the thousands of smaller hobby lathes out there. Nobody will ever convince me that a light lathe cannot be precisely leveled.

I also believe that a level lathe is much easier to work with. If the lathe is not level, it produces a taper. If that taper is acceptable to you then fine but if the only thing that stands between having a taper-producing lathe and an accurate one is leveling the lathe then it makes sense to me to level the damned thing. For my lathe, the difference between accepting a few thou of taper and zero taper is usually a few fractional turns on the leveling pads; why would I not take the time to do that? This is where that precision level comes in. It allows you to get to the point where you can quickly do a 2-collar test and a few tweaks to the levelers and be done with it.
 
Graham, correct me if I'm wrong but is the situation that you have an old lathe that you are restoring and you are concerned that it may have some bed twist and you are not certain you can get it straight and level enough to be functional?
Yes indeed, you have that exactly right, except put that in the plural. One SB9 is working, but has the more worn ways. The other was in a pile of bits, but I have picked through them all, and I found everything was actually there. The bed had been laying on it's side under the motor for who knows how long. If a lathe is actually apart, it is likely for a good reason. Maybe only for a paint job, but I was not going to simply put it together without at least a measure-up and decide. Getting to a starting point where I can properly discover if there are problems, especially I where I did not have solid experience, is what prompts these questions.

My apologies if I have inadvertently diverted the thread. I thought that this issue was related and relevant. Levels have a job to do on machines, and I don't think folk get into extremes of levels technology with only love of levels in mind (do they)?

@mikey
You would think that a lathe must have a solid connection to the earth if it is to be leveled and accurate but perhaps this is not entirely true.
OK - I get it now. A lathe, especially the bigger heavier ones, can hold it's working parts in the right place relative to each other so long as it's mounting points are level, and unable to move about in that level plane. The bed is put into the same state it was when it was planed. The example of putting a lathe (Sherline) on a base that is on rubber feet, but lathe can be leveled shows that a bench under can be of wood or anything you like , so long as it is strong enough stay still and keep the supports in the same place day after day. Bench nor floor does not have to supply stiffness, just level support,

Now, you have to accept that the bed will not untwist in one go. It can take a preliminary leveling to get it as good as you can, then another session to get closer and then repeated every few weeks until it behaves but it will get there. I would definitely not scrape anything in an attempt to level the lathe; you will only destroy that lathe.

I think the heavier the lathe, the easier it is to level it and have it stay level. That does not mean a light lathe cannot be leveled with great precision; it can, but it takes a bit longer to settle. As evidence, I give you my Sherline and the thousands of smaller hobby lathes out there. Nobody will ever convince me that a light lathe cannot be precisely leveled.

Definitely not going near scraping unless it needs it for reasons of wear. If the situation is there is definitely a twist, and it's a light lathe like SB9, I would likely attempt to "speed up" the getting back to normal by temporarily loading it appropriately. The unworn tops of the ways will do fine as reference if I just assume they were level when the bed was made. So far, I have confined my "restoration" to parts around the edges, and now, I have put all aside to get into construction of 18' x 12' outhouse/shop/shed/man-cave/viral_pestilence_hideout.

I thought if I "hung" the bed vertical from one end, and set it ringing now and then while I get the shop together, it would maybe find it's own way back to the state it was when it was made.
 
Last edited:
Man! I hate to bring this back to the original situation...but @Aukai I have a dumbed down way to get it dead nuts on. Remember, I gave up & tore mine apart. I replaced the crappy adjustment screw with an Allen, other than that, it’s all on the jinky way I brought it in to calibration.
If your DONE...I definitely get it, but this took me about 2 hours, & the 1st hours was just the same old chasing my tail, the last hour it move close & closer, removing that imbalance between left & right flip.
Holy cow what a load off!
 

Attachments

  • 428A7A18-DDAE-47A4-B7A0-47B2CC49383E.jpeg
    428A7A18-DDAE-47A4-B7A0-47B2CC49383E.jpeg
    1.6 MB · Views: 11
  • 8170C19F-C813-4E33-9EFF-82CA23DDF0F9.jpeg
    8170C19F-C813-4E33-9EFF-82CA23DDF0F9.jpeg
    1.4 MB · Views: 12
@GunsOfNavarone : That is great! Really well done. Seal up the adjuster with a drop of wax, or hot-melt, or nail varnish (yes - it's OK to raid any lady's kit for a cause like this), and know that this level now has an added value hard to match from any supplier. For you, it has arrived at a status of TRUST.

You don't have anymore to be persuaded by advertisements, nor reputation, nor a huge hit on your wallet. You know what it can do, and you know what it took to make it so.
 
@Aukai I think (I know mine) was far too out of calibration to use a level table to try to hit on center. On your flat surface, adjust the level until its lightly hitting the end of the vial either side, to where it seems to have less gravity working against it..I know, wonky. Then using a tripod table (I built one in 10 mins and it even had a SLIGHT bow to it!) Now using the ADJUSTABLE TABLE LEGS, move the bubble until it's closer to center (not on center) flip it and use the adjustment screw and split that in half, flip it, use the table legs and again (split it) Never try to get dead center, just keep splitting a few times. Now level you table (just close ish) and go again. Literally about 6 or 7 shots, I saw how close it became. When you re-level the table, make sure you get the small perpendicular vial reset as well. I can promise you'll get the quickly this way. I was actually going to pull the vial and trash the whole thing yesterday!
Great to hear, glad it came around. I'm not done yet
 
I certainly know that feeling. Thanks for the tips, very useful when I get back at it, I'm working the airport, don't get home till 2200 ish
 
@Aukai I think (I know mine) was far too out of calibration to use a level table to try to hit on center. On your flat surface, adjust the level until its lightly hitting the end of the vial either side, to where it seems to have less gravity working against it..I know, wonky. Then using a tripod table (I built one in 10 mins and it even had a SLIGHT bow to it!) Now using the ADJUSTABLE TABLE LEGS, move the bubble until it's closer to center (not on center) flip it and use the adjustment screw and split that in half, flip it, use the table legs and again (split it) Never try to get dead center, just keep splitting a few times. Now level you table (just close ish) and go again. Literally about 6 or 7 shots, I saw how close it became. When you re-level the table, make sure you get the small perpendicular vial reset as well. I can promise you'll get the quickly this way. I was actually going to pull the vial and trash the whole thing yesterday!
Now as I read this again, I am thinking I know why it might have been such a battle. I may be wrong here, and please forgive if I misunderstand what you did, but it looks to me as if you ended up leveling two things, one being the level itself, and the other, the table under it, in an iterative process where stage by stage, you zeroed in on getting everything level, including the surface under the level.

I have done this process, and it took nothing like what you describe to get there. The surface under the level needs only to be pretty flat, and not move at all. The sort of flatness common on a piece of MDF will do. The surface does NOT have to be level, nor need it get leveled in the process. It can, in theory even be at a silly tilt, but it helps to have it approximately level when you start out, if only to not have things fall off. Getting the surface to a sloppy version of level is good enough, and it slows down the change from bubble jammed up one side to slinging across to the other.

I kept rotating the level around a mark until the bubble moved across. To speed things up, I used a separate level first. One that behaved, and would be against the same line showing level when reversed. Then I tried the one needing adjusting, and as expected, it found a new line, and when reversed, yet another, with my reference line straight up the middle of them. From then on, I only used the "good" line. I marked the corner place of the level also, so that when I turned it 180°, I could set it down in the same place.

The rest is obvious, although several times, I did keep turning the adjuster the "wrong" direction because of messing up which way was "up". Allowing waiting for settle times, it took about 30mins. I never needed to alter the MDF surface. Important that it stays put, ummoved during the entire process. Absolutely not adjusting it from underneath. Simply set the level up to the same line you know to be true level every time, and leave the table alone.
 
@graham-xrf
I really believe (and I can only speak for myself) was that when I first got the level, I thought, I’ll make sure it’s calibrated...Chinese/shipping/not a terribly expensive level etc...
I had NO IDEA what I was fooling with. I watched videos, but never did I get the warning I should have. Since then it’s been a nightmare. Mine is particularly complex inside compared to most, and I disassembled it. Anyway, I FOUND a perfectly level surface is a bad thing when THIS FAR OUT IF WACK. I would have never got it calibrated....ever.
Getting the bubble where it just was not pegging a side was a good start. Both Aukai & myself could achieve this, but flipping it 180 destroyed it. So, instead of adjusting the level when I flipped it....I changed the TABLE LEVEL. No the pegged side was SLOWLY GETTING CLOSER TO CENTER, but no there yet. Flipped it and NOW changed the adjustment slightly. Back and forth with this technique. I THINK what it did was MUCH SLOWER, bring it into calibration. Splitting the difference of how much my table was off and how much my level was off.
I actually took it on a cold, bumpy ride to work today to make sure it wasn’t a fluke. I’m still dead on!
These levels to someone new at dealing with them are IMPOSSIBLE to get calibrated once you have pretty much turned the adjustment screw all the way one way, then all the way the other. Now it’s good, I CAN use a level surface, but before, just wasn’t going to ever happen. Added work pictures...
 

Attachments

  • 9C8BF618-FCF0-477F-BD5E-DD976331CD24.jpeg
    9C8BF618-FCF0-477F-BD5E-DD976331CD24.jpeg
    84.3 KB · Views: 7
  • E5F21025-1C3E-4DF9-A42E-23B6A5E83298.jpeg
    E5F21025-1C3E-4DF9-A42E-23B6A5E83298.jpeg
    84.1 KB · Views: 5
Back
Top