Re: YALB (Yet Another Lathe Bench)... CONCLUSION and SUMMARY
OK, after dealing with uncountable delays... The lathe bench is finally done. First, just want folks to know that I tried many experiments in the process of doing all the final setup. I wanted to learn first-hand and hopefully have enough info to put an end to all the myth about lathe leveling. I also apologize it took so long but, life gets in the way of fun and that's how the dice roll.
First, just a picture of the overall area with some new top shelves and a built-in bench shelf. I'm planning to put a plexiglass cover over the built-in shelf because it will surely get filled with swarf as it is now. The foot brake from the old bench was easily installed in the new bench. The footer rails of this bench were positioned to accommodate the brake mechanism as-is. I also installed the brake pads on the gearbox main sheave so it has a true emergency brake now.
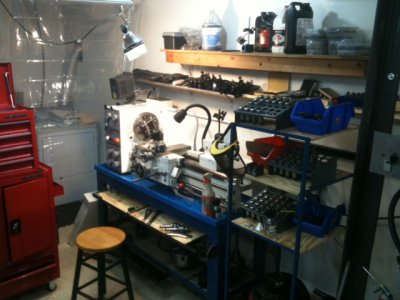
Here's a close up of the built in self which is just a frame of angle iron and 5/16 plywood and another picture of some underside storage. BTW: Drilling the frame mounting holes in 1/2" steel with a hand drill was no picnic.
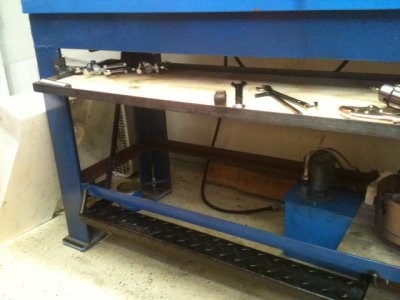
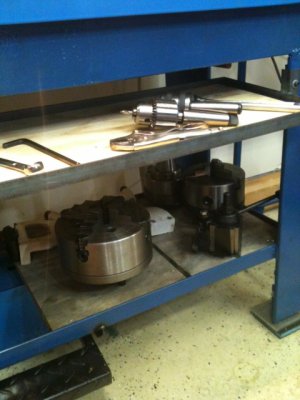
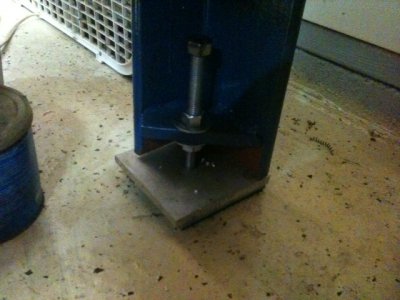
Now for the basic bench leveling... Each leg as a 5/8" screw jack built into it as pictured. These were for basic leveling of the bench to accommodate the slope in the garage floor. For this, a carpenter's level was simply used on bench itself. As adjustments were made, I tried to get a good feel of how much torque was being applied and tried to make all the leveling bolts feel approximately the same. Right now, each jack is sitting on a metal plate which is then sitting on a piece of industrial vibration pad. The pads were from eBay -real cheap. Each one is good for 50lbs/sqin and they are 4x4" (=800lbs). In the process of doing all this, I wasn't sure if the vibration pads were needed or not. Tests were done both ways and pads seemed to help. Time will tell if I decide to keep them. Now that I have a handle on how to level this lathe, removing the pads and re-doing it shouldn't be too difficult.
Now for the good stuff but, in retrospect, it's pretty anti-climactic. If you look at the earlier posts of this thread, you'll see the bench had a three point leveling system under both the head and tailstock. The construction is well documented in the first few posts. Here's a picture of the tailstock end from the underside. The three bolts with heads showing are the adjustment bolts. They correspond to front, back and center elevation (from the perspective of standing in front of the lathe). The other two bolts are the hold-down bolts for the tailstock bed feet.
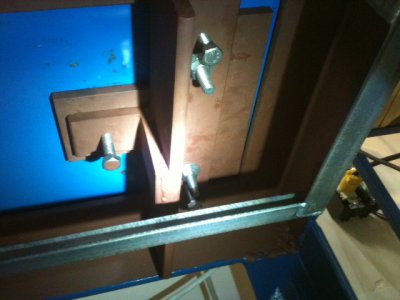
Also shown here is the same thing but under the headstock. Three adjustment bolts and in this case, 4 hold-down bolts. In this case, the hold-down bolts went in from the bottom side and the nut is on the top side. This was due to necessity as the bolts were too long to feed in from the top.
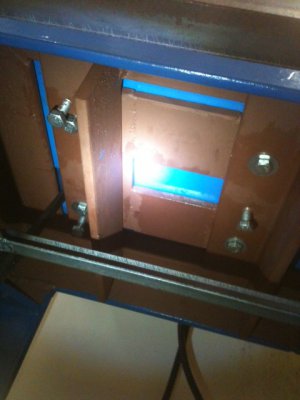
... From hereon out, you don't need a level. Somewhere along the line, I heard that twisting the ways of a lathe was bad. -Shame on me for believing everything I read ...
If you look at this thread
http://www.hobby-machinist.com/show...thout-a-precision-level?highlight=level+lathe , post #29, it mentions the Rollie method of aligning a lathe. I started with this method and used the adjusting bolts in my three-point leveling system instead of shims under the legs as recommended by the Rollie method. I'd recommend reading the Rollie method as it will get you in the ballpark. With all of the adjustment bolts in a neutral, non-engaged position and with all the tightening bolts fastened properly, I made small changes in the headstock pitch by loosing two of the hold-down bolts, making a small adjustment of the adjustment screws then re-tightening the hold-down bolts. After several tries, I got the "wobble-zone" centered (as described in the procedure).
Next comes the icing on the cake. As suggested by Richard King, the setup was tested with the two collar method. Rich has a thread about that here and another fellow recently posted his procedure and results. Using the Rollie method alone, the two collar method showed about 0.001" difference on a shaft of 8". Using the same adjustment bolts and with the two collar method, I was easily able to get the diameters to match dead-on!
Now for the clincher... As you know, my three-point system has a total of 6 adjustment bolts. I only had to adjust ONE bolt, to get the lathe perfectly aligned!
And now to put an end to some myths... When a precision machinist level is placed on a precision flat across the ways, it does not show level in either the X or Y direction. Similarly, when the precision level is placed on the flat part of the cross-slide fixture, it does now show as level in any direction. End of story, a lathe does not need to be perfectly level with the horizon to be accurate!
As for the bench, I feel very little vibration at all and it has a much smoother feeling than before.
My observation in all this is that heavy benches are a good thing. The Rollie method gets you in the ballpark and the 2 collar method comes in for the kill.
I tried to use the Rollie / 2-collar method without using my 3-point levelers and just used the leg levelers in the legs. When doing that, I could indeed get the lathe to cut dead on but, I also felt more vibration in the overall setup.
Ray


