Hi David,
Thanks for opening up another "rabbit hole"! Many ways to spend money on finding center or an edge. Here are some from my shop; there are probably more. I guess before I share my "arsenal", one handy tool you already have is your DRO. Yours likely has a "1/2" function. You can find the center of a block, boss, or hole using an edge finder and your DRO. Move in X to find the LH edge and Zero X. Then shoot to the RH side and edge find it. Leave the table at the RH edge and type "1/2 X"; your DRO X is now at the half-way point between the two. No need to enter anything in the DRO to compensate for the diameter of the edge finder. Repeat if needed to find the Y.
The same technique can be used to find the center of a hole or boss. Eyeball center on the Y and repeat the X procedure above. That'll give you an approximate center in X. Move X to that location and repeat the process on the Y axis. Move to the center in Y and repeat the process for X.
Here are a few other methods, I'm sure others with a bigger tool box than mine and more experience will add to the list.
Bruce
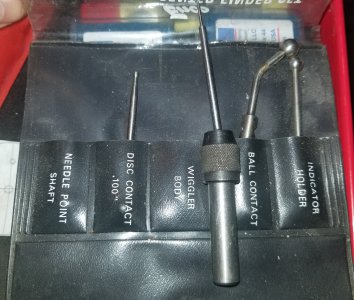
You've got edge finders and wigglers down. I'm lazy and edge finders are cheap, so I have them in 3/8" and 1/2" diameters. That way I can grab either one depending on the collet in my mill, quite often saves a collet change.
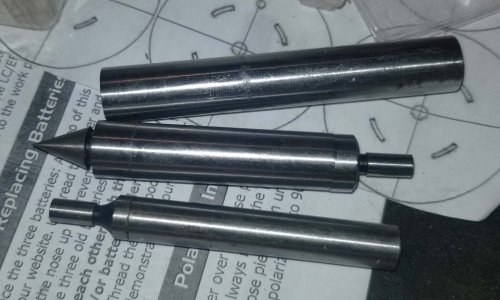
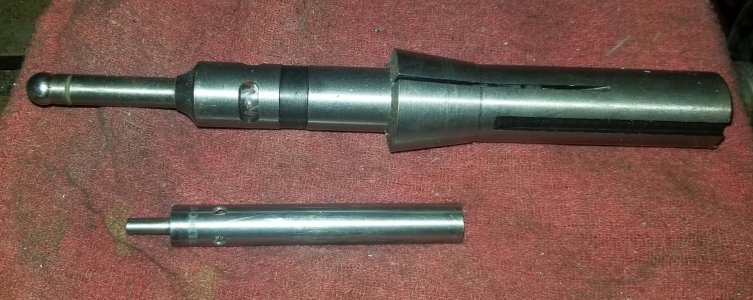
I'll use the electronic edge finders also. Catch is the material has to be conductive, so won't work on wood or plastic. Good idea to confirm the battery by touching off to some steel for starters. The larger one is an import that has a 20 mm shank and a 10 mm ball. I typically work in English units, so punch the E/M button on the DRO when using this one. Also have a dedicated 20 mm R8 collet for it since all of my tooling is English. This one has a super bright light and tone when it touches off. These are under $20 on eBay.
The other one is a Borite electric; has a 1/2" shank. This one lights up only, no tone like the import above. I'll grab this one if the spindle happens to have a 1/2" collet in it. I have two of them from eBay, under $20 for each one.
Condition on these is the spindle run-out is not accounted for as they are typically used without the mill running. Probably not a big deal if your spindle/collet have very little run-out. The import is pretty tall, so maybe better suited to a knee or square column mill than a Rong Fu.
Real sophisticated method used for 100's of years is a piece of paper. My dad was a high school shop teacher and taught this method. He originally used cigarette papers which were something like 0.001" thick, but kids kept stealing them to roll their own. Super cheap and pretty accurate, just compensate for the thickness of the paper. He'd run the mill with the cutter in place and stick the paper between the cutter and the work. Creep up on the edge until the paper starts to catch. My old Dilbert day-calendar pages are 0.003" thick.
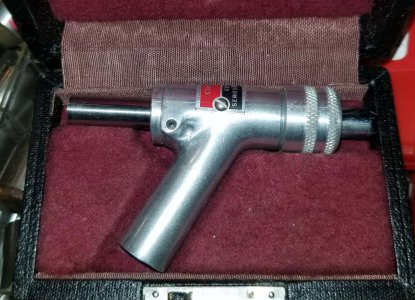
Another possibility is a centering scope. Probably more useful for finding a scribed line in the middle of the work or a pricked hole, but you could find an edge. It's a microscope that goes in the spindle, peek through the eyepiece on the side. The scope has a cross-hair or line for alignment. Mine has a pretty tight focal range and needs to be about 1" above the work +/- practically nothing. Personally, it's a paperweight in my tool box. I've used it twice, didn't learn my lesson after the first time bumping my head into the mill; you're practically kissing the work to use these. Naturally, no power on the spindle when using these. A popular make off eBay is Skoal, run around $175. Mine is a Center-Scope brand, got it for probably under $40 on eBay.
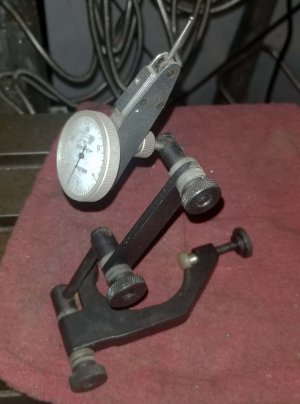
One "essential" is an Indicol type dial test indicator holder. You can't use them to find an edge, more for getting on center of a hole or boss. These attach to the spindle and you manually sweep them with the indicator in contact with the work. I usually do X then Y. Touch off on the LH side and zero the indicator. Swing to the RH side and note the number. Adjust the table for half the distance and re-zero. Then swing back to the LH side and repeat the adjustment if necessary. Swing to Y close to me and move the table in Y to zero. Then repeat the process in Y swinging between front and back. Pain in the butt with this method can be the visibility of the DTI. Some guys use a mirror to see the back side, most probably stand at the side of the mill and/or crane their neck to see. This one is done without power to the spindle also. They can be used to tram or square up work to an axis. My holder is a $15 import. I leave a decent 0.0005" Mitutoyo on mine, so variable price on the DTI.
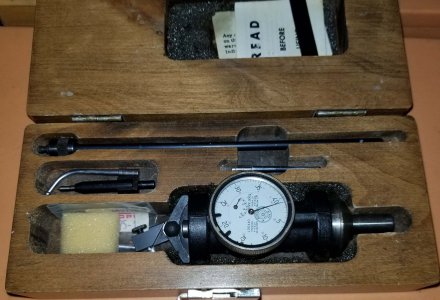
A co-axial indicator does the same thing as the Indicol, but is done under power. These let you find center of a boss or hole pretty quickly. Plus side is the indicator face is stationary, so no gymnastics required to read the display. Down side is they are a bit tall, so not the best option for a Rong Fu mill, better suited to a knee mill or square column mill. There's a reaction bar that rests on a surface (I usually throw an angle plate on the table), adjust the probe to make contact with the work. Turn on the mill and see the indicator needle wildly wobble. Adjust the table in X and Y to minimize the wobble. You can tell if you've gone too far as the needle wobble will increase.
I have a center-finding attachment for pricked holes which I don't believe is standard with the Blake co-ax's. They are around $40. Process is the same to find center on a hole; tip of the probe is spring-loaded so you jam it into the hole and fire up the mill. Move the table to minimize the needle wobble. Tubalcain has a good video on using these. I started with a Shars which would NEVER get below about 0.020 indicated on center. My Blake will dial in to 0.001 with no issues. A decent Blake can be had for around $100 off eBay (around $350 new).
By the way, the indicated numbers on the dial SHOULD NOT be taken as an absolute measurement. If the needle reads a variation of 0.005 (for example), that doesn't necessarily mean 0.005". Lots of geometry involved like angle from center, length of probe, etc. I've not checked my Blake against the Indicol method above, but if it was super critical, I'd go with the Indicol over the co-ax. They both account for spindle run-out.
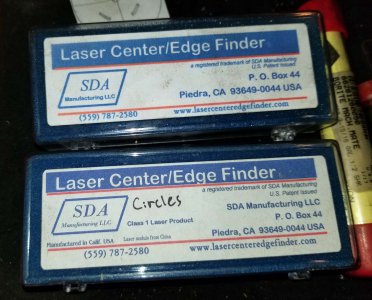
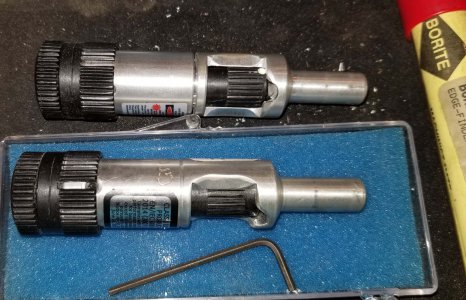
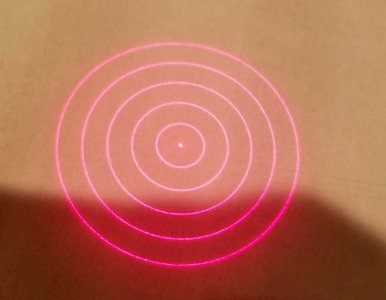
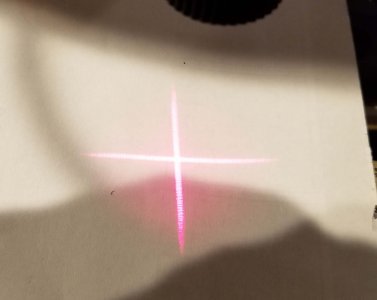
Yet another is a laser center/edge finder. There are videos of guys using them to find the edge of their vise or work, but these are not as accurate as an edge finder or piece of paper. I primarily use mine to find the center of a hole or a boss, works quicker than a co-ax or Indicol, but not as accurate. I can typically hit within 0.005" of center (or better). Mine are from SDA, there are a couple of other makes out there. SDA sells ones that project a dot, cross-hair or concentric circles. The circles one is nice for finding a hole or boss, you adjust the spindle/table up/down and dial a circle right on the edge of the work. There's a polarizing filter on the end so you can adjust the thickness of the lines, but doing so means the line is harder to see. I turn off my shop lights when using these. These are >$150 new though I bought mine off eBay for under $50 each.
There are some videos out there where guys have taken a laser pointer and mounted it at an angle in their spindle. Turn the spindle on and project a spinning circle, diameter is varied by raising/lowering the table/spindle. Might be a nice project though without the polarizing filter, I wonder about the thickness of the projected line. Probably not bad if you were setting up to knock a hole in wood for a corn-hole game, but I wouldn't use it to find the center of an engine block cylinder.
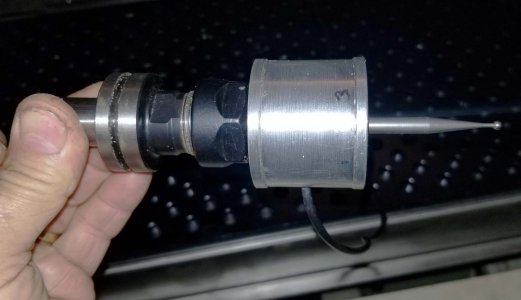
Another one for the CNC mill is a probe. I have a Tormach and use the heck out of my probe. The length and diameter of the probe ball are programmed into the machine. I move to a corner (vise or work), hit a button and the controller touches off in X and Y and zero's the machine on the corner. Same thing for a boss/pocket or hole. Move the probe over the work, hit a button and Z is set.
I think that's about it in my tool boxes. And to your original question, even with all of these options in my tool box, I use an edge finder 90% of the time on a manual mill.


